AI Walk-In Closet Design: Fit the Clothes, Fit the Space
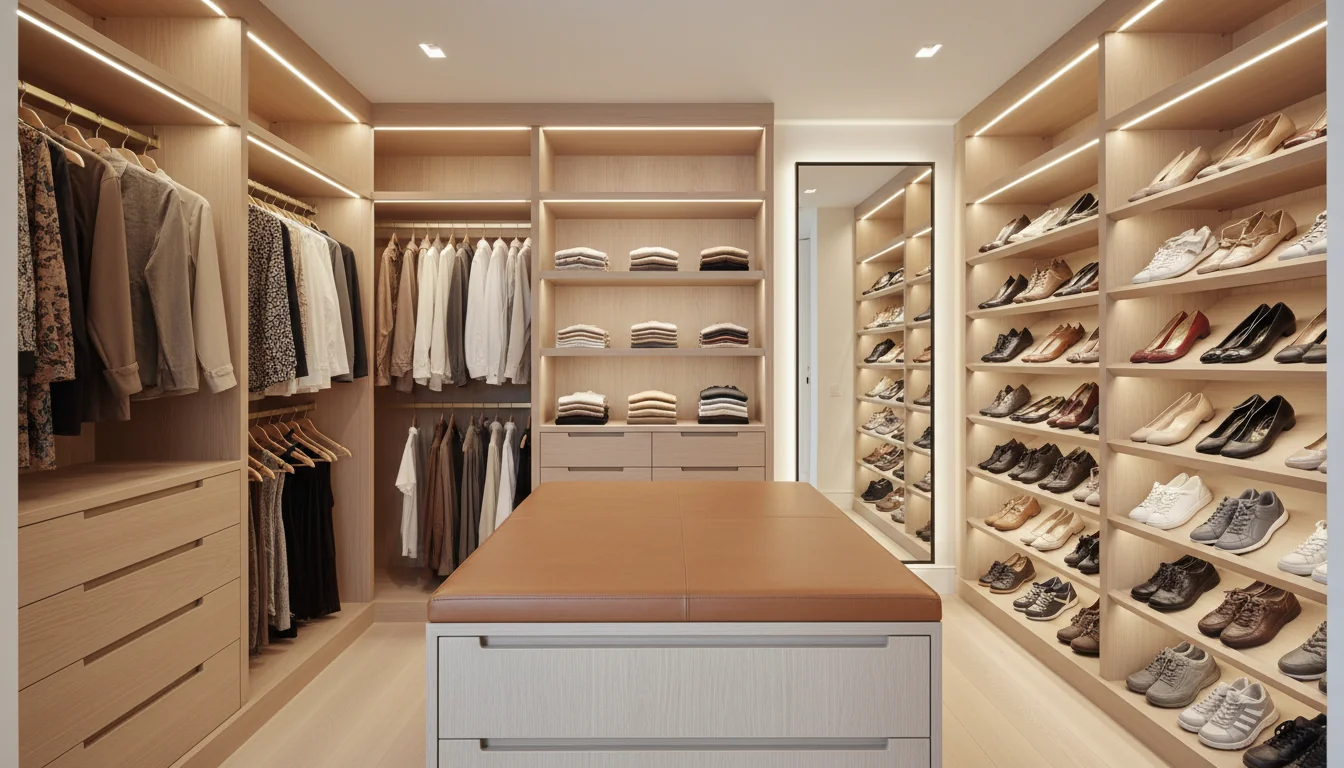
A walk-in closet is the room people most want to redo and least know how to plan. You can see the problem clearly enough — the single rod sagging under everything you own, the shoes in a pile, the sweaters crushed flat on a shelf you can’t reach — but the path to a fixed version runs straight through a spreadsheet of dimensions, a catalog of shelf depths, and a vocabulary of “long hang” and “double hang” that nobody outside the closet industry actually uses. So the project stalls. AI walk-in closet design is what gets it moving again: you photograph the closet you have, the AI maps the layout to your actual dimensions, and you preview three working configurations before you order a single hanger.
This guide covers why closets are the hardest room for an AI to design, how to capture and measure yours so the render is accurate, the four storage zones every closet has to balance, when an island earns its footprint, and how lighting and mirror placement decide whether the finished closet feels like a boutique or a utility corridor.
What is AI walk-in closet design? AI walk-in closet design is the process of feeding a photo and the rough dimensions of an existing closet into an AI interior design tool, which then generates photoreal renders of the same space reconfigured with new shelving, hanging rods, drawers, lighting, and finishes. The AI preserves the room’s architecture — walls, door, window, ceiling height — and lays out storage zones (hanging, folded, shoes, accessories) that fit the measured footprint. The output is a buildable layout you can take to a closet company, a contractor, or a flat-pack retailer, not a fantasy render that ignores your wall lengths.
Why closets are the hardest AI-design target
Most rooms give an AI a lot of slack. A living room render can be “wrong” by a foot in either direction and still read as a good design — you’d just slide the sofa over. A closet has no slack. Every inch is allocated. A rod that’s 2 inches too low means your long coats drag the floor; a shelf 3 inches too deep means the door won’t close; an island 4 inches too wide means you can’t open the drawers. Closets are the one room where the design is the dimensions, and that makes them the hardest thing a consumer AI tool has to render well.
There’s a second difficulty. Closets are small, enclosed, and badly lit — exactly the photo condition AI tools handle worst. A 6-by-8-foot closet shot under a single bulb gives the model shadows, foreshortening, and walls that run out of frame, and it has to infer the geometry of a room it can barely see. This is the same capture problem from our how to take photos for AI room design guide, just intensified.
Third, closets are dense with function per square foot. A living room has maybe five or six design decisions; a walk-in has dozens — rod heights, shelf depths, drawer counts, shoe-shelf pitch, accessory storage, mirror, seating, lighting layers — and they all interact. The AI isn’t placing furniture in a room; it’s solving a packing problem with aesthetic constraints on top.
The takeaway isn’t that AI can’t design closets. It’s that closet renders are only as good as the dimensions you give the tool. For a living room you can get away with a photo alone; for a closet, the photo plus accurate measurements is the whole job. Tools that ask for measurements are doing it right; tools that promise a closet design from a photo alone are showing you a mood board, not a plan.
Capture and layout tips: getting the render accurate
The fix for the capture problem is method, not equipment. You do not need a better phone. You need to shoot the closet the way it actually has to be shot, and you need to hand the AI real numbers alongside the image.
Start with the photo. Stand in the closet doorway — or just inside it if the closet is deep — and shoot straight back at the far wall, phone at chest height, in one-point perspective so the back wall reads as a clean rectangle. Turn on every light you have and open the door fully; if there’s a window, shoot during the day. Take one straight-back shot, then one of each side wall from the opposite corner. Three to four photos give the AI enough overlapping information to reconstruct the box.
Then measure. This is the step that separates a closet render you can build from one you can only admire. At minimum, the AI needs each wall’s length, the ceiling height, the door width and swing direction, the window position, and the depth of any bump-out, soffit, or angled ceiling. Our how to measure a room for furniture guide is the right method — measure twice, record in inches, note the obstructions. Closet companies quote off a measured drawing; an AI design works the same way.
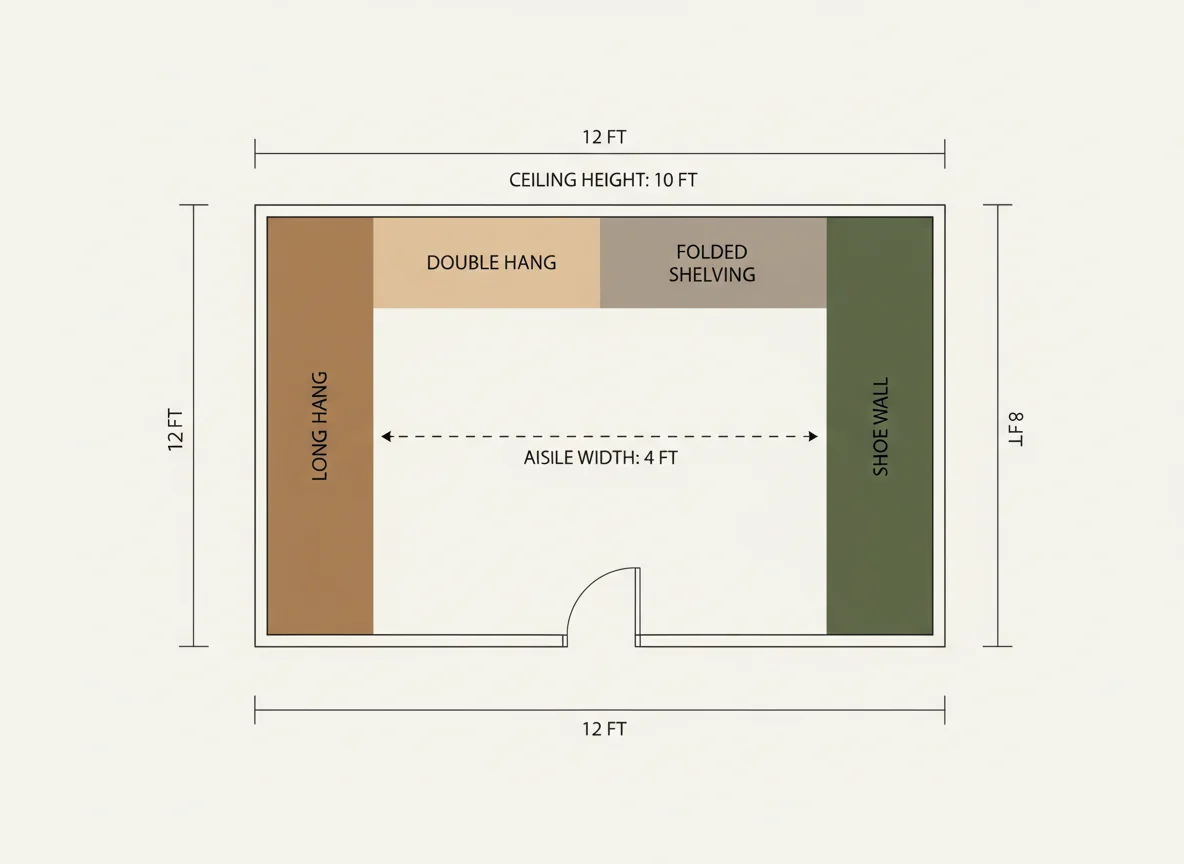
A few measurements matter more than people expect. Ceiling height decides whether you get one hanging zone or two stacked ones — you need about 84 inches of clear wall to double-hang shirts and jackets. Door swing decides how much wall you lose; an inward-swinging door can kill a 2-foot strip of otherwise usable wall. And the clear floor between facing runs of storage decides whether an island fits at all: below about 36 inches of aisle you can’t stand and pull a drawer; below 24 inches you can barely turn around. Give the AI those numbers and it lays out a closet that works.
The four zones: hanging, folded, shoes, and accessories
Every walk-in closet, no matter the size or style, is a balance of four storage zones. A good AI render gets the proportion between them right for what you actually own. Before you generate anything, it helps to know what each zone needs so you can prompt for it — and so you can tell whether the render the AI hands back is realistic.
Hanging is usually the largest zone and the one with the most variety. Long hang — for dresses, coats, and robes — needs about 68 inches of clear height below the rod. Double hang — two rods stacked for shirts, folded trousers, and jackets — fits in about 84 inches and roughly doubles the capacity of that wall section. Medium hang for skirts and trousers sits in between. The single most common closet mistake the AI can fix in a render is a wall of nothing but long hang holding a closet full of shirts: you’re wasting three feet of air under every garment. Tell the prompt how much of each you need and the AI will allocate the wall accordingly.
Folded storage — open shelves and drawers — is for knitwear, denim, t-shirts, and anything that creases or stretches on a hanger. Open shelves read lighter and let you see everything; drawers hide clutter and protect delicate pieces. Most closets want a mix. Shelf depth matters: 14 inches handles folded sweaters comfortably, and shelves spaced 12 to 14 inches apart keep stacks from toppling.
Shoes are their own problem because they don’t stack and they multiply. Angled shelves display them and save depth; flat shelves hold more per linear foot; cubbies protect them but eat space. A dedicated shoe wall — even a narrow one — is the difference between a closet that stays organized and one that doesn’t. If you have a real collection, prompt for it specifically; the AI’s default closet allocates almost no shoe storage.
Accessories — belts, bags, jewelry, ties, watches, scarves — are the zone everyone forgets until the render is done and there’s nowhere to put them. Shallow divided drawers, valet rods, pegboard, glass-front display: small in square footage, high in daily friction. The same logic applies in tighter spaces; our guide to organizing a small studio apartment leans hard on accessory zones because they’re where small spaces win or lose.
The reason to think in zones before you generate is simple: the AI optimizes for what you tell it. A vague prompt — “nice walk-in closet” — returns the statistical-average closet, which is mostly long hang and almost no shoe or accessory storage. A zoned prompt — “60% double hang, 20% long hang, open shelving for 30 sweaters, a 24-inch angled shoe wall, two shallow accessory drawers” — returns a closet built around your actual wardrobe. Be specific about function and the render gets dramatically more useful.
Island vs wall-only layouts
The island is the closet feature people want most and plan worst. It reads as the luxury move — the boutique centerpiece, the folding surface, the drawer bank, the display top — and an AI will happily render you one whether or not your closet can actually take it. This is the single decision worth testing across multiple renders before you commit, because an island that doesn’t fit doesn’t just look wrong, it makes the closet unusable.
The math is unforgiving. A functional island is at least 24 inches deep and 36 inches long, and it needs clear aisle on every side you intend to use. With drawers, that clearance has to be enough to stand and fully open a drawer — call it 36 inches minimum, 42 comfortable. Add the island’s own depth and you need a closet roughly 8 to 9 feet wide before an island earns its place. Narrower than that and the island turns your walk-in into two awkward corridors.
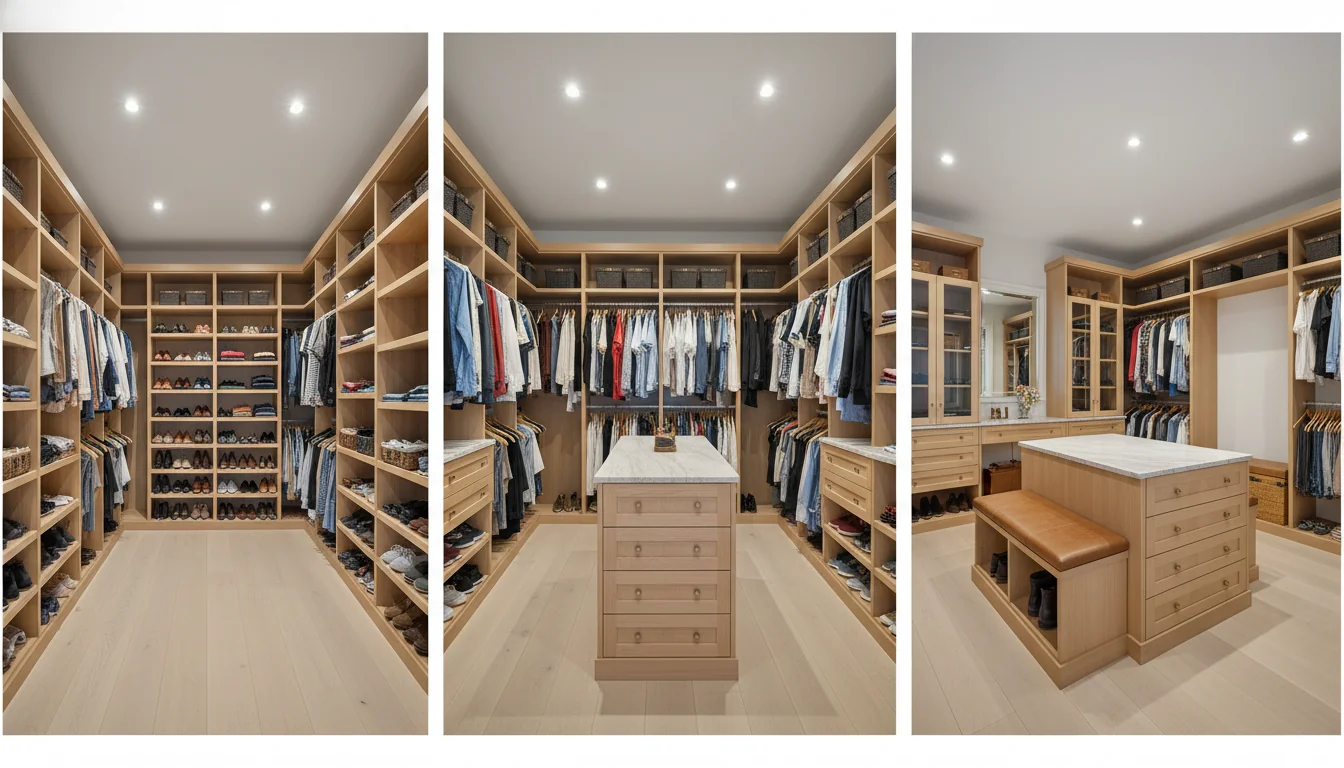
This is exactly where previewing multiple configurations pays for itself. Generate the same closet three ways — wall-only, with a slim island, with a full island — and the renders make the trade-off obvious in a way a tape measure never does. Here’s how the options actually compare:
| Layout | Min. closet width | Best for | Trade-off |
|---|---|---|---|
| Wall-only (U-shape or L-shape) | 5–7 ft | Most closets; maximizing storage per square foot | No central folding surface or display |
| Slim island / narrow dresser | 7–8 ft | Adding drawers + a small folding top without losing the aisle | Limited drawer depth; not a true “boutique” centerpiece |
| Full island with seating | 9+ ft | Large closets used as a dressing room | Consumes floor area that could be hanging or shelving |
| Peninsula (island attached to one wall) | 6–8 ft | Awkwardly proportioned or longer-than-wide closets | Blocks one wall; access on three sides only |
The peninsula is the option AI renders tend to under-suggest and the one that rescues the most real closets. If your space is long and narrow — too tight for a freestanding island but too long to leave the center empty — a peninsula running off the back wall gives you drawers and a folding top without choking the aisle. If the first island render looks cramped, regenerate with “peninsula attached to the back wall” before you give up on the idea entirely. The principle is the same one that governs furniture placement in any room, and our bedroom layout plan guide covers the underlying logic of clearances and circulation paths in more depth.
Lighting and mirror placement
A closet can be perfectly organized and still feel like a utility room, and the reason is almost always lighting. The default closet light — one bulb, dead center — puts every shelf in its own shadow and renders colors badly enough that you can’t tell navy from black. A good AI render treats lighting as three layers, and it’s worth prompting for all three.
Ambient light is the overhead layer — ideally more than one fixture, or a fixture plus a window, so the room is evenly lit corner to corner. Task light does the real work: LED strips under each shelf and behind the front edge of each rod, so the garments are lit rather than the shelf above them. This is the single upgrade that makes a closet read as “designed” rather than “stored.” Accent light — a picture light over the mirror, a lit display niche, toe-kick lighting under the island — is the boutique layer. When you prompt the AI, name the layers; a prompt that just says “well-lit” gets you the one-bulb default.
Color temperature matters more in a closet than almost anywhere else, because the closet is where you make color decisions about your clothes. Aim for a neutral-to-warm white in the 2700K–3500K range — warm enough to feel like a room, neutral enough that fabric colors read true. AI tools love to render closets in a flattering golden light that won’t match a 5000K LED strip; if the render looks warmer than the bulbs you intend to buy, trust the bulbs.
The mirror decides whether the closet works as a dressing room. A full-length mirror should be at least 12 to 16 inches wide, tall enough to show you head to shoe, and lit from the front or sides — not from directly above, which lights your hair and leaves your outfit dark. The best placement is the end wall opposite the door, or the back of the door itself. If you have the width, a three-way mirror is worth prompting for; if you don’t, a single well-lit full-length is the non-negotiable minimum.
For the broader principles of layering light, the American Lighting Association’s residential lighting guidance is a solid reference, and our AI interior design overview covers how AI tools handle lighting across every room type.
Putting it together: the three-render workflow
The reason AI walk-in closet design beats sketching it yourself isn’t the rendering quality — it’s the iteration. Round one is the honest baseline: photograph and measure the closet, feed in the dimensions, and prompt for a zoned layout that matches your real wardrobe. Round two is the island question: regenerate wall-only, with a slim island, and with a peninsula, and let the renders settle the trade-off. Round three is finish and light: lock the layout, then iterate on wood tone, hardware, lighting, and mirror placement. By the third render you have something specific enough to hand to a closet company or a flat-pack retailer — a measured layout, a zone breakdown, a finish direction, and a lighting plan. That’s a brief, not a daydream.
FAQ
How accurate is an AI walk-in closet design compared to a professional closet plan?
It’s as accurate as the measurements you feed it. Given correct wall lengths, ceiling height, and door details, an AI render gets rod heights, shelf depths, and aisle clearances into a buildable range — close enough to brief a closet company. What it won’t catch is code issues, structural constraints, or electrical that needs to move. Treat the render as the design step, and a professional as the final verification before anything gets ordered or cut.
Can AI design a small walk-in closet, or only large ones?
It works for both, and small closets arguably benefit more, because every inch matters and seeing the trade-offs rendered is more valuable. For a closet under about 7 feet wide, prompt for a wall-only U-shape or L-shape, skip the island entirely, and lean on double-hang sections and a vertical shoe wall to maximize capacity. The constraint isn’t size — it’s whether you give the AI accurate dimensions so it can pack the small space honestly instead of rendering a roomier closet than you have.
What measurements do I need before I start?
At minimum: the length of each wall, the ceiling height, the door width and swing direction, the position and size of any window, and the depth of any soffit, bump-out, or angled ceiling. Record everything in inches, measure each dimension twice, and note obstructions like vents, outlets, and light switches. The photo tells the AI what the closet looks like; the measurements tell it what will actually fit. A render built on a photo alone is a mood board, not a plan.
How much does a walk-in closet redesign actually cost?
A reconfiguration using a flat-pack or modular system typically runs in the low four figures; a semi-custom closet from a dedicated closet company commonly lands in the $3,000–$7,000 range; a fully custom build with an island, custom cabinetry, and integrated lighting goes well above that. The value of designing it with AI first is that you walk into those quotes with a specific layout and zone breakdown, which makes it far easier to compare bids and avoid paying for storage you don’t need.
Should I show the AI render to a closet company?
Yes — a render plus your measurements gives a closet company a concrete starting point instead of a vague conversation, which usually means faster, more accurate quotes. Be clear that it’s a design intent, not an engineered drawing: the professional still needs to verify dimensions on site and adapt the plan to the system they build.
Fit the closet to the clothes — in minutes
A walk-in closet is the room where good design and exact dimensions are the same thing, which is why it’s worth previewing before you buy. With RoomGenius, you photograph the closet you have, hand the app your measurements, and get back working layouts — zoned for your real wardrobe, sized to your real walls, lit the way a dressing room should be. Generate the wall-only version, the island version, and the peninsula version, compare them side by side, and walk into your closet company’s quote knowing exactly what you want.
Download RoomGenius on the App Store or Google Play and fit the closet to the clothes — in minutes, not weekends.