AI Room Before and After: Real Transformations from a Single Photo
You scroll past the “before and after” posts on Pinterest and the gut reaction is the same every time. The afters look great. The path from your room — the one you’d photograph right now from where you’re sitting — to one of those afters looks impossible. You’re not hiring a designer, you’re not gutting the kitchen, and you’re not refinishing the floors. So the inspiration sits in a folder labeled “Someday,” and the room stays the way it is.
AI room before and after is what closes that gap. You feed in the photo you’d otherwise be embarrassed to share, you pick a style, and ninety seconds later you have a photoreal render of the same room — same windows, same proportions, same architectural bones — finished the way a designer would have finished it. No demolition. No deposit on the line. No hourly bill. This guide is a working tour of eight real AI before-and-after pairs across the rooms people actually redesign — living room, bedroom, kitchen, dining, home office, bathroom, kids’ room, and an unfinished basement — broken down so you can see what changed, what stayed, and which moves you could replicate in your own space.
What is an AI room before-and-after? An AI room before-and-after is a side-by-side comparison of a real photograph of a room (“before”) and an AI-generated render of the same room redesigned in a chosen style (“after”). The AI keeps the room’s geometry — walls, windows, doors, ceiling height — and replaces the furniture, finishes, color palette, and decor with a new design generated from your style prompt. The point isn’t a fantasy makeover. The point is a render you can actually build toward, one purchase at a time, knowing the proportions and sight lines you’re staring at on screen will match the room when the boxes arrive.
What makes an AI before-and-after trustworthy
Most of the “AI redesign” examples floating around in 2026 are not trustworthy. They’re either fully synthetic rooms — meaning the “before” is also AI-generated and matches the “after” too neatly — or they’re heavily stylized renders that disguise the AI’s weaknesses (perspective drift, melted hardware, impossible doorways) behind a thick fog of dramatic lighting. A real before-and-after should pass four checks before you take design cues from it.
The before is a real phone photo. Not a 3D model, not a render, not a magazine shot. You should be able to see the small evidence of a lived-in room — a slight tilt on the picture frame, a power outlet, a vent — and that same evidence should still be present in the after.
The geometry is unchanged. Walls don’t move, windows don’t shrink or grow, the doorway is in the same place. The most common dishonest AI before-and-after stretches the room in the after to make space for the new furniture. The trustworthy version forces the design to fit the room, not the other way around.
Lighting is preserved. If the before has soft morning light from a window on the left, the after has soft morning light from a window on the left. AI tools that flip the lighting wholesale are flattering the render at the cost of telling you the truth about how the new pieces will look in your actual light.
The materials are buildable. Every fabric, finish, and fixture in the after should correspond to something you could actually buy. Photoreal renders are easy; photoreal renders constrained to real, shoppable furniture are harder, and the second category is the one worth studying.
The eight pairs below were generated with RoomGenius from real phone photos. Each one is labeled with the style prompt used, the four or five furniture swaps that did most of the heavy lifting, and a note on what the AI deliberately left alone.
Eight room-by-room transformations
1. Suburban beige living room → warm contemporary
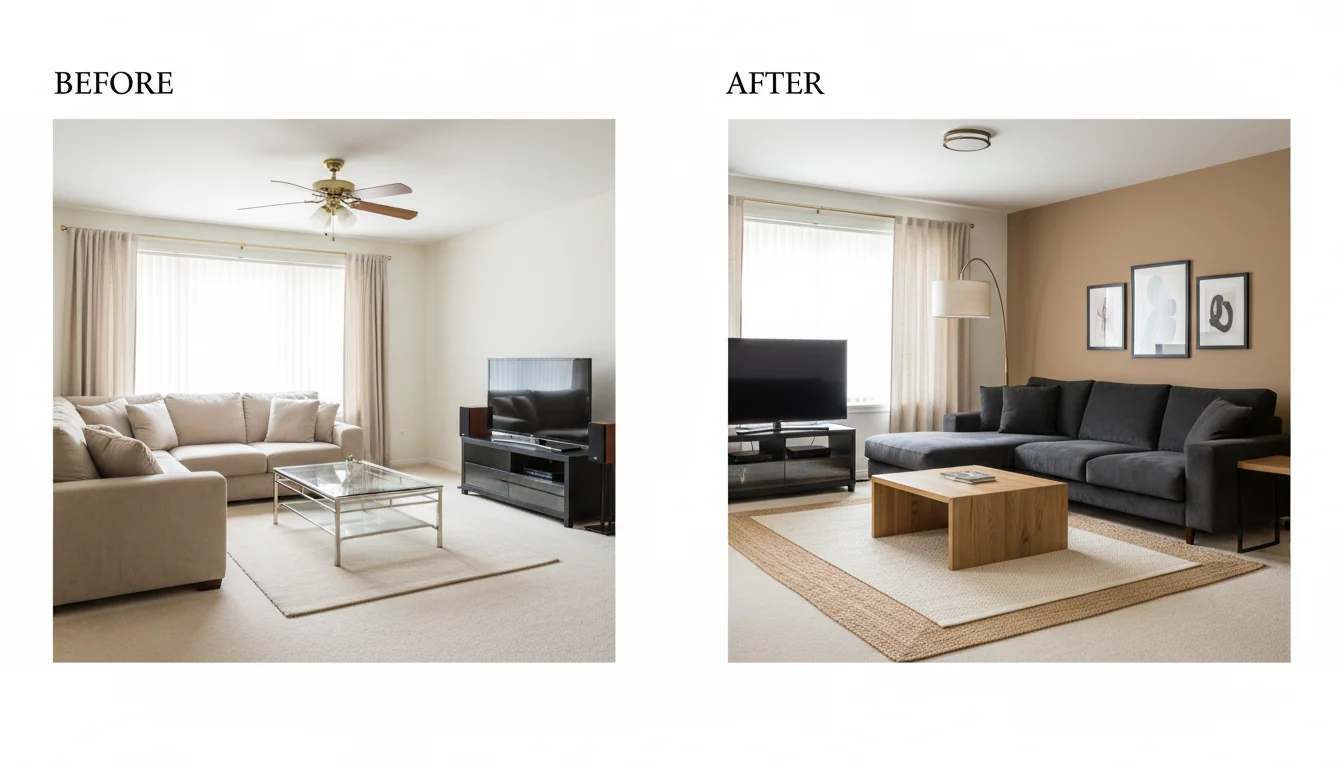
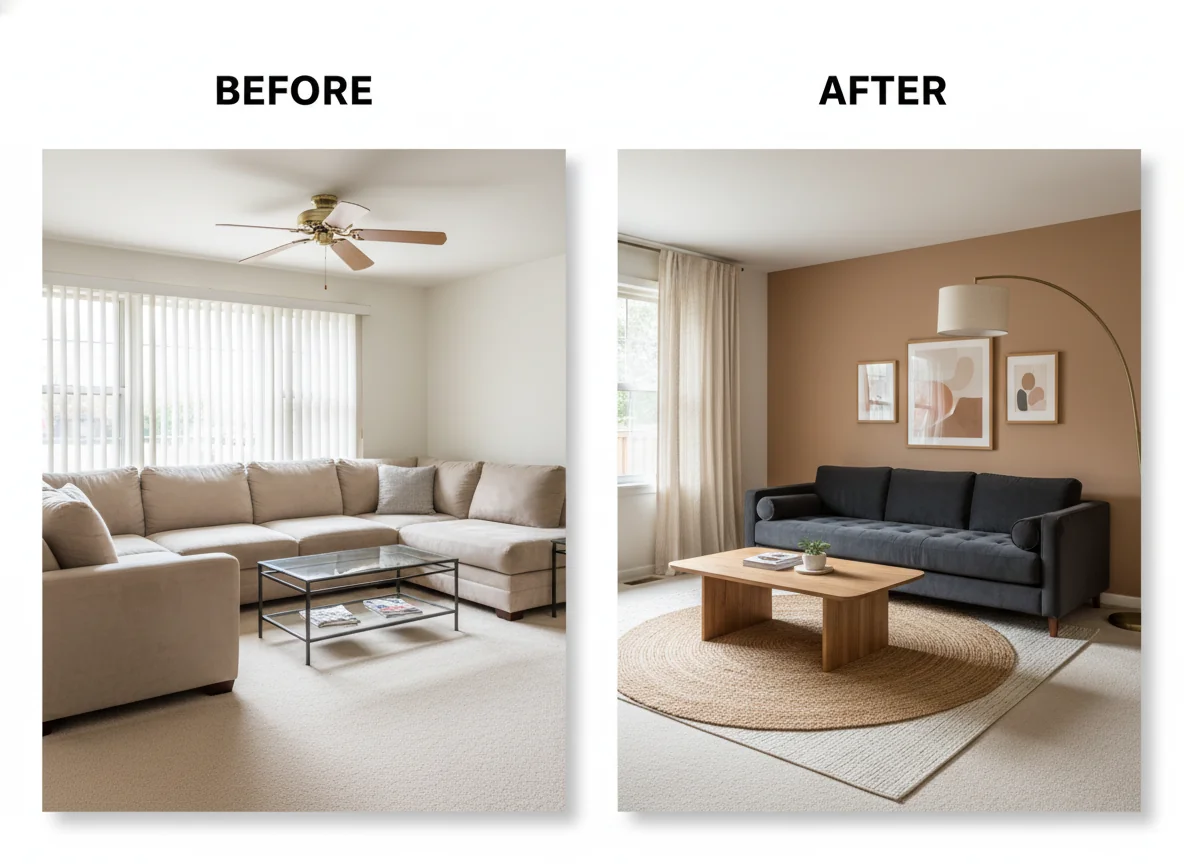
The before is the one most readers will recognize: mid-2010s beige sectional, glass coffee table, brass ceiling fan, vertical blinds, off-white walls. Functional. Forgettable.
Style prompt: “warm contemporary, charcoal bouclé sofa, oak and brass accents, layered natural-fiber rugs, clay accent wall behind the TV.” Four swaps did most of the work — the beige microfiber sofa became charcoal bouclé, the glass coffee table became a low solid-oak slab, a brass arc lamp filled the empty corner behind the sofa, and a single clay-toned accent wall went up behind the TV with the other three walls left neutral. The AI kept the windows, the trim, the ceiling fan housing, and the room’s footprint untouched.
2. Builder-grade primary bedroom → quiet Japandi
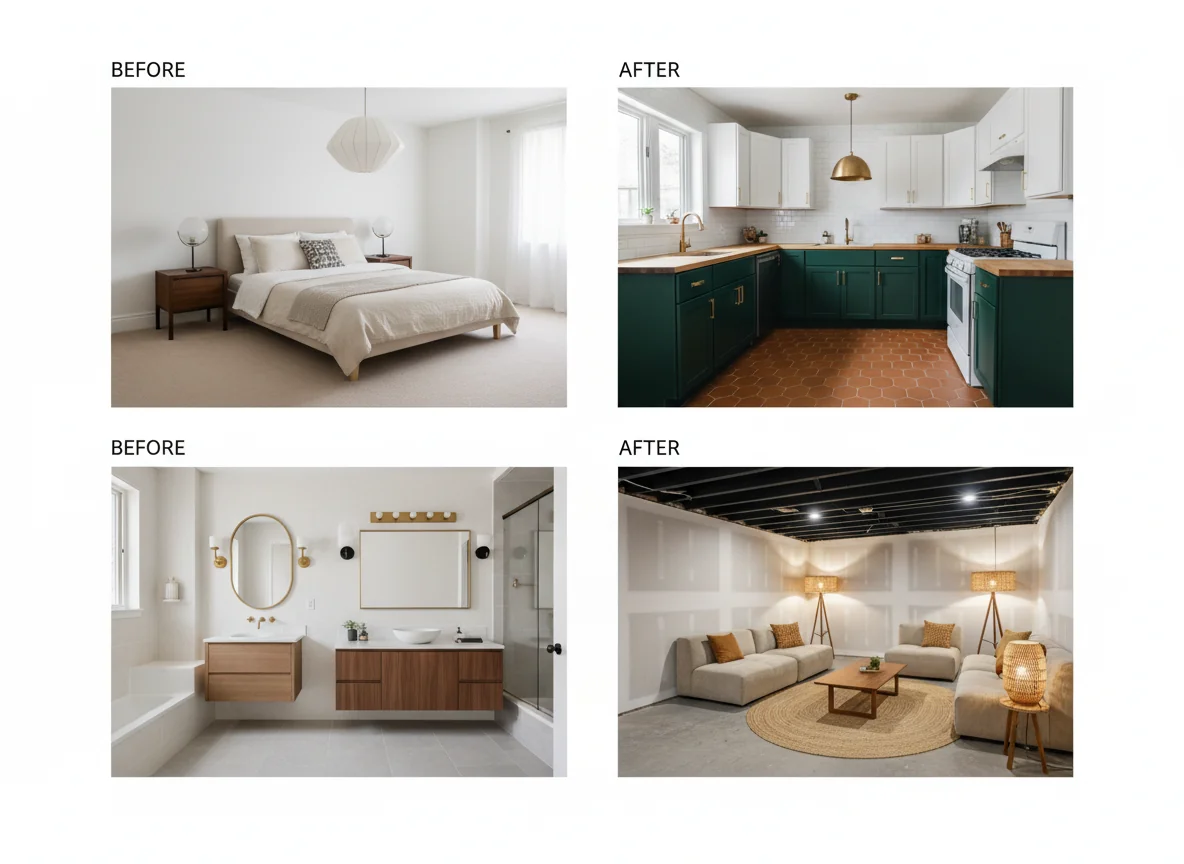
The before is what every relocation listing looks like: a queen bed with a beige upholstered headboard against an off-white wall, two mismatched nightstands, a globe overhead light, beige carpet, and the original aluminum blinds.
Style prompt: “Japandi, low-profile platform bed, matching pale-oak nightstands, linen bedding in oatmeal and soft black, paper pendant lamp, woven floor rug.” The bed stays in place — the AI correctly reads the wall opposite the door as the headboard wall — and the visual hardware swaps. Mismatched nightstands become matching pale oak. Quilted polyester becomes layered linen. The globe overhead becomes a paper pendant. A handwoven rug softens the carpet without replacing it. The door, closet, and window do not move. The bed is the same size; the room reads completely different.
3. Apartment kitchen → moody bistro
The before is a small galley kitchen in an older apartment: white cabinets, faux-marble laminate counters, a single window above the sink, a builder pendant, dark linoleum floor.
Style prompt: “moody bistro kitchen, deep forest-green lower cabinets, brass hardware, warm-white upper open shelving, single brass pendant over the sink, butcher block counters, terracotta floor tile.” The harder pair on the list — the AI has to respect a real plumbing layout. Sink, range, and fridge do not move. The redesign repaints the lower cabinets, swaps hardware, replaces the upper cabinets with open shelving, swaps the counter for butcher block, and changes the floor. The new cabinetry is resized to the existing footprint exactly. The “moody bistro” reading lands because four high-impact finishes shift at once, not because the room got bigger.
4. Dining room → modern farmhouse
The before is a small dining room off a kitchen: a glass-top pedestal table with four mismatched chairs, a 2008 brass chandelier, a beige wall, and a leftover framed print.
Style prompt: “modern farmhouse dining, reclaimed-oak trestle table, cane-back side chairs in oatmeal linen, black iron-and-linen ribbed pendant, shiplap accent wall behind the table.” The table holds its position. The glass-top becomes a substantial oak trestle, the mismatched chairs become six matching cane-back chairs, the brass chandelier becomes a black iron-and-linen pendant, and shiplap goes up on the focal wall. The window and trim stay where they were.
5. Spare-room home office → focused minimalist
The before is a guest room with a desk crammed into a corner: particleboard desk, black gaming chair, small bookshelf, daybed, a few unframed posters tacked to the wall.
Style prompt: “minimalist focused home office, oak floating desk, walnut task chair in tan leather, single tall bookshelf, framed monochrome prints in a grid, neutral linen daybed.” The visual noise collapses. The desk becomes a clean oak floating piece. The gaming chair becomes a walnut-frame leather task chair. Unframed posters become a grid of six framed monochrome prints. The daybed gets re-dressed in linen. The room stays dual-function. The render makes obvious what was hard to see in the before — half the problem was incoherent materials, not room size.
6. 1990s bathroom → spa contemporary
The before is the bathroom most homeowners over 35 will recognize: a beige-tone vanity with a cultured-marble integrated sink, an oval gold-framed mirror, a brass-and-glass four-bulb light bar, beige tile floor, off-white walls.
Style prompt: “spa contemporary bathroom, floating walnut vanity with vessel sink, large frameless mirror, matte black wall sconces flanking the mirror, large-format porcelain floor tile in warm grey, warm white walls.” The vanity, sink, mirror, sconces, and floor swap. The shower, toilet, window, and plumbing rough-in stay exactly where they are. Bathrooms feel like a full gut to redesign; the AI shows you the version that swaps five surfaces and leaves everything else alone for a fraction of the cost.
7. Shared kids’ room → playful but calm
The before is two twin beds against opposite walls in a small room, a mountain of stuffed animals, a primary-colored rug, mismatched bedding, a bare bulb fixture, walls papered with art tape.
Style prompt: “calm playful kids’ room, two matching low pine beds with linen bedding in muted sage and soft rust, low wooden bookcase between the beds, single warm-white pendant, rolled wool rug in oatmeal, framed primary-color prints in a horizontal row above each bed.” The two-bed layout holds. Mismatched bedding becomes matched-but-distinct (same linen set, different muted accent colors). The stuffed-animal pile becomes a low wooden bookcase that doubles as a toy display. The taped-up art becomes a framed grid above each bed.
8. Unfinished basement → warm flex lounge
The before is an unfinished basement: poured concrete floor, exposed ceiling, drywall on two walls, the other two exposed, a dim overhead bulb, a folding table, moving boxes.
Style prompt: “warm finished basement lounge, polished concrete floor in a warm grey, matte black painted ceiling joists, two facing oatmeal modular sofas, low walnut coffee table, woven floor lamps in each corner, large jute rug, built-in bookshelf along one wall.” The most ambitious pair, and the most useful — it answers the question every basement owner asks: what if I don’t fully finish it? The render preserves the concrete floor, the exposed ceiling (just painted), and the existing drywall (just painted warm white). The room becomes a real lounge without a permit. The AI is showing the soft-finish path, not the structural one.
What the AI changed (and what it kept)
The pattern is consistent across all eight pairs. The AI changes the decor layer — paint, wallpaper, soft furnishings, lighting, decor, hardware finishes, and the freestanding furniture — and preserves the architectural layer — walls, windows, doors, ceilings, plumbing rough-ins, and the room’s overall footprint.
This is also the single best mental model for using AI room before-and-after tools well. A redesign that respects the architectural layer is a redesign you can actually build. A redesign that quietly moves a window or shrinks a doorway is a fantasy render dressed up as a plan. The pairs above were all generated with the AI’s “preserve geometry” mode on; this is the default in most consumer tools in 2026 and the setting worth checking before you commit to a style direction.
| Room | What changed | What stayed | Approx. material budget* |
|---|---|---|---|
| Living room | Sofa, coffee table, rug, floor lamp, accent wall | Windows, trim, floor, ceiling fan housing | $2,000–$4,500 |
| Bedroom | Bed, nightstands, bedding, overhead light, area rug | Door, closet, window, carpet | $1,500–$3,500 |
| Kitchen | Cabinet color, hardware, counters, upper shelving, floor | Appliances, plumbing, window, room footprint | $4,000–$9,000 |
| Dining | Table, chairs, pendant, accent wall, art | Window, trim, floor, doorway | $1,800–$4,000 |
| Home office | Desk, chair, art, bookshelf, daybed dressing | Walls, window, floor | $1,000–$2,500 |
| Bathroom | Vanity, sink, mirror, sconces, floor tile | Shower, toilet, window, plumbing rough-in | $2,500–$6,500 |
| Kids’ room | Bedding, art, rug, pendant, bookcase | Bed frames (if matched), walls, window | $800–$2,200 |
| Basement | Sofas, rug, lamps, ceiling paint, bookshelf | Concrete floor, drywall, ceiling joists, framing | $2,500–$6,000 |
*Approximate retail material budget at U.S. mid-market price points as of May 2026. Excludes labor. Renters and DIYers can land at the lower end; full-service installation pushes the upper end higher.
The budget column is the one most readers underestimate. A good AI render compresses what feels like a $30,000 remodel into a $3,000 swap — but only when the AI is honest about preserving the expensive structural layer. The basement pair is the clearest example. A fully finished basement with framed walls, drop ceilings, and carpet is a $25,000–$60,000 project. The AI’s “soft-finish lounge” version of the same basement is closer to $4,000 in furniture and a weekend of painting.
How to replicate each in your own room
The pairs above were generated from real phone photos. The path from “your phone photo” to a render you can build toward is shorter than most readers expect — three steps.
First, take the right photo. Stand in the doorway, hold the phone at chest height, shoot the room in one-point perspective so the back wall reads as a rectangle, and shoot in soft daylight. Our how to take photos for AI room design guide is the working playbook.
Second, write a specific style prompt. The eight prompts above all share the same structure: a style label (“warm contemporary,” “Japandi,” “moody bistro”), three to five concrete material or color cues, and at most one architectural cue if the budget allows. Vague prompts produce generic afters; specific prompts produce afters you’d actually live in.
Third, iterate before you commit. The first render is rarely the keeper. The second or third — with one variable swapped per round, not all of them — is usually the one. Treat it like a designer’s mood-board pass, not a single binary “did it work” check.
For deeper context on the AI-redesign genre as a whole, Architectural Digest’s coverage is a reasonable mainstream primer, and our AI interior design overview goes deeper on the consumer-facing toolset and trade-offs. If you’re researching the broader before-and-after genre — real renovations, real staging, real remodels — our companion posts on before and after renovations, home staging before and after, and before and after bathroom remodel pictures are the working library.
FAQ
How accurate is an AI room before-and-after compared to the finished real room?
Accuracy depends on three things: the quality of the before photo, the specificity of the style prompt, and whether the AI is in geometry-preserving mode. With a clean doorway-angle photo and a specific four-variable prompt, the gap is usually small — sofa colors render within one or two shades, oak finishes read accurately, and the overall composition holds. The biggest gap is on fabrics with unusual texture (deep bouclés, heavy linens, certain velvets), where the render simplifies what the real fabric would do in your light.
Can the AI move my furniture in the after, or only swap it?
Both. Most consumer tools in 2026 will swap and rearrange, but rearrangement stays inside the existing room — no walls move, no windows shift. The AI might move the sofa from the long wall to the short wall, rotate a dining table to a more natural axis, or swap the bed orientation. If you want pure swaps, most tools have a “preserve layout” mode that locks furniture positions.
How many renders should I generate before deciding on a direction?
Usually three to five. The first checks whether the prompt produces anything close to the direction you wanted. The second and third change one variable each — a different sofa color, a different rug — to learn what’s load-bearing. The fourth and fifth lock the choice. Past five renders, the prompt is usually too vague rather than the AI being too inconsistent.
Can I share an AI before-and-after pair with a contractor or designer as a brief?
Yes — one of the highest-leverage uses of the format. A render plus a four-variable description (style, primary materials, accent color, lighting direction) gives a pro enough to quote against and enough to push back on if something in the render isn’t buildable. It’s not a construction document, but it’s a much better brief than a Pinterest board.
Your before photo. Any of these afters. In seconds. Start a redesign and watch your own room move through the same pipeline as the eight rooms above.