7 Essential Real Estate Photography Tips for 2025
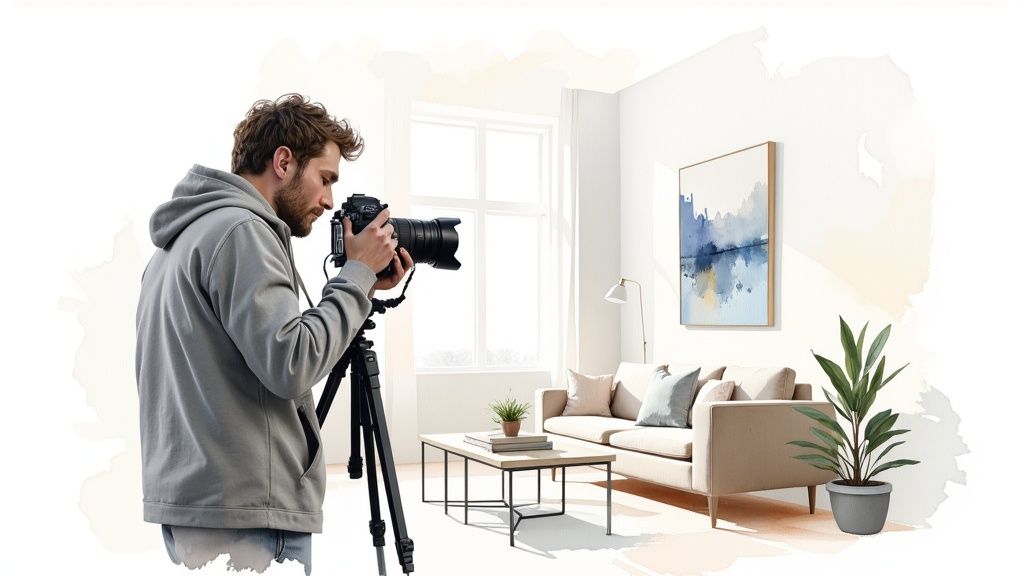
In today’s visually-driven market, the first showing doesn’t happen in person; it happens online. The quality of your listing photos can make the difference between a property that languishes on the market and one that sparks a bidding war. Poor images can instantly devalue a home in a buyer’s eyes, while professional, captivating photos can increase perceived value, attract more serious inquiries, and lead to faster sales at a better price.
This guide moves beyond generic advice. We’ve compiled a comprehensive breakdown of actionable, professional-grade real estate photography tips designed to give you a tangible competitive edge. You will learn the specific techniques photographers use to make properties look their absolute best, from manipulating light to perfecting post-processing workflows.
We will cover seven essential strategies:
- Mastering natural light and golden hour shooting
- Using ultra-wide angle lenses correctly
- Implementing High Dynamic Range (HDR) photography
- Staging and decluttering spaces for maximum impact
- Perfecting your camera height and composition angles
- Blending flash and ambient light like a pro
- Optimizing your post-processing for vibrant, accurate images
Each tip is designed to help you capture stunning photos that not only showcase a property’s best features but also tell a compelling story. Let’s dive in and transform your listings from standard to standout.
1. Master Natural Light and Golden Hour Shooting
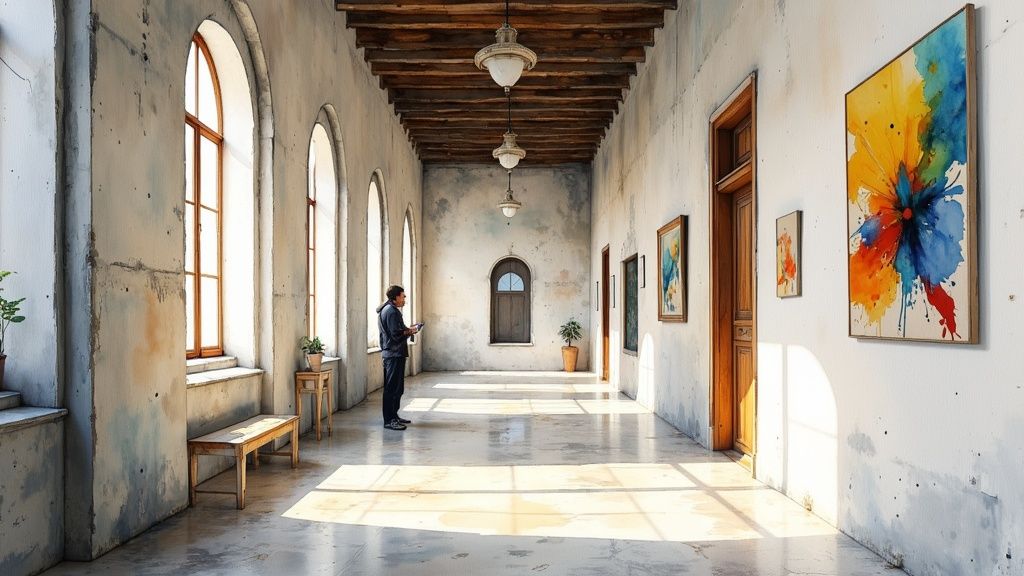
Natural light is the secret ingredient that transforms good real estate photos into great ones. It creates a warm, inviting atmosphere that artificial lighting simply cannot replicate. Relying on sunlight makes spaces feel larger, cleaner, and more appealing, helping potential buyers emotionally connect with the property. Luxury real estate photographer Mike Kelley, for example, built his brand on using exclusively natural light to create stunning, authentic images that command attention.

The “golden hour,” the period shortly after sunrise or before sunset, is particularly powerful. During this time, the sun is low in the sky, casting a soft, golden glow that minimizes harsh shadows and highlights a home’s best features. This is why premier listings, like those from Sotheby’s International Realty, often feature exteriors bathed in the warm light of dusk or dawn. It creates a feeling of luxury and tranquility.
How to Implement This Tip
To effectively leverage natural light, timing and preparation are everything. The goal is to capture the property when the sunlight is most flattering, both inside and out.
- Schedule Strategically: Plan your interior shoot for midday when the sun is highest, providing maximum brightness. For exteriors, schedule sessions one hour after sunrise or one hour before sunset to capture that coveted golden hour light.
- Maximize Interior Light: Before shooting, open all curtains, blinds, and shutters to let in as much natural light as possible. This is a fundamental step in making rooms feel bright and airy.
- Avoid Mixed Lighting: Turn off all interior lights. Mixing the cool, blue tones of daylight with the warm, yellow tones of artificial bulbs can create unappealing color casts that are difficult to correct in post-production. This is one of the most crucial real estate photography tips for achieving a clean, professional look.
- Use Reflectors: For rooms with poor light or dark corners, use a simple white foam board or a professional reflector to bounce light from a window into shadowy areas. This brightens the space without resorting to artificial flashes.
2. Use Ultra-Wide Angle Lenses (10-24mm)
An ultra-wide angle lens is a non-negotiable tool for professional real estate photography. These lenses, typically in the 10-24mm range for crop-sensor cameras or 16-35mm for full-frame, are essential for capturing the full scope and scale of a room. They create a sense of spaciousness that standard lenses cannot, allowing photographers to showcase entire room layouts, the flow between spaces, and key architectural features in a single, compelling shot.
This technique is a cornerstone of the industry, making properties appear larger and more inviting to potential buyers scrolling through listings. In fact, Zillow’s internal data shows listings with professional wide-angle photos often sell significantly faster. Luxury hotel brands like Four Seasons also rely heavily on ultra-wide shots to market their suites, proving the lens’s power to convey space and luxury. The goal is not to mislead, but to accurately represent the feel and layout of a home, which these lenses do perfectly.
How to Implement This Tip
Using an ultra-wide angle lens effectively requires more than just attaching it to your camera. The key is to create an expansive view without introducing distracting distortion that makes the space feel unnatural.
- Choose the Right Focal Length: Start with a focal length between 16mm and 24mm (on a full-frame camera). Going wider, like 10-14mm, can cause extreme distortion at the edges of the frame, making furniture look stretched and unrealistic.
- Position at Chest Height: Place your camera and tripod at chest level, around 4-5 feet (1.2-1.5 meters) from the floor. This height provides a natural, eye-level perspective that feels authentic to the viewer.
- Keep the Camera Perfectly Level: This is one of the most critical real estate photography tips. Use a bubble level on your tripod or the camera’s internal level guide to ensure all vertical lines in the image are straight. Angling the camera up or down causes converging vertical lines, making walls look like they are falling inward or outward.
- Use Lens Correction Profiles: In post-processing software like Adobe Lightroom or Photoshop, apply the specific lens correction profile for your lens model. This automatically fixes barrel distortion and vignetting, ensuring straight lines and even brightness across the image.
- Avoid Shooting Too Close: Do not place objects too close to the edge of the frame or position the camera right against a wall. This exaggerates perspective distortion and can make nearby items look disproportionately large.
3. Implement HDR (High Dynamic Range) Photography
High Dynamic Range (HDR) photography is a game-changing technique for capturing scenes with extreme differences between light and shadow. It involves combining multiple exposures of the same shot, taken at different brightness levels, into a single, perfectly exposed image. This method is essential for interior real estate photography, where bright windows often contrast with darker room interiors, allowing you to create photos that reflect what the human eye naturally sees.
The result is a balanced, detailed photograph where nothing is lost in overly dark shadows or blown-out highlights. Leading real estate firms like Compass utilize HDR to ensure their luxury listings look both professional and true-to-life, preventing the common issue of losing the view outside a window. This professional polish is one of the most effective real estate photography tips for elevating a listing’s perceived value and attracting serious buyers.
How to Implement This Tip
Creating high-quality HDR images requires a specific shooting process and the right tools. The key is to capture a range of exposures without any camera movement between shots.
- Use a Sturdy Tripod: This is non-negotiable. The camera must remain perfectly still while you capture multiple frames. Any movement will result in blurry, misaligned final images.
- Shoot in Bracketing Mode: Most modern DSLR and mirrorless cameras have an auto-exposure bracketing (AEB) function. Set it to take 3 to 5 photos, each spaced 2 stops apart (e.g., -2, 0, +2). This ensures you capture the full dynamic range of the scene.
- Use a Timer or Remote Shutter: To eliminate any chance of camera shake, use your camera’s two-second timer or a remote shutter release to take the pictures. This prevents the slight movement caused by pressing the shutter button.
- Process with HDR Software: Merge your bracketed photos using dedicated HDR software. Popular options like Photomatix Pro or Aurora HDR are designed for this purpose. When processing, aim for a natural, realistic look by adjusting the tone mapping, avoiding the overly processed, surreal effect that can make a property look fake.
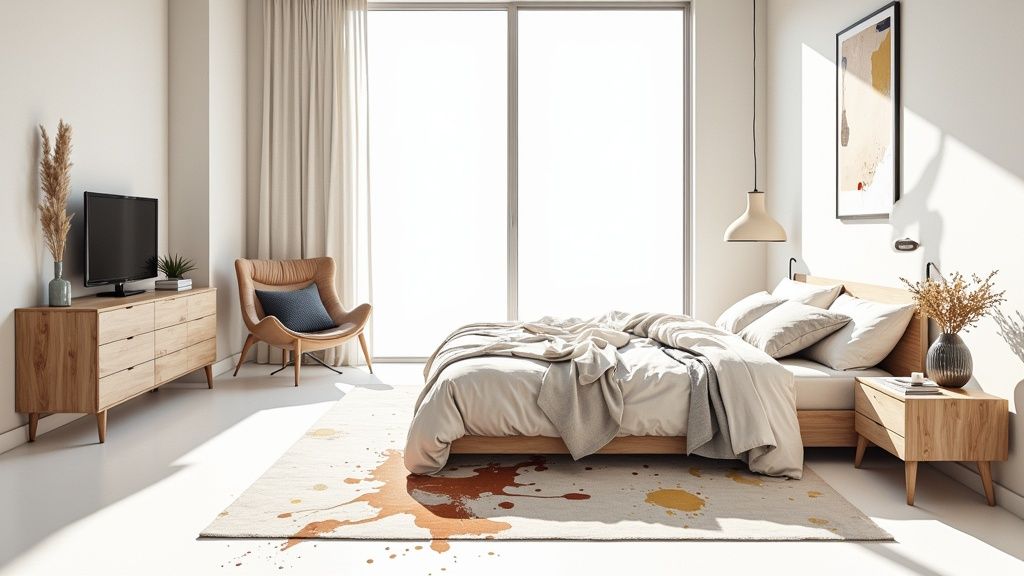
4. Stage and Declutter Spaces Before Shooting
Before you even pick up a camera, preparing the property is one of the most critical real estate photography tips for creating impactful images. Staging and decluttering remove distractions, allowing potential buyers to envision themselves in the space. A clean, organized environment highlights a home’s best features, like its layout and architectural details, rather than the current owner’s personal taste.

The power of staging is well-documented; the National Association of Realtors reports that staged homes often sell significantly faster than their non-staged counterparts. Top-tier staging companies like Meridith Baer Home collaborate with luxury photographers to create magazine-worthy scenes that attract premium offers. This approach transforms a lived-in house into a desirable, market-ready product.
How to Implement This Tip
Effective staging is about depersonalization and maximizing visual appeal. The goal is to create a neutral yet inviting canvas that photographs well and resonates with a broad audience. Before you even pick up your camera, a crucial step is to prepare the property by ensuring it is properly staged and decluttered. You can learn more about how to stage your house for sale effectively to maximize its appeal.
- Depersonalize Completely: Remove all family photos, personal collections, religious items, and children’s artwork. Buyers need to see the house as their future home, not someone else’s.
- Clear All Surfaces: Kitchen and bathroom countertops should be almost entirely clear. Leave only one or two intentional, decorative items, like a small plant or a bowl of fresh fruit.
- Arrange Furniture Strategically: Position furniture to create clear, walkable pathways and define each room’s purpose. This helps make spaces feel larger and more functional in photos. For smaller spaces, a virtual home staging app can help visualize optimal layouts.
- Add Simple, Elegant Touches: Introduce fresh flowers or a green plant for a pop of natural color. Ensure all beds are made with crisp, neutral, hotel-quality linens to create a sense of luxury and comfort.
- Tidy Up Every Corner: Don’t forget to hide trash cans, pet bowls, laundry baskets, and excessive wires. These small details can detract from an otherwise beautiful shot.
5. Perfect Your Camera Height and Angles
Consistent camera positioning is crucial for creating professional real estate photos that accurately represent room proportions and create visual harmony throughout a listing. The goal is to present a natural, true-to-life perspective that allows potential buyers to realistically envision themselves in the space. Tilting the camera up or down distorts vertical lines, making walls appear to slant inward or outward, which looks unprofessional and can make a room feel unsettling.
The industry standard, championed by real estate photography educator Scott Hargis and enforced by many MLS photography guidelines, is to shoot from chest height, approximately 4-5 feet (1.2-1.5 meters). This height mimics the natural eye level of a person in the room, creating an authentic viewing experience. Maintaining this height from room to room ensures the entire photo gallery feels cohesive and professionally produced, building trust with the viewer.
How to Implement This Tip
Achieving consistent height and straight angles requires precision and the right tools. The key is to eliminate distortion and create a stable, repeatable setup for every shot.
- Set a Consistent Tripod Height: Use a tripod for every shot and set it to your predetermined height (e.g., 4.5 feet). Use the height markings on the tripod legs or a piece of colored tape to ensure every setup is identical, creating a seamless visual flow in the final gallery.
- Keep the Camera Perfectly Level: Always ensure your camera is level, both horizontally and vertically. The camera’s sensor should be parallel to the walls. Use your camera’s built-in electronic level or a bubble level attached to the hot shoe to guarantee all vertical lines are straight.
- Shoot from Corners or Doorways: To capture the most space and create a sense of depth, position your camera in a corner or just outside the doorway. This vantage point shows the room’s layout and natural flow, providing a comprehensive view.
- Avoid Tilting: Never tilt the camera up to capture a high ceiling or down to show more floor. Instead, consider using a wider-angle lens (16-24mm) or stepping back to include more of the space while keeping the camera perfectly level. This is one of the most critical real estate photography tips for professional results and is a foundational principle in interior design photography.
6. Master Flash and Ambient Light Blending
While natural light is king, mastering the art of flash and ambient light blending elevates your work to the highest professional standard. This technique combines the existing light in a room (ambient) with a controlled burst from an external flash to create images that are bright, crisp, and perfectly balanced. It allows you to illuminate dark corners while preserving the warm, inviting atmosphere of interior light fixtures, resulting in a look that feels both natural and high-end.
This advanced skill is the hallmark of top-tier architectural photographers. Studios like Virtually Here Studios and instructors like Rich Baum have built their reputations on this method, producing flawless images that command premium rates. Luxury hotel and resort photography also relies heavily on this technique to showcase interiors with perfect clarity and ambiance, proving its value in the high-end market. It’s one of the most impactful real estate photography tips for those looking to level up their services.
How to Implement This Tip
Blending flash and ambient light is a multi-step process that requires precision and practice. The core idea is to capture two or more exposures and combine them for a final, polished image.
- Shoot the Ambient Exposure First: Start by taking a photo using only the ambient light. This shot captures the natural mood, the warmth from lamps, and the light from the windows. This exposure will serve as your baseline.
- Introduce a Bounced Flash: For your second shot, add a single, off-camera flash. Instead of pointing it directly at the scene, bounce it off a ceiling or a neutral-colored wall. This softens and diffuses the light, filling in shadows without creating harsh, artificial-looking hotspots.
- Use Wireless Triggers: Wireless flash triggers are essential for this technique. They allow you to position your flash anywhere in the room for precise control over the direction and quality of light, helping you avoid unwanted reflections and shadows.
- Blend Exposures in Post-Production: The real magic happens in software like Adobe Photoshop. Layer your ambient and flash exposures, then use layer masks to manually brush in the light from the flash shot only where it’s needed. This gives you complete control over the final look, ensuring every part of the room is perfectly lit.
7. Optimize Post-Processing and Color Correction
Professional post-processing is the essential final step that transforms raw real estate photos into polished, market-ready images. It’s where you correct colors, adjust exposure, and fix perspective to ensure every photo looks its absolute best. This editing stage is not about misrepresentation; it’s about presenting the property accurately and attractively, making it stand out in a crowded online marketplace.
Many top real estate photographers estimate they spend as much as 50% of their time on post-processing, highlighting its importance. Services like BoxBrownie exist solely to handle this critical task, processing thousands of listings daily. Research from Zillow reinforces this, with studies showing that professionally edited photos can generate significantly more online interest, proving that a thoughtful edit is just as important as the initial shot.
How to Implement This Tip
An effective editing workflow brings consistency and quality to your images. The goal is to enhance the photo’s natural appeal without making it look artificial, which is one of the most vital real estate photography tips for building trust with buyers.
- Always Shoot in RAW Format: RAW files capture all the image data from the camera’s sensor, providing maximum flexibility for adjusting exposure, white balance, and colors in post-production without losing quality.
- Use Lens Correction Profiles: Modern editing software like Adobe Lightroom and Photoshop includes profiles for most lenses. Applying these automatically corrects common issues like barrel distortion and vignetting, ensuring straight lines and evenly lit corners.
- Perfect Your White Balance: Adjust the white balance to ensure whites look clean and colors appear natural and true to life. This prevents unwanted yellow or blue color casts and makes the home feel more inviting. Getting this right is key to showcasing ideal color schemes for your home.
- Develop a Consistent Workflow: Create editing presets or a consistent step-by-step process for all your photos. This ensures a uniform look across the entire listing, which appears more professional and cohesive to potential buyers.
- Export for the Web: When you’re finished, export your images in the sRGB color space. This is the standard for web browsers and ensures that the colors you see on your screen are accurately represented on listing sites like Zillow and Realtor.com.
7 Key Real Estate Photography Tips Comparison
| Technique | Implementation Complexity 🔄 | Resource Requirements ⚡ | Expected Outcomes 📊 | Ideal Use Cases 💡 | Key Advantages ⭐ |
|---|---|---|---|---|---|
| Master Natural Light and Golden Hour Shooting | Medium – time-sensitive & weather dependent | Low – only natural light, minimal equipment | Warm, inviting photos with soft shadows, quick post-processing | Outdoor & exterior shots, emotional appeal | Emotionally appealing, reduces need for artificial lighting |
| Use Ultra-Wide Angle Lenses (10-24mm) | Medium – requires skill to manage distortion | High – investment in specialized lens | Spacious, comprehensive room views with dramatic perspective | Small rooms, architectural details, listing showcases | Captures full room, reduces number of shots needed |
| Implement HDR (High Dynamic Range) Photography | High – multiple exposures, tripod needed | Medium – tripod plus HDR software | Balanced exposure with details in shadows and highlights | Interiors with bright windows & dark areas | Reveals full dynamic range, professional magazine-quality |
| Stage and Declutter Spaces Before Shooting | Medium – prep time with coordination | Medium to high – staging furniture, décor rental | Clean, appealing photos focusing on space potential | All listing types needing buyer appeal | Increases perceived value, helps buyers envision living spaces |
| Perfect Your Camera Height and Angles | Low to Medium – requires discipline | Low – tripod helpful | Natural perspective, consistent visual style | All interior real estate photography | Prevents distortion, maintains uniformity |
| Master Flash and Ambient Light Blending | High – complex lighting & post-processing | High – flash units, triggers, stands, gels | Perfectly balanced, natural-looking lighting | Low-light interiors, luxury shoots | Maintains ambiance, works in all light conditions |
| Optimize Post-Processing and Color Correction | High – skilled editing & software required | Medium to high – software & time investment | Polished, market-ready images with consistent color and exposure | All listings needing professional finish | Dramatically improves image quality, consistent photo sets |
Capture More Than Photos - Capture Buyers’ Imaginations
You’ve navigated the essential techniques that separate standard property photos from captivating visual stories. From mastering the soft, inviting glow of the golden hour to harnessing the technical power of High Dynamic Range (HDR), each of these real estate photography tips is a powerful tool in your marketing arsenal. They are not just isolated tricks but interconnected principles that, when combined, create a compelling narrative for potential buyers.
Remember, the goal is not simply to document a space but to sell a dream. By decluttering and staging meticulously, you clear the canvas for a buyer’s imagination. By perfecting your camera height and angles, you create a sense of scale and flow, guiding their virtual tour through the home. And by artfully blending flash with ambient light, you ensure every room, from the brightest sunroom to the coziest den, looks its absolute best.
From Technical Skills to Tangible Results
The true value of implementing these strategies lies in their cumulative effect. Consistently applying these advanced real estate photography tips across your portfolio does more than just make individual listings look good; it builds a powerful brand reputation. Agents and homeowners who present properties with professional-grade imagery are perceived as more credible, detail-oriented, and successful.
The most important takeaway is that great photography bridges the gap between a listing and a showing. It’s the critical first impression that convinces a buyer to invest their time and emotion into a property. Your images must do the heavy lifting, answering questions, highlighting features, and sparking a connection before the buyer ever steps through the front door.
Your Actionable Path to Photographic Excellence
Don’t feel overwhelmed. Start by focusing on one or two areas for improvement on your very next shoot.
- For your next project, prioritize lighting. Experiment with bracketing for HDR or practice balancing your flash with natural light.
- Next, focus on composition. Pay close attention to your camera height and use your wide-angle lens deliberately to make spaces feel both expansive and authentic.
- Finally, refine your post-processing workflow. A consistent editing style will become your signature, tying all your work together with a polished, professional look.
By methodically integrating these concepts, you will move from simply taking pictures to strategically marketing properties. You’ll not only attract more clicks and inquiries but also empower clients to see the full, brilliant potential of a space. This mastery is what turns a passive online scroller into an enthusiastic, motivated buyer, ultimately leading to faster sales and stronger offers.
Ready to take your staging to the next level without the cost and hassle of physical furniture? Combine your new photography skills with the power of virtual staging from RoomGenius. Transform empty rooms into beautifully furnished, move-in-ready spaces in minutes, helping buyers visualize their future home. Explore how RoomGenius can elevate your listings today.