Your Guide to Using an Online Room Layout Planner

Ever tried to picture a new sofa in your living room, only to realize after it’s delivered that it completely swallows the space? We’ve all been there. That gap between what’s in our head and what works in reality can lead to some seriously expensive mistakes. This is exactly where an online room layout planner like RoomGenius comes in—it’s like a digital sandbox for your home.
Why You Should Use an Online Room Planner
Think of it this way: an online planner translates your ideas into a tangible, interactive model you can actually see and walk through. You can experiment with furniture arrangements, splash different colors on the walls, and figure out the perfect layout before you spend a single dollar or lift a paintbrush.
The technology has come a long way from the clunky 2D grids of the past. Today’s tools offer incredible 3D walkthroughs and even augmented reality features that once were only available to professional interior designers. It’s all about giving you the power to experiment freely, without the risk of ordering a non-refundable armchair that just doesn’t work.
Put Yourself in the Designer’s Seat
When you use an online planner, you’re not just guessing anymore; you’re making confident, informed decisions about your space. It’s an incredible feeling of control.
- Dodge Expensive Errors: You can test the exact dimensions of a new dining table to make sure there’s still room to walk around it. No more buyer’s remorse.
- Play with Different Looks: Curious about a minimalist vibe but not ready to commit? Or maybe you want to see if a bold, eclectic style feels right? You can try on different aesthetics with a few clicks.
- Make Collaboration a Breeze: Sharing your design with a partner, contractor, or interior designer is simple. Everyone can get on the same page, see the vision, and provide feedback.
Here’s a look at a living room design coming to life inside RoomGenius.

This kind of visualization is invaluable. You can immediately see how the natural light hits the furniture, whether the scale of the coffee table is right, and how the colors all work together in a realistic setting. It’s this practical insight that turns a good idea into a truly great, functional room.
It’s More Than Just a Trend
The move toward planning our homes digitally isn’t just a fleeting fad—it’s a massive shift in how we approach design. The global market for these tools was valued at a staggering USD 2.5 billion in 2023 and is on track to nearly double to around USD 5 billion by 2031. That kind of growth shows just how much people want accessible, personalized design solutions.
It’s not just about comprehensive room planners, either. The availability of specialized tools, like free cabinet design software tools, is making it easier than ever to tackle specific projects with confidence.
The Bottom Line: Digital planners take the guesswork and anxiety out of interior design. They give you a risk-free playground to build, tweak, and perfect your vision until you’ve created a space that is genuinely and uniquely yours.
Creating an Accurate Digital Blueprint of Your Room
Every great design begins with a solid foundation. Before you can jump into the fun part—picking out sofas and rugs with an online room layout planner—you have to create an accurate digital version of your actual space. Trust me, this is the most critical part of the entire process. Get this right, and everything else will fall into place.
Think of it as building a “digital twin” of your room. The goal here is to transfer your real-world dimensions into the planner with total precision. This is what ensures that the beautiful armchair you place virtually will actually fit when it arrives at your door.
Measuring for Success
First things first, grab a tape measure. It’s time to document your room’s core dimensions. Don’t just stop at the length and width; you need to capture every architectural detail that will affect your final layout.
- Wall-to-Wall Dimensions: Measure the length of each and every wall.
- Doors and Windows: Note the width of each opening and, just as importantly, its distance from the nearest corner.
- Ceiling Height: This is easy to forget but essential for visualizing scale, especially if you’re considering tall furniture or statement light fixtures.
- Permanent Fixtures: Measure anything that isn’t moving, like fireplaces, radiators, built-in shelving, or any of those awkward architectural nooks and crannies.
Here’s a little tip from experience: sketch a rough “mud map” on a piece of paper as you go. It’s so much easier to jot down the numbers on a quick drawing than to have to re-measure because you can’t remember which number went where. Double-check everything. A few centimeters off can make a surprising amount of difference.
Remember to account for things like baseboards or chunky window trim. They can prevent furniture from sitting flush against a wall, and it’s these little details that separate a good layout from a perfect one.
Once you have all your measurements, you’re ready to start building your room in the planner. Most tools, RoomGenius included, make this part incredibly simple. You’ll either draw the walls to your exact lengths or start with a standard room shape and just plug in your numbers to adjust the dimensions.
This visual guide breaks down the simple workflow for bringing your space to life.
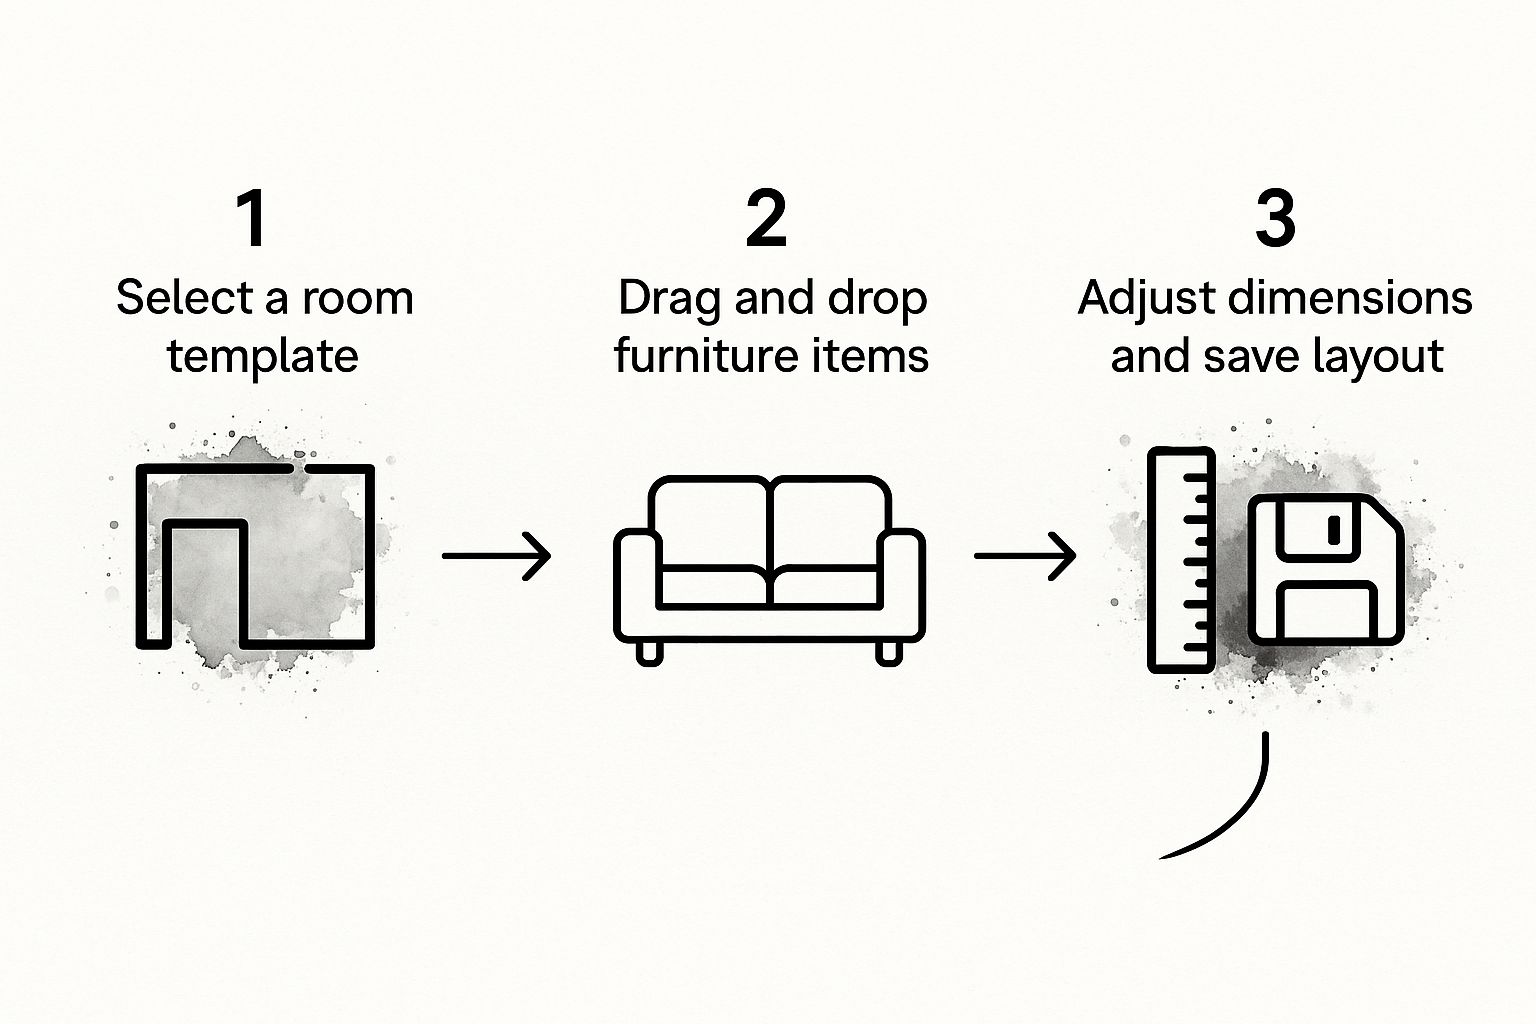
The whole process is designed to be intuitive, quickly taking you from a blank slate to a fully realized layout you can save and tweak to your heart’s content.
Adding Architectural Details
With your walls up, the next job is to add the doors, windows, and other fixed elements you measured earlier. Placing these features correctly is absolutely essential because they dictate traffic flow and furniture placement. A window in the wrong spot can suddenly make your tall bookshelf impossible, and an inaccurate doorway can completely mess up a planned walkway.
In RoomGenius, you just drag these elements onto your walls and then set their exact dimensions and locations. And please, don’t forget to save your progress! I always recommend saving a “base model” of your empty room. That way, you can duplicate it anytime you want to experiment with a new layout without having to re-enter all those measurements from scratch. If you’re curious how AI can help here, our guide on AI interior design software shows how you can get started even faster.
Furnishing and Styling Your Virtual Space
Once you have your digital blueprint ready, it’s time for the best part—bringing your room to life. This is where you get to play with furniture, decor, and textures to build a space that feels like you. A tool like RoomGenius isn’t just about drawing lines; it’s about accessing huge digital libraries to find the perfect pieces that nail your personal style.
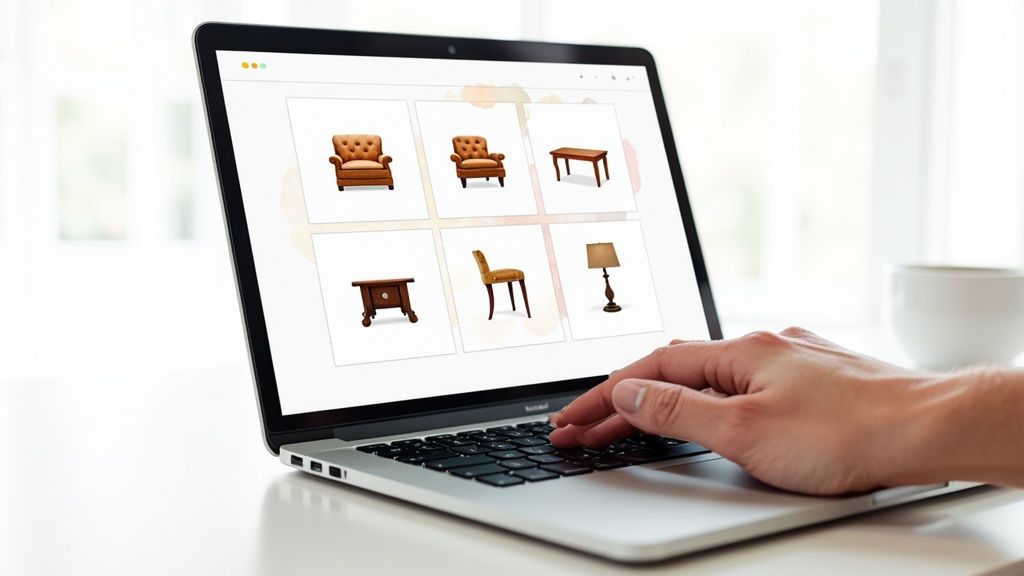
The freedom to experiment is precisely why these tools have become so indispensable. It’s no surprise that online room planners are a hit with homeowners everywhere. They give you a sandbox to test out different furniture arrangements and color palettes from the comfort of your couch, making the whole planning process so much more efficient.
Placing Your Anchor Pieces
Every great room design starts with the “anchors”—the big, foundational items that set the tone. In a living room, that’s almost always the sofa. In a bedroom, it’s the bed. Get these placed first.
Think about how you’ll use the room. Is your living room all about movie nights? Then your sofa should probably face the media center. If it’s more of a conversation hub, maybe two sofas or a cluster of armchairs facing each other makes more sense.
Pro Tip: I always tell clients to leave at least 3 feet of clearance for major walkways. For the smaller paths, like between a coffee table and a sofa, 18 inches is usually enough. This keeps the room from feeling cramped and makes it easy to move around.
After your main furniture is set, you can start building the rest of the layout around it. This simple strategy stops the space from feeling jumbled and makes sure your most important pieces get the prime real estate they deserve.
Mastering Flow and Balance
Traffic flow is all about the invisible lines people walk along to get through a room. A good layout feels intuitive, with clear, easy paths from one door to another. As you add smaller things like side tables or floor lamps, picture yourself walking through the space. Are you tripping over anything? Does the path feel natural?
Next up is visual balance. This doesn’t mean you need perfect symmetry. It’s more about spreading out the “visual weight” so that one side of the room doesn’t feel heavier or more cluttered than the other.
Here are a few ways to achieve it:
- Balance a large sofa on one wall with two armchairs and a small table on the opposite side.
- Counter a tall bookcase with a large piece of art on the opposing wall.
- Mix dark-colored furniture with lighter pieces to create contrast that doesn’t feel overwhelming.
Trying these ideas out digitally first is a huge advantage. If you want more tips on getting a professional finish, our guide on using a https://www.room-genius.com/blog/virtual-room-design-app/ is packed with more strategies.
Here’s a quick rundown of what makes these modern tools so powerful.
Key Features of Modern Online Room Planners
This table breaks down some of the most valuable features you’ll find in top-tier online room planners like RoomGenius. Understanding these functions will help you get the most out of the tool.
| Feature | What It Does | Practical Application |
|---|---|---|
| 2D/3D Visualization | Lets you switch between a top-down floor plan and a realistic 3D view. | Use 2D for precise layout planning and 3D to check sightlines, height, and overall feel. |
| Vast Furniture Library | Offers a catalog of generic and brand-name items to place in your room. | Test if that specific IKEA sofa will fit, or find a generic armchair with the right dimensions to represent yours. |
| Custom Dimensions | Allows you to input exact measurements for your room and furniture. | Ensures your digital plan is a true-to-life model, preventing real-world measurement mistakes. |
| Color & Texture Tools | Lets you apply different paint colors, flooring, and fabric textures. | Experiment with a bold accent wall or see how a light oak floor looks before committing to a purchase. |
| Snapshot/Render | Generates a high-quality, photorealistic image of your designed space. | Share your vision with a partner or contractor, or simply get a clear picture of the final result. |
Knowing how to use these features turns a simple planning session into a powerful design process, giving you confidence in your final decisions.
Adding Decor and Personality
With the main furniture locked in, it’s time to add the layers that make a space feel like home. Think rugs, lighting, curtains, art, and even a few plants. A well-placed rug can define a seating area, while the right lamps can make a room feel instantly cozier.
When you’re ready to start filling in the details, it helps to look for inspiration. You can easily explore products categorized by room to get ideas and see how different pieces complement each other. Use the planner as your playground to test out different textures and colors until you land on a combination that feels perfectly cohesive and inviting.
Using 3D Visualization to Finalize Your Design
A flat, 2D floor plan is your blueprint. It’s fantastic for getting the measurements right and figuring out the basic puzzle of where furniture can go. But let’s be honest, it’s in the third dimension that a design really starts to breathe. Shifting from that top-down view to a 3D model is how you go from planning a room to actually feeling it. This is where you find real confidence in your layout.
Making that jump is surprisingly simple with an online room layout planner like RoomGenius. It’s often just one click to go from that bird’s-eye schematic to a fully rendered, walkable space. All of a sudden, you’re not just looking at boxes on a grid; you’re standing in your future living room. You can turn your head and see how everything really connects.
Experience Your Space Before It Exists
The real power of 3D is that it answers questions a 2D plan just can’t. You can finally check the little details that make or break how a room works in daily life. Think of this step as your final reality check, catching problems before you’ve spent a dime.
Start by taking a virtual walk around your room.
- Check Your Sightlines: “Sit” on your virtual sofa. What’s the view? Is the TV at a comfortable height, or is that cool new floor lamp you picked out blocking the screen?
- Feel the Flow: Mentally run through your daily routines. Can you get from the door to the couch without awkwardly shuffling past the coffee table? Is there enough room to pull out the dining chairs without hitting a wall?
- Assess Scale and Proportion: This is a big one. Does that oversized armchair you fell in love with totally dominate the room and make it feel cramped? Or does that delicate little side table just disappear next to your bulky sectional?
This is exactly why 3D visualization has become so essential. It’s no longer just a cool feature; it’s a core part of modern design that bridges the gap between an abstract plan and how you’ll actually live in the space.
This is all getting smarter, too. New tech is making these tools incredibly powerful. We’re seeing a remarkable 70% increase in the adoption of AI-powered design suggestions. It’s homeowners who are really driving this trend, with residential projects making up about 55% of the market as people look for better ways to plan their renovations. You can dig deeper into how technology is shaping the room planner market to see where this is all headed.
See How Light Changes Everything
Lighting is one of the most critical—and most often overlooked—elements in design. A 3D model is a game-changer here because it can simulate how light, both natural and artificial, will play out in your room at different times of the day. You can finally see exactly where that morning sun is going to hit and whether it’s going to put a nasty glare on your TV.
This is more than just a neat trick; it’s incredibly practical. You might realize that the dark navy accent wall you’ve been dreaming of looks amazing in the bright afternoon light but makes the whole room feel like a cave once the sun goes down. Or you could discover that putting a mirror on one wall will catch the late afternoon sun perfectly, bouncing light into a corner that was otherwise dark and dreary.
Test Colors and Textures with Confidence
Of course, visualization isn’t just about where you put the couch. It’s your chance to test-drive materials and finishes. This is where you can be brave and try out that bold wallpaper you’re nervous about or see how different flooring completely changes the mood of the room.
Imagine a couple of common scenarios:
- Living Room: You’re stuck between a light oak floor and a richer, dark walnut. Instead of guessing, you can apply both textures in your 3D model and instantly see which one works better with your furniture and paint.
- Bedroom: You’re trying to create a cozy retreat. Experiment with different rug textures, from a simple low-pile wool to a plush, high-pile shag, and see which one truly adds that feeling of warmth you’re after.
This final, immersive check is your last stop before you start buying things. It’s where you catch all those little details that make a huge difference, making sure the room you create isn’t just well-planned, but a space you’ll genuinely love spending time in.
Pro Tips for a Polished and Practical Layout
You’ve got a solid 3D model of your room. That’s a huge step, but now comes the fun part—refining it with the details that take a layout from just “good” to truly great. This is where an online room planner really shines, letting you play with professional design principles to nail that perfect balance between beautiful and functional.
These are the tweaks that make all the difference in how a space actually feels to live in.
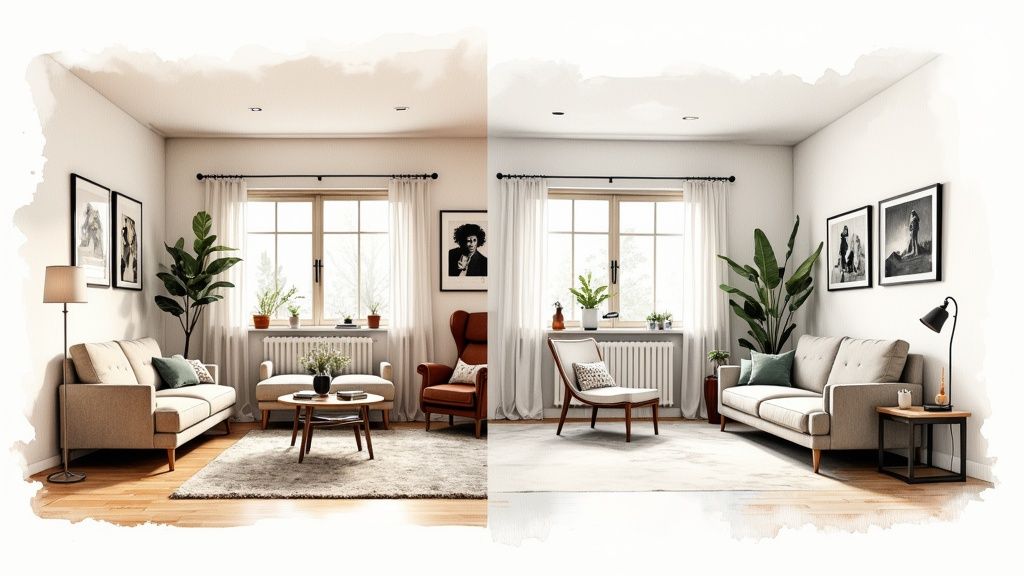
Think of this as your final checklist for turning that digital model into a room that’s not just stunning to look at, but also perfectly suited to your everyday life.
Let Your Walls Talk
Color is one of the most powerful tools in any designer’s kit, and virtual paint tools are your commitment-free playground. Before you even think about buying a can of paint, test a few different color schemes. See for yourself how a moody, dark color can make a cavernous room feel cozier, or how a light, airy shade can completely open up a smaller space.
And don’t forget the power of an accent wall! Try slapping a bold color or even a textured wallpaper onto the wall behind your sofa or headboard. It’s a classic trick for creating an instant focal point and injecting some personality without overwhelming the room.
Key Takeaway: Pay close attention to how your chosen colors look under the 3D lighting simulation. That perfect shade of sage green might look incredible in the virtual afternoon sun but feel completely different under the glow of evening lamps.
Plan for Real Life
A gorgeous layout means nothing if it doesn’t work with your daily routine. One of the most common mistakes I see is people forgetting the boring-but-essential stuff, like electrical outlets.
Use your planner to mark exactly where your outlets are. This one small step prevents those all-too-common design fails, like a lamp cord stretched precariously across a walkway. Make sure your key pieces—your media console, the side tables for lamps, your desk—are all within easy reach of a power source. For more on weaving practical needs into your design, especially in complex rooms, check out this excellent guide on choosing the perfect kitchen layout.
Embrace the Empty Space
It’s so tempting to fill every last corner, but resist the urge. Negative space—the empty area around and between your furniture—is what gives your layout room to breathe. It’s the secret ingredient that prevents a space from feeling cluttered and chaotic.
- Avoid Overcrowding: Make sure you have clear, comfortable pathways to walk through the room. A good rule of thumb is to have at least 3 feet of clearance in major walkways.
- Group Intentionally: Create distinct zones by clustering furniture. Think of a cozy conversation area or a quiet reading nook. Leaving open space around these groups defines their purpose.
- Balance Visual Weight: Don’t put all your heavy, bulky furniture on one side of the room. Mix large pieces with lighter, more delicate ones to create a sense of visual equilibrium.
This idea of valuing empty space is a core principle in many design fields. For instance, it’s a key technique used in a https://www.room-genius.com/blog/virtual-home-staging-app/ to help potential buyers see a home’s potential, not its clutter. By applying these pro tips, you’ll elevate your design from a simple furniture arrangement to a thoughtful, polished, and truly livable space.
Got Questions? We’ve Got Answers
Jumping into an online room layout planner for the first time can feel exciting, but it’s totally normal to have a few questions. Even the most experienced designers had to start somewhere! Let’s tackle some of the most common things people wonder about when they start mapping out their dream space.
Just How Accurate Are These Digital Plans?
This is probably the #1 question we hear: “Can I really trust this digital layout for my real-life room?” The short answer is yes, absolutely. But there’s a small catch—the plan is only as good as the measurements you put in.
Think of it this way: garbage in, garbage out. If you take a few extra minutes to precisely measure your walls, windows, and doorways before you start, your digital model will be a near-perfect mirror of your actual room. That little bit of prep work up front saves you from the massive headache of a new sofa not quite fitting through the door.
Can I Plan My Patio or Deck, Too?
What about taking the design outside? Many people wonder if they can use a room planner for their patio, balcony, or deck. You bet.
You can map out the dimensions of your outdoor space just like you would any interior room. The trick is to dive into the furniture library and look for items specifically tagged for outdoor use. A great planner will have a whole collection of weather-resistant chairs, tables, and even outdoor rugs to help you build a plan that’s both beautiful and practical for your alfresco living area.
Pro Tip: Don’t just copy-paste your living room design outside. Remember to consider real-world factors like where the sun hits at different times of the day or which areas might be exposed to rain. This will influence your furniture placement and material choices, even in the planning stage.
How Can I Share My Design with Others?
Okay, so you’ve created a masterpiece. Now what? How do you show your design to your partner for a second opinion, or send it over to your contractor?
Thankfully, sharing is a breeze with modern tools. Most planners, RoomGenius included, give you several easy options:
- Send a shareable link: This lets anyone view your project right in their web browser, no software needed.
- Export your layout: You can save your plan as a high-quality image (like a JPEG or PNG) or a detailed PDF, perfect for printing or attaching to an email.
- Invite people to collaborate: For real-time feedback, you can invite others directly into the project to leave comments or make edits.
This kind of collaboration is crucial. It keeps everyone on the same page and helps ensure your vision is brought to life exactly as you imagined it, from the first click to the final piece of furniture.
Ready to stop guessing and start designing with confidence? With RoomGenius, you can create a stunning, practical room layout in minutes. Try it today and see your vision come to life. Visit https://www.room-genius.com to get started.