Layered Lighting 101: Why One Light Is Never Enough
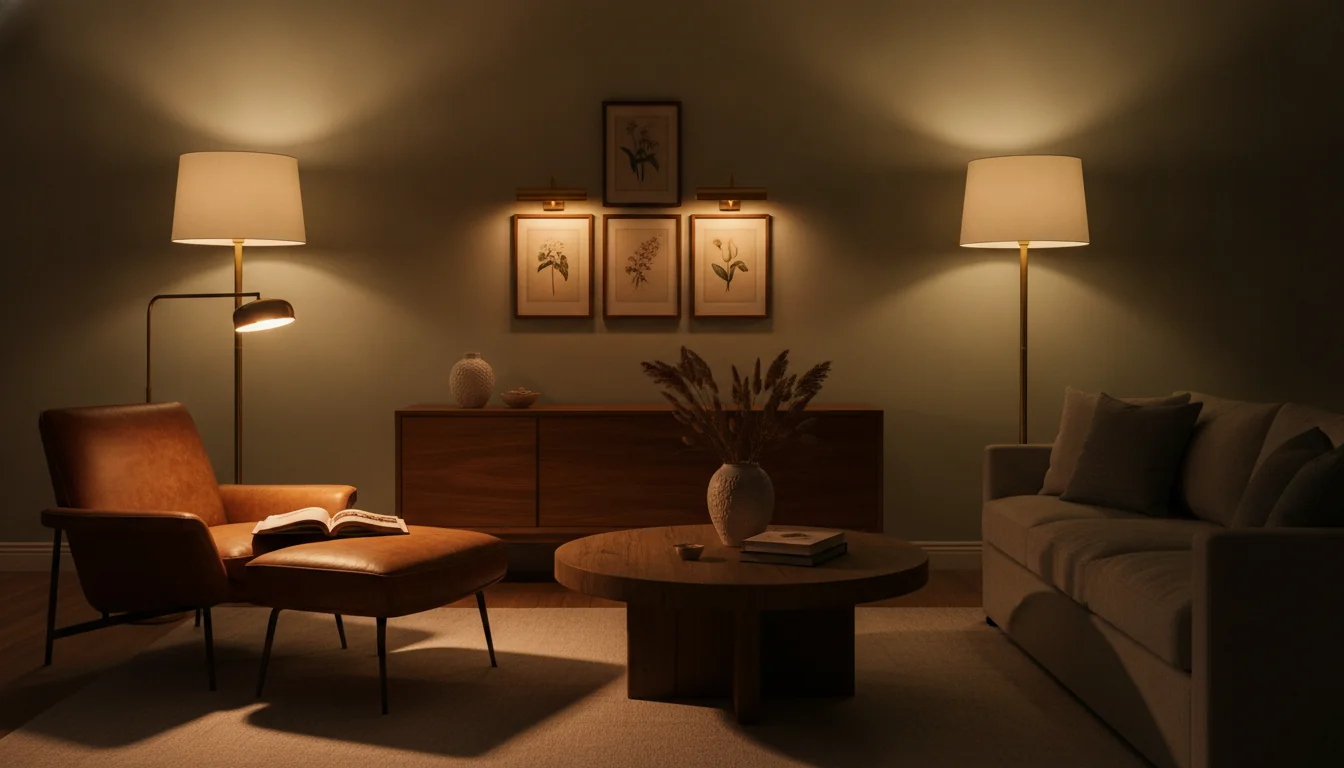
A room lit by a single overhead fixture is a room that technically has light — and nothing else. You can see. You can move around. But the room has no depth. No focal point. No atmosphere. The sofa might be right, the rug might be right, the layout might be fine. Without layered lighting, the room still reads as flat.
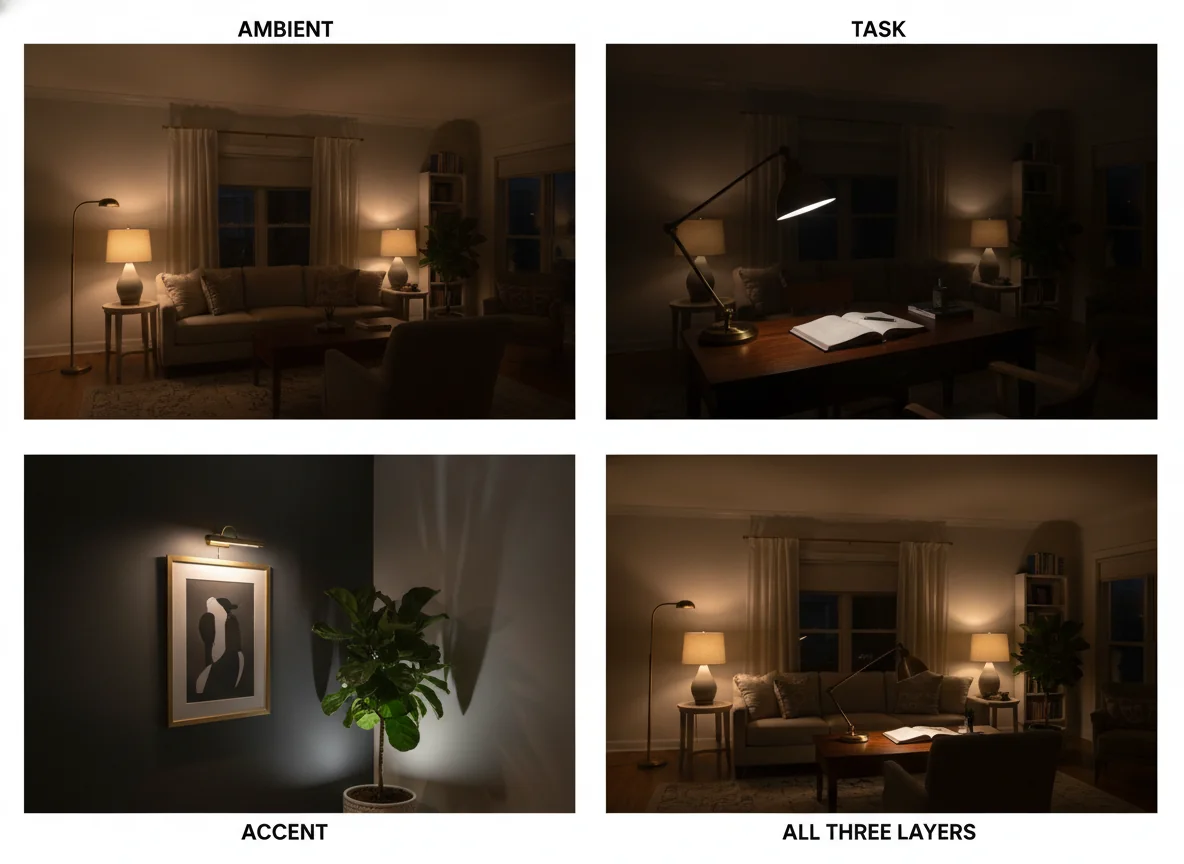
Layered lighting is the intentional combination of three distinct light layers — ambient, task, and accent — each serving a different purpose and controlled independently. It is the single highest-leverage design upgrade most rooms are missing, because it costs less than replacing a sofa and changes the room more than repainting. And it is achievable without an electrician, a renovation, or a single new fixture if you know how to deploy what you already have.
This guide covers what layered lighting actually means, the three-layer framework, how to build layers without rewiring, bulb temperature and dimming fundamentals, room-by-room layering strategies, common mistakes, and how to preview a layered lighting plan with AI before you buy a single lamp.
What is layered lighting? Layered lighting is the practice of using three separate light sources — ambient (general illumination), task (activity-focused light), and accent (dramatic or directional light) — in a single room, each on its own control, so you can adjust the room’s lighting scene by time of day, activity, and mood. It replaces the single-overhead-fixture default with a flexible system that makes a room feel larger, deeper, and more intentional. Layered lighting does not require built-in fixtures, hardwired switches, or an electrician; plug-in lamps, floor lamps, smart bulbs, and battery-powered accent lights achieve the same effect in any room.
What layered lighting actually means
Layered lighting is not a product category or a style trend. It is a functional framework that aligns light placement with human activity. The name comes from the idea that light, like clothing, works in layers — a base layer, a mid layer, and a top layer — each doing something the others cannot do alone.
The reason most homes do not have layered lighting is not that the homeowner chose against it. It is that builders default to a single ceiling fixture per room as the standard, and homeowners inherit that standard without questioning it. The room is lit. The room functions. The question never comes up until someone walks into a room with layered lighting and feels the difference viscerally — the room is warmer, deeper, more livable, and it is not obvious why.
The difference is that a single overhead light illuminates the center of the room and leaves the walls, corners, and surfaces in relative shadow. The room reads as smaller than it is because the boundaries recede. Layered lighting — a floor lamp near the wall, a table lamp on a console, a picture light over the art — pulls the spatial boundary outward and makes the room feel larger without moving a single piece of furniture.
Two practical observations that illustrate the gap:
A single light source creates a single shadow direction. Stand in a room lit by one ceiling fixture. Your shadow falls in one direction, hard and consistent. The room looks like a police interrogation room in a film. Now add a table lamp at waist height. The shadow softens. Add a floor lamp in the corner. The shadow splits. The room looks like a room.
Light temperature determines color perception. A warm 2700K bulb makes blues look gray and reds look rich. A cool 4000K bulb makes whites look clinical and wood tones look flat. The same paint color reads completely differently under different light temperatures, which is why a color that looked perfect in the store looks wrong on your wall. Our design concepts interior design guide covers how light interacts with the other design elements in a room.
The three layers, recapped
The ambient-task-accent framework is the lighting-industry standard, and it works because it maps directly to how people use a room.
Ambient light is the base layer — general illumination that lets you walk through a room safely, see the room’s shape, and orient yourself. It is soft, even, and shadowless. Sources include recessed ceiling lights on a dimmer, cove LED strips, track lighting bounced off a ceiling, and large floor lamps that direct light upward. The goal of ambient light is to make the room visible without drawing attention to the light source itself.
Task light is focused illumination for a specific activity — reading, cooking, writing, applying makeup, working on a hobby. It is brighter than ambient and directed at a work surface. Sources include desk lamps, under-cabinet kitchen lights, pendant lights over a kitchen island, reading floor lamps, and swing-arm sconces beside a bed. The goal of task light is to reduce eye strain and improve performance on the activity.
Accent light is dramatic light that draws attention to a specific object or surface — a piece of art, a plant, a textured wall, a bookshelf. It is typically three times brighter on the target than the ambient light around it. Sources include picture lights, track heads aimed at a wall, shelf LED strips, plant uplights, and wall washers. The goal of accent light is to create visual interest and depth.
| Layer | Purpose | Brightness | Typical sources | Dimmable? |
|---|---|---|---|---|
| Ambient | General visibility | Low–medium | Ceiling lights, cove LEDs, upward-facing floor lamps | Yes (strongly recommended) |
| Task | Activity-focused | Medium–high | Desk lamps, under-cabinet lights, pendants, reading lamps | Yes (helpful) |
| Accent | Visual drama | High on target | Picture lights, track heads, shelf strips, uplights | Yes (for variable scenes) |
The three layers work best on separate controls — separate switches, dimmers, or smart plugs — so you can adjust the balance by time of day and activity. A living room at 8 PM with guests should have ambient and accent light active. The same room at 10 PM with one person reading should have only the task light on. The range of scenes available from the same fixtures is what makes a room feel designed rather than simply lit. Our interior design tips for beginners post covers the broader principle of layering design elements.
Building layers without rewiring (renter-friendly)
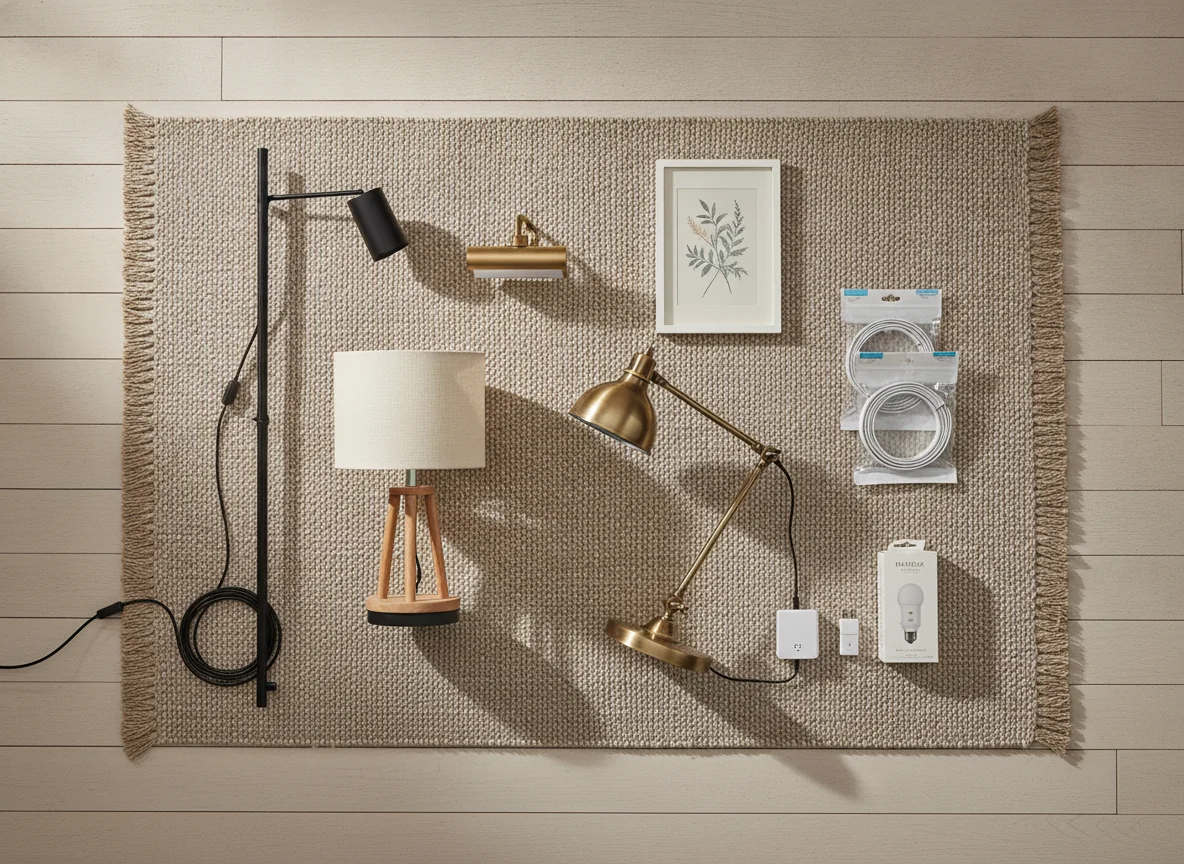
The most common objection to layered lighting is that it requires construction — new switches, new wiring, new ceiling fixtures. It does not. Every layer in the ambient-task-accent framework can be achieved with plug-in, battery-powered, or smart-bulb solutions that require no wiring, no landlord permission, and no deposit risk.
Ambient without rewiring. A large floor lamp with an upward-facing shade — a torchiere or an arc lamp — bouncing light off a pale ceiling provides ambient light for an entire room. Two such lamps in opposite corners cover most living rooms and bedrooms. The light is soft, even, and comes from a visible source that looks intentional. For a warmer ambient effect, place a table lamp on a console or sideboard with a cream drum shade; the shade diffuses light into a soft glow that fills the lower half of the room.
Task without rewiring. Plug-in desk lamps, articulated floor lamps, and clip-on reading lights are the easiest task sources to add. A floor lamp with an adjustable arm placed next to the primary reading chair costs $40 to $120, plugs into any wall outlet, and provides better reading light than an overhead fixture that costs ten times as much to install. Under-cabinet lighting in a rental kitchen can be achieved with stick-on LED strips that run on rechargeable batteries or plug into a countertop outlet.
Accent without rewiring. Battery-powered picture lights with adhesive backs attach to the frame of any artwork and last six to twelve months on a charge. Plug-in LED puck lights placed on a bookshelf shelf, aimed outward, create accent light for a fraction of the cost of a built-in. Uplights placed behind a large floor plant or in a corner cast dramatic shadows that add depth without a single wire.
| Layer | No-wiring solution | Typical cost | Installation |
|---|---|---|---|
| Ambient | Upward-facing floor lamp (torchiere or arc) | $50–$200 | Plug in |
| Ambient | Table lamp with drum shade on console | $30–$120 | Plug in |
| Task | Articulated floor lamp | $40–$120 | Plug in |
| Task | Stick-on LED under-cabinet strips | $15–$40 | Adhesive + battery or plug |
| Accent | Battery-powered picture light | $20–$60 | Clip or adhesive |
| Accent | Plug-in LED puck light on shelf | $10–$30 | Place or adhesive |
The principle is simple: plug-in light sources are temporary, moveable, and require zero permanent changes. They are also the most effective way to test a lighting plan before committing to a hardwired solution. If you are unsure whether a floor lamp in the corner will provide enough ambient light, buy one, plug it in, and live with it for a week. Our what is space planning guide covers how to test spatial changes before committing to them.
Bulb temperature and dimming basics
Light sources are defined by two technical specifications that matter far more than the fixture design: color temperature and dimmability. Getting these right is the difference between a room that looks intentionally lit and a room that looks like a hardware store demo.
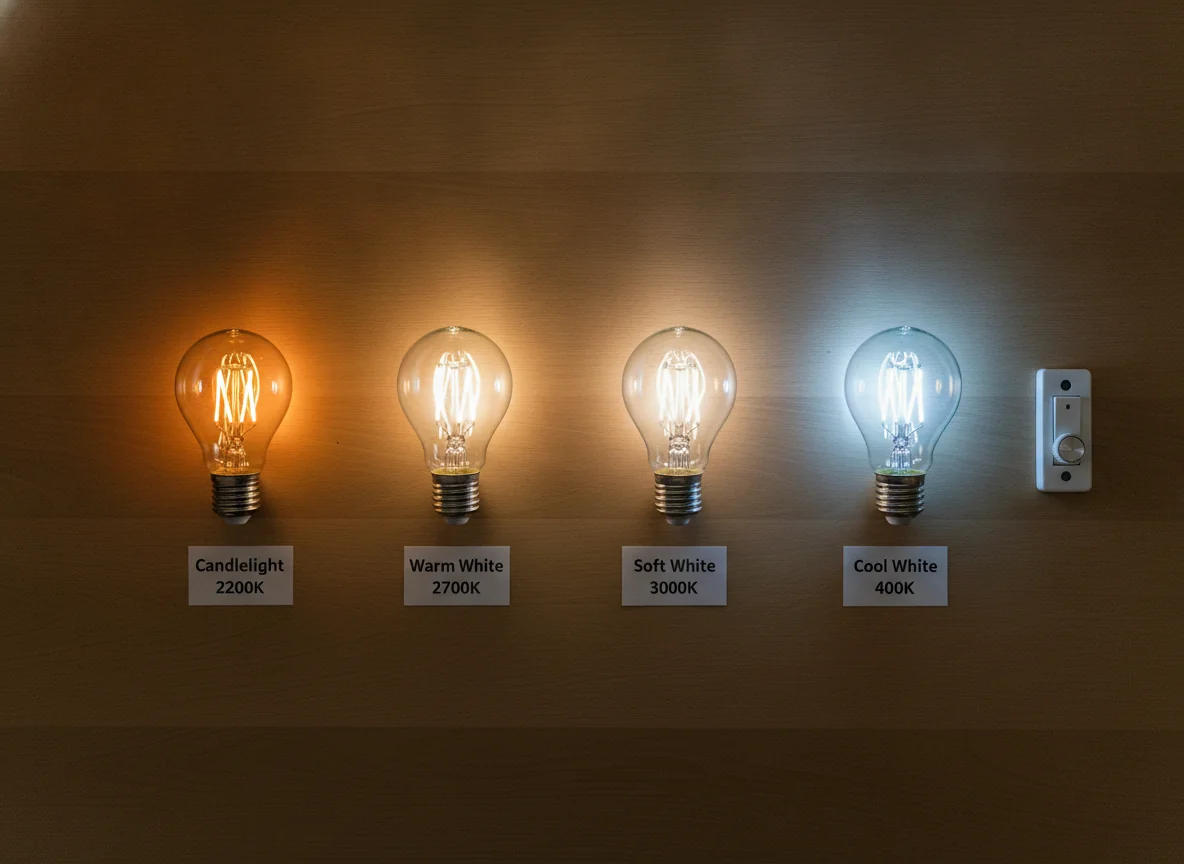
Color temperature is measured in Kelvin (K). Lower numbers are warmer, higher numbers are cooler. The residential range is 2200K to 4000K.
- 2200K–2700K (warm white). The color of candlelight, sunset, and incandescent bulbs. This is the standard for living rooms, bedrooms, and dining rooms — anywhere you want a relaxed, inviting atmosphere. A 2700K bulb is the safe default for almost every residential fixture.
- 3000K (soft white). Slightly cooler than warm white. Good for kitchens, bathrooms, and home offices where you need a bit more alertness without the clinical feel of higher temperatures.
- 3500K–4000K (neutral to cool white). Bright, crisp, and slightly clinical. Appropriate for task-heavy spaces like a garage, workshop, or laundry room, or for under-cabinet kitchen lights where you need to see food colors accurately. Avoid in living areas.
- 4000K+ (daylight). Blue-toned and harsh. Rarely appropriate in residential interiors. Reserved for retail, commercial, and medical settings.
| Kelvin | Name | Feel | Best for |
|---|---|---|---|
| 2200K | Candlelight | Very warm, intimate | Accent, dining, mood |
| 2700K | Warm white | Soft, inviting | Living room, bedroom, general |
| 3000K | Soft white | Neutral-warm | Kitchen, bath, office |
| 3500K–4000K | Cool white | Bright, crisp | Task lighting, under-cabinet |
| 4000K+ | Daylight | Blue, clinical | Garage, workshop, commercial |
The single-temperature rule. Every bulb in the same room should be the same color temperature. A room with a 2700K table lamp, a 3000K ceiling light, and a 4000K floor lamp looks disjointed. The eye registers the mismatch as discomfort even if the conscious mind does not name it. Pick one temperature for the room and stick to it.
Dimmability. Dimmable bulbs and dimmer switches are the single most underused tool in residential lighting. A dimmer lets a single fixture serve multiple functions: the same ceiling light that provides ambient illumination at 80 percent for a dinner party provides a nightlight at 10 percent for a late-night trip to the kitchen. Dimmers are inexpensive ($15 to $40 for a switch, $10 to $25 for a plug-in dimmer) and easy to install. For renters, plug-in dimmers work with any lamp — no wiring required.
Smart bulbs (Philips Hue, LIFX, or similar) offer the ultimate flexibility: they dim without a special switch, change color temperature, and can be controlled by voice or phone. The trade-off is cost ($15 to $50 per bulb) and the need to keep the switch in the on position permanently. For most rooms, a combination of dimmable LED bulbs on a standard dimmer switch, plus one or two smart bulbs for accent or scene-control, is the most practical setup.
Layering by room
The ambient-task-accent framework applies to every room, but the balance and source choices shift by function.
Living room. The living room is the most lighting-complex room because it supports the widest range of activities at different times of day. Ambient light should come from multiple sources at low brightness, not one source at high brightness — a pair of large table lamps on consoles, a floor lamp bouncing light off the ceiling, and cove LED strips if available. Task light belongs next to the primary reading seat. Accent light over the largest art piece, a plant uplight, and a wall washer aimed at a textured accent wall provide the drama. Every living room light source should be on a dimmer.
| Scene | Ambient | Task | Accent | Best for |
|---|---|---|---|---|
| Daytime | Off | Off | Optional | Active use |
| Evening social | 60% | 30% | 70% | Guests, conversation |
| Movie night | 10% | Off | 30% | Screen viewing |
| Reading | Off | 90% | Off | Focused reading |
| Wind-down | 20% | Off | 10% | Quiet relaxation |
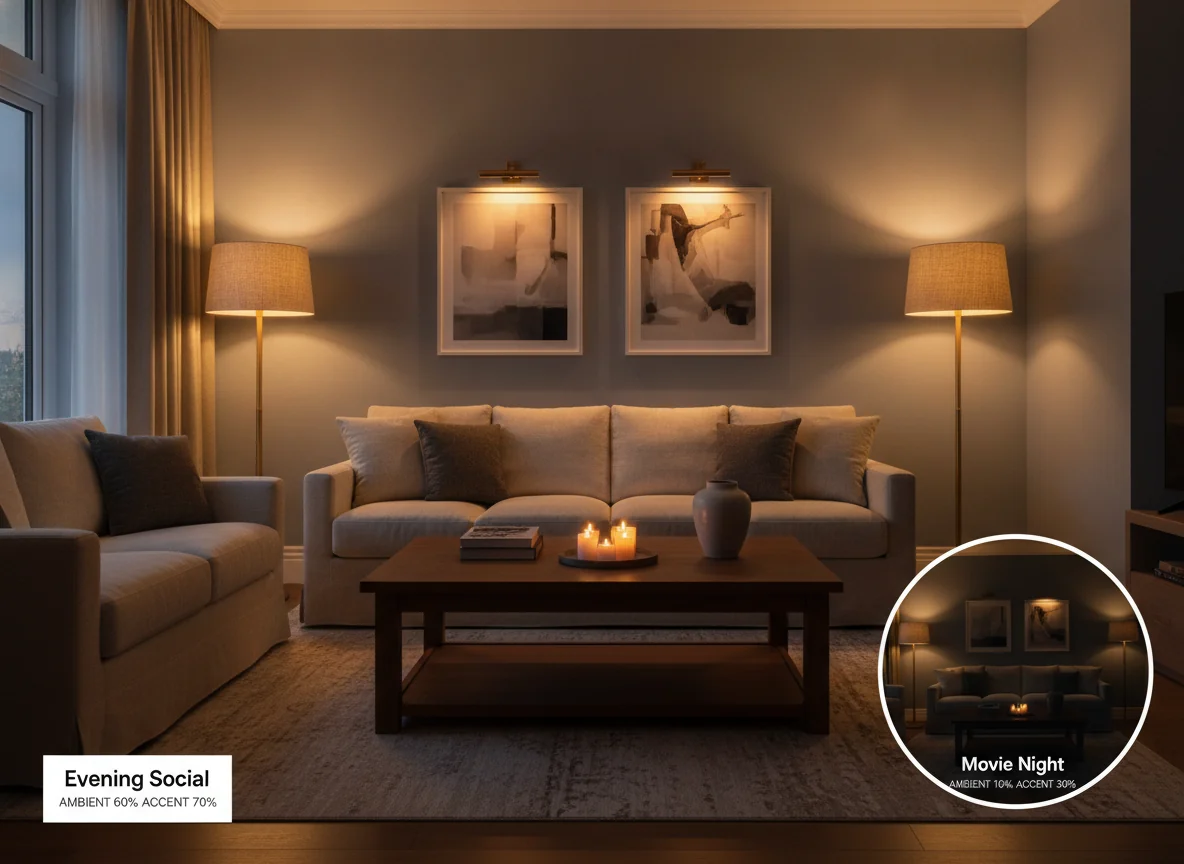
Kitchen and dining. The kitchen needs bright, shadow-free task light; the dining area needs warm, focused accent light. In the kitchen, ambient comes from recessed ceiling lights on a dimmer or a flush-mount fixture. Task light is under-cabinet LED strips for counter prep and a pendant over the island. In the dining area, a chandelier or pendant over the table provides the accent layer — dimmed to 40–60 percent for dinner, not 100 percent. Put the kitchen and dining lights on separate dimmers so the kitchen can be bright while the table is mood-lit.
Bedroom. The bedroom is the most common room to get layered lighting wrong because a single overhead fixture remains the standard even in new construction. Ambient light should come from a pair of table lamps on nightstands, not the ceiling light. Task light goes beside the reading side of the bed — a swing-arm sconce or a small articulated lamp. Accent light can be a picture light over the headboard art, a strip behind the headboard for a floating effect, or a small uplight in a corner. The ceiling light, if it exists, should be on a dimmer set to a maximum of 60 percent for occasional use — never as the primary light source.
Home office. Task light is the priority. A desk lamp with an adjustable arm and a warm-to-neutral temperature (3000K) provides focused light on the work surface without glare on the screen. Ambient light from a floor lamp or overhead fixture prevents the room from feeling like a dark cave around the desk. Accent light on a bookshelf or plant adds visual interest during video calls.
Bathroom. Vanity lighting is the most important task light. Sconces on either side of the mirror provide even facial illumination without shadows. A single overhead light above the mirror casts shadows under the eyes and chin — the most common bathroom lighting mistake. Ambient light from a ceiling fixture on a dimmer handles general visibility. Accent light is optional but effective over a piece of art or a plant.
Common layering mistakes
Even homeowners who know about layered lighting make the same mistakes. Naming them makes them easier to avoid.
One source for multiple layers. A single dimmer switch on a ceiling light does not create layered lighting. It creates one light at different brightness levels. Layered lighting requires at least two independent sources in different locations and at different heights. A ceiling light plus one floor lamp is the minimum viable configuration for any room.
All light at eye level. Table lamps and floor lamps are effective, but every light source at the same height creates a flat, horizontal light field. The most interesting rooms mix light at three heights: overhead (ceiling or cove), mid-height (table lamps, sconces), and low (uplights, toe-kick strips, floor-level accent lights). The vertical spread of light is what makes a room feel three-dimensional.
Brightness everywhere, all the time. The most common overcorrection is adding so many light sources that the room is uniformly bright from every direction. This defeats the purpose of layering. The goal is to have some areas bright and some intentionally dim, with the ability to shift the balance. A room where every corner is equally lit has no drama and no focus.
Wrong color temperature mix. Mixing 2700K and 4000K bulbs in the same room is the most common technical mistake. The eye registers the mismatch as visual static. Stick to one temperature per room, or use smart bulbs that can change temperature together.
Forgetting the switch location. A beautiful layered lighting plan is useless if the lamps are spread across the room and none of the switches are near the entry. Put at least one light source — usually a table lamp on a smart plug or a floor lamp — on a switch or voice control that works from the doorway, so you can enter a lit room and adjust from there. Our how to decorate small spaces guide covers switch placement and traffic-flow logic for tight rooms.
Previewing layered lighting with AI
The hardest part of layered lighting is predicting how the combination of sources will look in your specific room. Ceiling height, wall color, furniture placement, window position, and existing fixtures all affect how light behaves. A floor lamp that works perfectly in a friend’s living room may cast the wrong shadow in yours. A picture light that looks dramatic on a white wall may disappear against dark wallpaper.
This is exactly where AI room design closes the gap. Snap a photo of your room, describe the lighting layers you want to test — “a warm 2700K floor lamp in the corner, a reading lamp next to the armchair, and a picture light over the dining table” — and a modern AI rendering app produces a photoreal preview of how those light sources would look in your actual room, at your actual scale, with your actual furniture and wall color.
The AI preview lets you test:
- Fixture placement. Does the floor lamp in the corner cast light where you want it, or does it get blocked by the sofa?
- Light temperature. Does a warm 2700K ambient layer make the room feel cozy, or does it make the white walls look yellow?
- Layer balance. With ambient at 60 percent, task at 80 percent, and accent at 50 percent, does the room feel right, or does one layer dominate?
- Fixture style. Does a brass arc lamp work with your existing furniture, or would a black torchiere be better?
The best part: you can test a dozen combinations in ten minutes, compare them side by side, and buy only the fixtures that passed the preview. The cost of the preview is zero. The cost of buying the wrong fixture and returning it is both time and shipping.
FAQ
What is the minimum number of light sources for a layered room?
Three sources in two different locations is the minimum viable configuration. A typical small living room works with a ceiling light on a dimmer (ambient, at 40–60 percent), a floor lamp near the seating area (task, at 80 percent), and a table lamp on a console (accent, at 50 percent). Two sources in the same location — even two bright lamps — do not create layering.
Can I do layered lighting without a dimmer switch?
Yes. Plug-in dimmers cost $10 to $25 and work with any lamp. Smart bulbs with dimming and color-temperature control start at $15 per bulb and can be controlled by phone, voice, or a smart switch. The key is independent control of each light source, not a specific type of switch.
Is layered lighting possible in a rental with no overhead fixtures?
Rentals without overhead fixtures are actually easier to layer because you have no single ceiling light to fight against. A combination of floor lamps for ambient, desk or reading lamps for task, and battery-powered picture lights for accent creates a complete layered system. The absence of a ceiling fixture forces good lighting habits.
What color temperature should I use in my living room?
2700K is the safe default for living rooms, bedrooms, and dining rooms. If you want slightly more alertness during the day, use 3000K in the living room and keep 2700K in the bedroom. The most important rule: pick one temperature for the room and use it everywhere.
How do I light a room with very high ceilings?
High ceilings require taller fixtures or different mounting heights. A torchiere floor lamp that is 72 inches tall bounces light off a high ceiling effectively. For overhead fixtures, pendants or chandeliers hung at 7 to 8 feet above the floor — not at the ceiling line — provide the ambient layer at a usable height. Wall sconces at 60 to 66 inches above the floor fill the mid-height layer.
What is the most common mistake people make with layered lighting?
Using the ceiling light at full brightness as the primary source and treating all other lights as secondary. The ceiling light should be the dimmest layer, providing only the ambient base. The task and accent lights should be the bright, focused sources. Reversing this — ceiling light at 100 percent, floor lamp at 50 percent — produces the flat, uninteresting light that layered lighting is supposed to replace.
Can I use smart bulbs to create layered lighting without buying new fixtures?
Yes. Smart bulbs in existing lamps give you independent control, dimming, and color-temperature adjustment for each light source. A $15 smart bulb in a $30 floor lamp creates a controllable ambient layer. A second smart bulb in a table lamp creates a controllable accent layer. The fixture itself is irrelevant — the control is what creates the layering. This is the most cost-effective way to test layered lighting before investing in new fixtures.
Preview a room with layered lighting before you buy a single lamp.
You already have the room. All you need is a photo and a few ideas. The RoomGenius app turns your photo into a photoreal layered lighting preview — test fixture placement, color temperature, and layer balance on your actual room in seconds. Download RoomGenius for iOS or Android and start with the free layer. No electrician required.
[UTM: utm_source=blog&utm_medium=organic&utm_campaign=whitespace_2026_05]