8 Essential Interior Design Sketches to Master in 2025
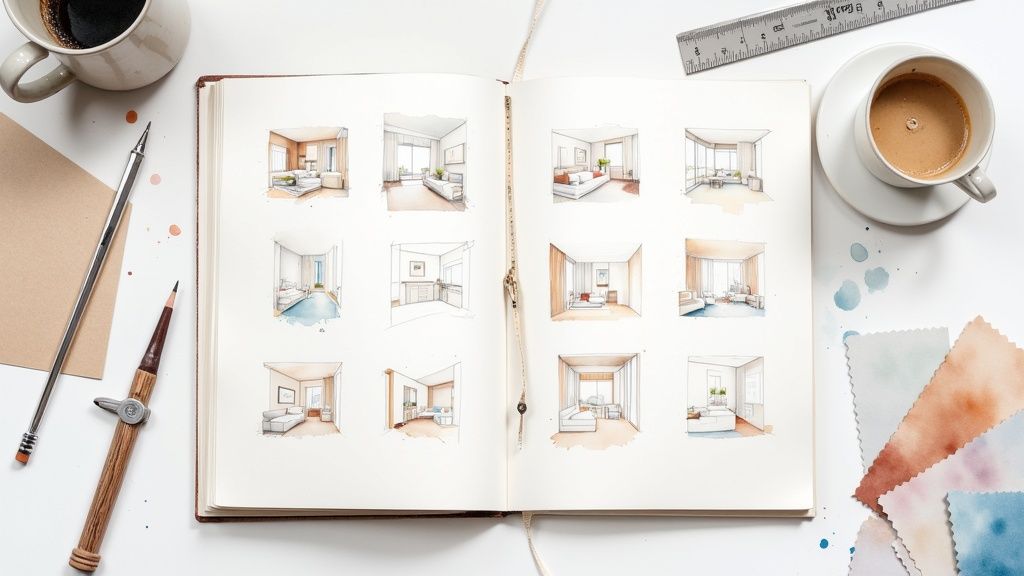
In the world of interior design, the journey from a vague idea to a fully realized space begins with a single, powerful tool: the sketch. Interior design sketches are the visual language of designers, architects, and homeowners, translating abstract concepts into tangible forms. They are far more than just pretty drawings; they serve as the foundational blueprint for creating atmosphere, ensuring functionality, and defining beauty within a room. This article explores 8 essential types of sketches that are crucial for anyone looking to design a space, from seasoned professionals refining their process to enthusiastic hobbyists planning a home project.
We will move beyond surface-level examples to provide a deep strategic analysis of each sketch type. For every example, we will break down its specific purpose, offering actionable insights and replicable methods that you can immediately apply to your own work. By understanding the unique strengths of each style, from the raw energy of a hand-drawn perspective sketch to the precise detail of a digital 3D rendering, you will learn how to effectively communicate your vision. This curated collection will equip you with the knowledge to select the right tool for the right job, helping you bring extraordinary spaces to life.
1. Hand-Drawn Perspective Sketches
Hand-drawn perspective sketches are the foundational language of interior design, serving as a powerful tool for rapidly translating abstract ideas into tangible, three-dimensional concepts. These freehand drawings use one-point, two-point, or three-point perspective to create a realistic illusion of depth, scale, and spatial relationships. This technique is indispensable during the initial conceptual phase, allowing designers and clients to visualize the flow, layout, and overall atmosphere of a space before committing to digital renders.
This method’s strength lies in its speed and expressive quality. A quick sketch can communicate the placement of a sofa, the height of a window, and the impact of a lighting fixture far more effectively than words alone. For more in-depth guidance, you can explore the fundamentals of interior design sketches on room-genius.com.
Strategic Analysis
The core value of hand-drawn perspective sketches is their ability to foster uninhibited creative exploration. Unlike digital tools that can sometimes feel rigid, the simple act of putting pencil to paper encourages fluid ideation. The imperfections and stylistic nuances of a hand drawing add a layer of personality and artistic intent that highly polished renders can lack, making the concept feel more approachable and personal to clients.
Key Insight: Hand-drawn sketches excel at communicating the feeling and potential of a space, not just its precise dimensions. This emotional connection is crucial for securing client buy-in during early design stages.
Actionable Takeaways
To effectively integrate this technique into your workflow, focus on these practical steps:
- Establish a Vanishing Point: Begin every sketch by defining your vanishing point(s) on the horizon line. This is the structural foundation for creating a believable sense of depth.
- Use Scale Figures: Always include a simple human figure (approximately 6 feet or 1.8 meters tall) in your sketch. This immediately provides a clear and relatable sense of scale for furniture and architectural elements.
- Vary Line Weights: Employ thicker, darker lines for objects closer to the viewer and lighter, thinner lines for those in the distance. This simple trick dramatically enhances the illusion of depth and creates a clear visual hierarchy.
2. Floor Plans and Layouts
Floor plans and layouts are the architectural backbone of any interior design project, serving as the primary tool for spatial organization. These are technical, top-down drawings that illustrate the arrangement of rooms, the placement of furniture, and the critical circulation paths within a space. Drawn to scale, they provide a precise, two-dimensional map that communicates the functional relationships between different areas, from a single room to an entire building.
This method’s power lies in its clarity and precision. It removes artistic interpretation to focus purely on dimensions, clearances, and flow, making it an indispensable reference for contractors, clients, and designers alike. For a deeper dive, you can learn how to create effective floor plans on room-genius.com.
Strategic Analysis
The strategic value of floor plans is their ability to establish functional feasibility. Before considering aesthetics, a floor plan confirms that a design works in practice. It answers crucial questions about accessibility, ergonomics, and compliance with building codes. This analytical approach prevents costly mistakes by ensuring every piece of furniture fits and every doorway provides adequate clearance. Once your initial floor plans are complete, you might want to explore a comprehensive a guide to rendered floor plan creation to visualize them in full color and detail.
Key Insight: A well-executed floor plan is a document of certainty. It transforms abstract spatial goals into a concrete, measurable, and actionable blueprint that serves as the single source of truth for the project’s layout.
Actionable Takeaways
To maximize the effectiveness of your floor plans, implement these practical steps:
- Use Standardized Symbols: Adhere to universal symbols for doors (including swing direction), windows, stairs, and fixtures. This universal language ensures clear communication with all stakeholders, from architects to electricians.
- Dimension Everything: Clearly label key measurements, including room dimensions, wall lengths, and clearance spaces (e.g., the distance between a sofa and a coffee table). Precision is non-negotiable.
- Color-Code Zones: Use subtle color or hatching to differentiate functional zones, such as work areas, relaxation spots, and high-traffic corridors. This visual organization makes the layout’s purpose instantly understandable.
3. Elevation Drawings
Elevation drawings are crucial technical interior design sketches that provide a flat, two-dimensional view of a vertical surface. Unlike perspective drawings that show depth, an elevation presents a wall as if you were looking directly at it, head-on. This orthogonal projection is indispensable for communicating precise details like cabinetry height, tile patterns, window placement, and the exact location of wall-mounted fixtures. It eliminates perspective distortion, ensuring that builders and installers have a clear and accurate guide for execution.
This method’s strength is its precision. It is the definitive document for specifying vertical elements, from the layout of kitchen appliances to the design of a custom built-in bookshelf. Elevations bridge the gap between creative vision and technical reality, forming a core part of construction documentation and ensuring the design is built exactly as intended.
Strategic Analysis
The core value of elevation drawings is their ability to deliver unambiguous technical communication. While perspective sketches sell the idea, elevations define the execution. They serve as a contractual document between the designer, client, and contractor, leaving no room for interpretation regarding the vertical arrangement and specifications of design elements. This precision minimizes costly on-site errors and ensures that complex features like custom millwork or intricate tile layouts are implemented flawlessly.
Key Insight: Elevations are the primary tool for finalizing and documenting vertical design decisions. They shift the conversation from “what if” to “this is how,” providing the clarity needed for accurate pricing and construction.
Actionable Takeaways
To effectively integrate elevation drawings into your workflow, focus on these practical steps:
- Reference Floor Plans: Always label your elevations to correspond directly with the floor plan (e.g., “Kitchen Elevation - North Wall”). This creates a clear and cohesive set of documents that is easy for all parties to follow.
- Annotate Finishes and Materials: Use callouts and notes to specify every material, finish, paint color, and hardware model. The more detailed the annotations, the fewer questions there will be during construction.
- Employ Varied Line Weights: Use a hierarchy of line weights to create visual clarity. Bolder lines should outline the primary profiles of cabinetry and walls, while thinner lines can indicate surface details like tile grout lines or door paneling.
4. Mood Boards and Material Collages
While not traditional sketches, mood boards and material collages are an essential visual planning tool in the interior design process. They function as a tangible summary of a project’s aesthetic, combining physical material samples like fabric swatches, wood finishes, and metal hardware with inspirational imagery and color palettes. This tactile approach bridges the gap between abstract ideas and the physical reality of a space, allowing clients to see and feel the proposed elements together.
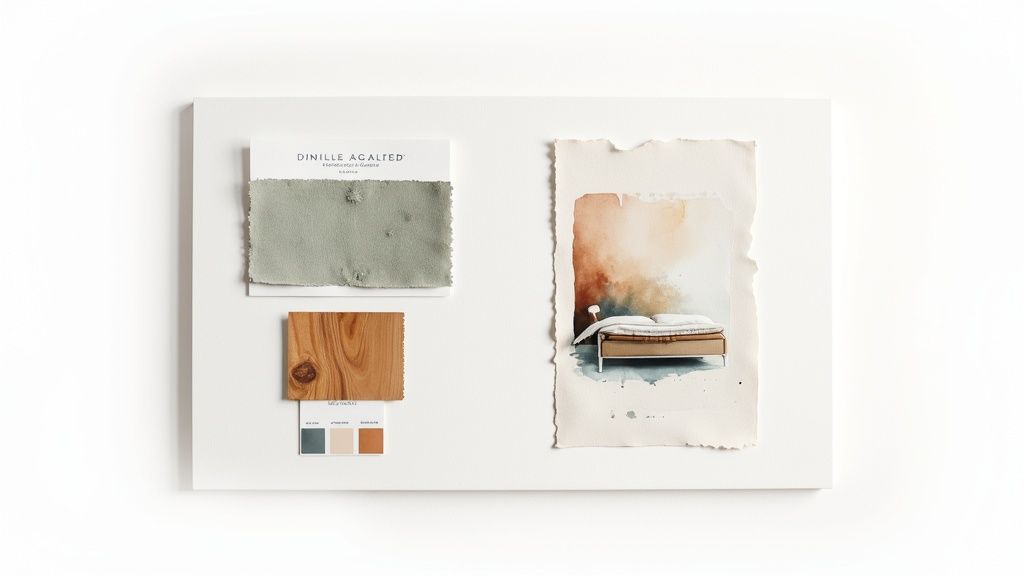
This method is invaluable for establishing a cohesive design direction before any detailed interior design sketches are finalized. It serves as a visual contract that ensures both the designer and client are aligned on the look, feel, and material quality, preventing costly misunderstandings later in the project. The combination of textures and colors in a collage format helps visualize the final harmony of a room.
Strategic Analysis
The primary strategic value of mood boards lies in their ability to facilitate client-centric decision-making. By presenting a curated collection of real materials, designers empower clients to make informed choices based on touch and sight, not just imagination. This collaborative process builds trust and gives clients a sense of ownership over the design, making them more invested in the final outcome. It also acts as a critical checkpoint to confirm the design direction before committing to procurement and implementation.
Key Insight: Mood boards are a powerful tool for managing expectations. They transform abstract concepts like “warm” or “modern” into a specific, agreed-upon collection of textures, colors, and finishes.
Actionable Takeaways
To create effective and persuasive mood boards, consider these practical steps:
- Establish a Visual Hierarchy: Arrange your board with a clear focal point. Place the most dominant materials, like flooring or a primary fabric, in a central or larger position and build the smaller, accent elements around them.
- Label Everything Clearly: Attach small, neat labels to each sample indicating the material name, supplier, and any relevant specifications. This professionalism not only impresses clients but also turns the board into a functional reference document for your team.
- Incorporate Inspiration Images: Don’t just show materials in isolation. Include 2-3 high-quality images of interiors that evoke the target mood. This helps clients connect the individual samples to the overall intended atmosphere.
5. 3D Renderings and Computer-Generated Visualizations
3D renderings and computer-generated visualizations represent the pinnacle of design presentation, transforming detailed digital models into photorealistic or stylized images. Using specialized software like 3ds Max, SketchUp with V-Ray, or Lumion, designers create immersive previews that showcase a space with unparalleled accuracy in lighting, material textures, and atmospheric effects. This technique is indispensable for high-value residential projects and large-scale commercial designs where precision and client confidence are paramount.
These visualizations bridge the final gap between concept and reality, allowing stakeholders to experience the finished interior before construction even begins. For a deeper look into the software powering these visuals, you can review some of the best AI interior design software on room-genius.com.
Strategic Analysis
The primary strategic value of 3D renderings is their ability to achieve absolute clarity and eliminate ambiguity. While hand drawings convey emotion, renderings confirm detail. They answer specific client questions about how sunlight will hit a floor at 4 PM, how a specific marble vein will look on a countertop, or how different lighting fixtures will interact. For creating highly detailed and immersive experiences, exploring Unreal Engine 5 Virtual Reality offers powerful tools for realistic virtual walkthroughs.
Key Insight: 3D renderings serve as a critical decision-making and marketing tool. Their photorealism secures client approval, justifies budgets, and helps sell a vision with a level of detail no other type of interior design sketch can match.
Actionable Takeaways
To leverage 3D visualizations effectively, integrate these professional practices:
- Model Lighting Accurately: Replicate the project’s actual geographic location, orientation, and time of day to produce realistic natural light. This helps in making informed decisions about window treatments and artificial lighting placement.
- Use High-Resolution Textures: Source high-quality texture maps for materials like wood, stone, and fabric. The believability of a render often depends on the realism of its surfaces.
- Render Multiple Viewpoints: Create a series of renderings from different key angles, such as the entryway view, a seated perspective from the sofa, and a wide-angle shot. This provides a comprehensive understanding of the space’s flow and functionality.
6. Section Drawings
Section drawings are essential architectural and interior design sketches that provide a vertical “slice” through a building or space. Imagine cutting a house in half like a layer cake; the section drawing shows you the inside of that cut, revealing crucial details about ceiling heights, the relationship between different floors, and the vertical scale of architectural features. This orthogonal view is indispensable for understanding the three-dimensional volume and structural composition of an interior.
This technique is fundamental for visualizing complex spatial arrangements that floor plans alone cannot convey. For instance, section drawings are critical for designing two-story loft conversions, spaces with mezzanines, or grand atriums where the vertical experience is a key part of the design. They allow designers to analyze and communicate how a person moves and feels within a multi-level environment.
Strategic Analysis
The primary strategic value of a section drawing is its ability to provide unambiguous vertical clarity. While perspective sketches show how a space will feel, and floor plans show how it is organized horizontally, a section drawing communicates precise technical information about height, volume, and construction. It removes guesswork regarding ceiling transitions, staircase dimensions, and the impact of structural beams or HVAC systems.
Key Insight: Section drawings bridge the gap between creative vision and technical execution. They are the primary tool for ensuring that ambitious vertical designs, like a floating staircase or a double-height living room, are proportionally correct and buildable.
Actionable Takeaways
To create effective section drawings for your interior design sketches, integrate these professional practices:
- Indicate the Cut Line: Always show where the “cut” is made by drawing a clear section line on your corresponding floor plan. Use arrows to indicate the direction of the view.
- Emphasize Cut Elements: Use a much heavier line weight or a solid fill (poche) for all the elements that are physically cut through, such as walls, floors, and roofs. This immediately clarifies the structure from the elements seen in the background.
- Include Vertical Dimensions: Add clear dimension lines to show critical heights, including floor-to-ceiling measurements, window sill and head heights, and the thickness of floor slabs. This technical data is vital for construction and fabrication.
7. Conceptual Diagrams and Design Concept Sketches
Conceptual diagrams and design concept sketches are the strategic blueprints of an interior design project, focusing on ideas and relationships rather than realistic details. These schematic drawings distill complex concepts into simple visuals, illustrating core principles like traffic flow, functional zoning, and spatial organization. They are essential communication tools in the earliest stages, allowing designers to map out the “why” behind a design before focusing on the “what.”
This method’s power lies in its clarity and focus. A simple diagram can effectively show how a retail store’s layout guides customer movement or how an office plan separates collaborative zones from quiet areas. These interior design sketches are less about aesthetics and more about logic, ensuring the foundational strategy of the space is sound.
Strategic Analysis
The primary value of conceptual diagrams is their ability to facilitate strategic alignment and problem-solving. By stripping away decorative elements, these sketches force both the designer and the client to concentrate on the functional core of the design. This abstract approach makes it easier to identify potential issues with workflow, adjacency, or accessibility early on, saving significant time and resources later in the project.
Key Insight: Conceptual diagrams are not for visualizing the final look; they are for validating the underlying design logic. They turn abstract goals, like “improving collaboration,” into a measurable spatial plan.
Actionable Takeaways
To effectively integrate this technique into your conceptual phase, focus on these practical steps:
- Use Color-Coding and Symbols: Assign distinct colors to different functional zones (e.g., green for public areas, blue for private offices). Create a simple legend with symbols to represent key elements like pathways, entrances, or equipment.
- Annotate Everything: Support your visual diagram with brief written notes. Clearly label zones, explain the reasoning behind a specific layout, and connect the diagram directly to the project’s main objectives.
- Iterate Rapidly: The simplicity of these diagrams allows you to create multiple versions quickly. Present two or three different conceptual approaches to stakeholders to compare, contrast, and refine the best possible solution collaboratively.
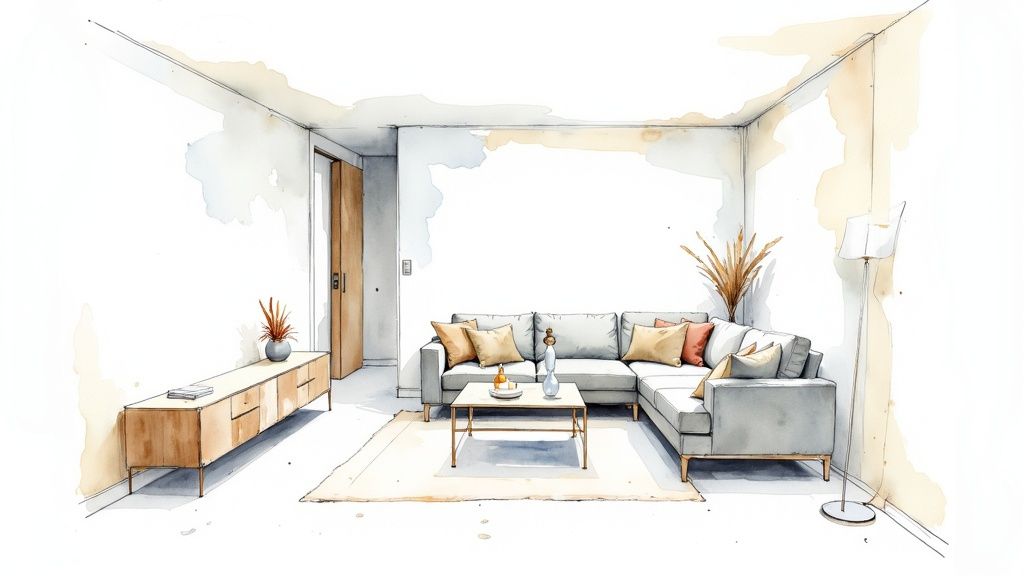
8. Digital Watercolor and Illustration Sketches
Digital watercolor and illustration sketches merge the expressive, fluid beauty of traditional art with the flexibility and precision of digital software. This technique uses tools like Procreate or Photoshop to create renderings that prioritize atmosphere, mood, and artistic style over photorealistic accuracy. These interior design sketches are ideal for evoking a specific feeling or lifestyle, making them highly effective for boutique hotel concepts, luxury residential presentations, and editorial illustrations where emotional connection is paramount.

The primary advantage of this method is its ability to tell a compelling story. By blending soft edges, transparent layers, and painterly textures, designers can create a visual narrative that resonates with clients on an emotional level, often more powerfully than a sterile, hyper-realistic render.
Strategic Analysis
The core value of digital watercolor sketches lies in their capacity to create a curated brand aesthetic. This artistic approach moves beyond simple spatial representation and into the realm of brand storytelling. For high-end residential projects or boutique hospitality, the sketch itself becomes a piece of marketing art, conveying a sense of bespoke luxury and exclusivity that aligns with the target audience’s aspirations.
Key Insight: These illustrative sketches are less about documenting a finished design and more about selling a dream. Their unique, non-photorealistic quality makes the vision feel aspirational yet attainable, inviting the client to imagine themselves within the art.
Actionable Takeaways
To effectively integrate this artistic technique into your presentations, concentrate on these practical steps:
- Build Up Layers: Work from light to dark, mimicking traditional watercolor techniques. Use separate layers for base colors, shadows, and highlights to maintain control and create depth with a translucent effect.
- Use a Tablet and Stylus: A pressure-sensitive stylus is essential for achieving the natural variation in line weight and opacity that defines this style. This allows for more organic, expressive brushstrokes that are difficult to replicate with a mouse.
- Incorporate Lifestyle Elements: Add ambient human figures, a book left open on a table, or steam rising from a coffee cup. These small details transform the space from a static room into a lived-in environment, enhancing its storytelling power.
8-Point Interior Sketch Comparison
| Method | 🔄 Implementation Complexity | ⚡ Resources & Speed | ⭐ Expected Outcome / Quality | 📊 Typical Impact | 💡 Key Advantages / Tips |
|---|---|---|---|---|---|
| Hand-Drawn Perspective Sketches | Low–Medium; skill-dependent | Minimal tools (paper/pencil); very fast | Good conceptual clarity, moderate accuracy | Fast ideation and spatial exploration | Great for brainstorming — start with light construction lines and include scale |
| Floor Plans and Layouts | Medium; technical drafting skills required | CAD or traditional drafting tools; moderate speed | High accuracy for spatial planning and measurements | Essential for documentation, compliance, and procurement | Indicate scale, dimensions and use standardized symbols |
| Elevation Drawings | Medium; detail-oriented | Drafting/CAD tools; moderate time per wall | High fidelity for vertical finishes and details | Guides construction of walls, cabinetry and finishes | Reference floor plans, show materials and hardware, use line-weight hierarchy |
| Mood Boards & Material Collages | Low; curational skillset | Physical samples or digital platforms; quick–moderate | High for aesthetic direction, low for technical detail | Aligns client taste and material palettes early | Label materials and sources, photograph boards for records, note lighting conditions |
| 3D Renderings & CG Visualizations | High; technical and artistic expertise | High software/hardware costs; time-intensive | Very high photorealism and immersive quality | Strong client persuasion, marketing and decision-making tool | Match real lighting, include accurate scale, label as artist rendering |
| Section Drawings | Medium–High; technical understanding | CAD/drafting tools; time-consuming for complex projects | High for vertical relationships and clearances | Prevents height/clearance errors; critical for multi-level design | Show section cut lines, include vertical dimensions and structural elements |
| Conceptual Diagrams & Concept Sketches | Low; schematic focus | Minimal tools (sketch/whiteboard/diagram software); very fast | High for communicating intent, low for construction accuracy | Rapidly explores options and aligns stakeholders early | Use clear legends, annotations and multiple iterations |
| Digital Watercolor & Illustration Sketches | Medium; artistic + digital skills | Tablet/software (Procreate/Photoshop); faster than photoreal renders | High emotional and stylistic impact, moderate technical accuracy | Engaging presentations, portfolios, and editorial visuals | Build layers gradually, maintain consistent style, include ambient figures for context |
Integrating Your Sketching Toolkit for Maximum Impact
Throughout this exploration of diverse interior design sketches, a central theme emerges: visual communication is the bedrock of successful design. We’ve journeyed from the raw, expressive power of hand-drawn perspective sketches to the technical precision of floor plans and elevations. We’ve seen how mood boards ground a vision in tangible materials and how conceptual diagrams capture the soul of a project before a single line is drawn for construction.
The true mastery, however, lies not in specializing in a single sketching technique but in developing a fluid, integrated workflow. Each type of sketch serves a unique purpose at a specific stage of the design process. The most effective designers and visionaries are multilingual in this visual language, able to select the perfect tool for the task at hand.
From Abstract Idea to Tangible Reality
Think of these eight sketch types as a complete toolkit for translating an idea into a physical space.
- Early Conceptualization: Start with conceptual diagrams and mood boards. These are low-risk, high-impact tools for exploring the core “why” behind a design and establishing the emotional and textural palette.
- Spatial Exploration: Move to quick hand-drawn perspective sketches and basic floor plans. This is where you test layouts, experiment with furniture placement, and begin to understand the three-dimensional feel of the space.
- Technical Refinement: Solidify the design with detailed elevation drawings and section drawings. These technical documents are crucial for communicating with contractors, cabinet makers, and other tradespeople, ensuring your vision is executed with precision.
- Client Communication & Persuasion: For final presentations, leverage the photorealistic power of 3D renderings alongside the artistic flair of digital watercolor sketches. This combination appeals to both the logical and emotional aspects of decision-making, providing clarity while simultaneously selling the dream.
By layering these methods, you create a comprehensive narrative that guides a project from an abstract feeling to a fully realized, functional, and beautiful interior.
The Strategic Value of a Visual Workflow
Mastering this integrated approach to interior design sketches provides a powerful strategic advantage. It enhances your ability to communicate complex ideas with absolute clarity, reducing misunderstandings between clients, designers, and builders. This clarity saves time, prevents costly mistakes, and ultimately leads to a more collaborative and satisfying design experience for everyone involved.
More importantly, it empowers you to be a more creative and confident designer. When you can quickly visualize an idea through a sketch, you can iterate faster, solve problems more effectively, and push the boundaries of your own creativity. The sketch is not just a presentation tool; it is a thinking tool. It’s where problems are solved, and brilliance is born. Whether you are a homeowner planning a renovation or a professional designer crafting a client’s dream home, embracing this versatile toolkit will elevate your process and transform your results.
Ready to bridge the gap between a simple sketch and a fully realized design? RoomGenius empowers you to upload your floor plans or basic interior design sketches and instantly generate multiple, photorealistic design variations using advanced AI. Stop imagining and start visualizing. Explore your design’s true potential today at RoomGenius.