How to Renovate Kitchen Cheaply: Top Tips for Budget Makeover
Thinking about a new kitchen but dreading the cost? I get it. The good news is you don’t need a six-figure budget to get a space you love. The secret to renovating a kitchen on the cheap is to stop thinking ‘replace everything’ and start thinking ‘refresh and repurpose’. It all starts with a smart plan that zeroes in on high-impact, low-cost changes.
Your Game Plan for a Budget-Friendly Kitchen Remodel
A truly successful kitchen remodel is built on strategy, not just a blank check. The whole point is to make savvy choices that give you the biggest visual bang for your buck. Instead of a full gut job, take a hard look at what you already have.
This “refresh” philosophy is what makes an affordable renovation possible. See the potential in your existing layout. For instance, those solid but dated oak cabinets? They can look brand new with a high-quality paint job and some modern hardware. That one move alone can save you thousands compared to ordering new custom cabinets.
The Power of Phased Renovations
One of the best ways to keep your budget in check is to break the project into smaller, more manageable stages. A phased renovation lets you spread the cost out over time, so you aren’t hit with one massive bill. You can tackle one piece at a time, as your budget allows.
Here’s a practical example of how that might play out:
- Phase 1 (First couple of months): Go for the easy wins. Paint the cabinets, swap out the old hardware, and maybe install a new peel-and-stick backsplash. Instant facelift.
- Phase 2 (The next few months): Focus on function. Upgrade that leaky faucet, install some under-cabinet LED lighting, or add pull-out shelves to your existing cabinets. These small things make a huge difference in daily use.
- Phase 3 (Later in the year): Time for the bigger stuff. Now you can use the money you’ve saved up for those new quartz countertops or that energy-efficient fridge you’ve had your eye on.
This approach isn’t just easier on your wallet; it’s less disruptive. You get to enjoy the upgrades as they happen without your kitchen being a total construction zone for a month straight. It’s a popular move—data shows 51% of homeowners are planning kitchen remodels, and many are opting for these smarter, phased upgrades. Better yet, these minor remodels are a great investment, recouping around 96.1% of their cost in added home value.
A well-planned renovation isn’t just about making things look good; it’s about making smart financial decisions that pay off. Deciding where to spend and where to save is crucial.
High-Impact vs. Low-Cost Renovation Priorities
| High-Impact Area | Low-Cost Strategy | Estimated Savings (vs. Replacement) |
|---|---|---|
| Kitchen Cabinets | Refinish or paint existing cabinets; update hardware. | 70-80% |
| Countertops | Install high-quality laminate or butcher block. | 50-70% |
| Backsplash | Use peel-and-stick tiles or paintable wallpaper. | 60-75% |
| Lighting | Swap out old fixtures; add under-cabinet LED strips. | 80-90% |
| Flooring | Install luxury vinyl tile (LVT) over existing floor. | 40-60% |
By prioritizing updates this way, you can achieve a dramatic transformation for a fraction of the cost of a full teardown.
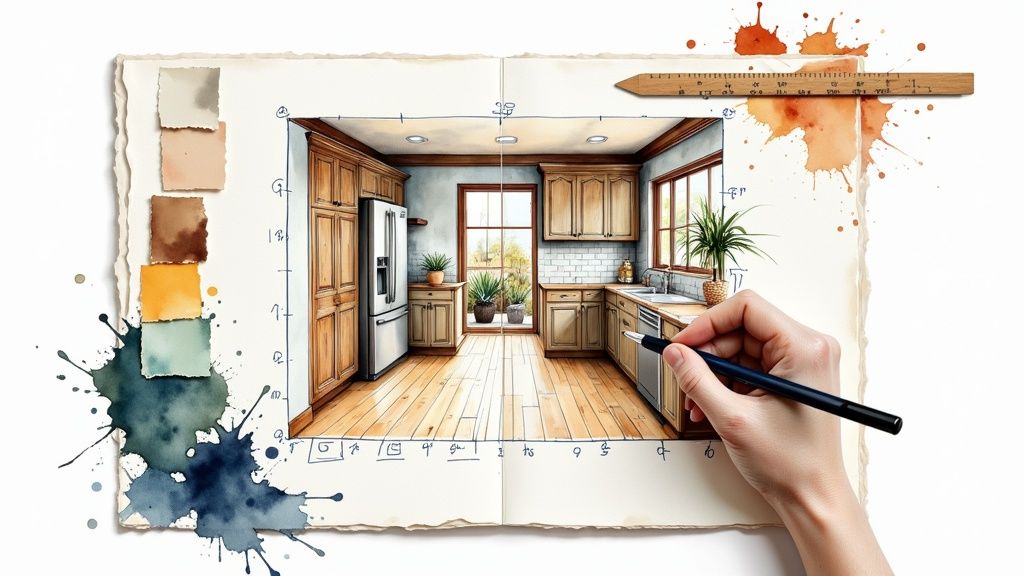
Planning Your Layout and Vision
Before you even think about picking up a paintbrush, you need a clear vision. This starts with a simple sketch of your current layout. Don’t worry, it doesn’t have to be perfect.
Creating a basic floor plan helps you see how you actually use the space and where you can make improvements without the massive expense of moving walls or plumbing. We’ve got a great guide on how to create floor plans that’s a perfect starting point. This simple step ensures your budget-friendly changes are also incredibly functional, setting you up for a renovation that feels as good as it looks.
Mapping Out Your Affordable Kitchen Remodel
Any successful project starts with a solid plan, not just a vague idea. This is where you lay the groundwork and figure out how to renovate a kitchen on the cheap by catching costly mistakes before you even pick up a tool. Think of it as creating a detailed roadmap that will guide every single decision you make, from the paint color on the walls to the hardware on the cabinets.
The very first thing you need to do is get brutally honest about your budget. It’s easy to list the big-ticket items like countertops and appliances, but a budget falls apart when you ignore the small stuff. Your plan has to account for every little detail.
- Materials: Don’t forget the paint, primer, sandpaper, and caulk.
- Tools: Will you need new rollers, quality brushes, or painter’s tape?
- Consumables: Factor in drop cloths, cleaning supplies, and wood filler.
- Contingency: Always, always build in a 10-15% buffer. This is for the “oops” moments, like discovering a small leak behind the old sink that you weren’t expecting.
This level of detail turns your budget from a hopeful guess into a reliable financial plan. It’s what separates a project that finishes on time and on budget from one that’s plagued by panicked, fund-draining trips to the hardware store.
Assess Your Current Layout
Before you start dreaming of knocking down walls, take a long, hard look at what you’re working with. Tearing out walls and moving plumbing or electrical lines are absolute budget-killers. The most affordable kitchen remodels almost always work within the existing footprint.
Ask yourself a few tough questions about your current space:
- What’s already working? Is the “kitchen triangle”—the path between your sink, stove, and fridge—already efficient? If it ain’t broke, don’t fix it. Don’t spend money creating problems that don’t exist.
- What are the biggest pain points? Is there a frustrating lack of counter space right next to the stove? Are the cabinets over the dishwasher impossible to reach? Pinpoint the specific frustrations you can solve with smarter, smaller changes.
- What can be saved? Those sturdy but dated oak cabinets are prime candidates for a refresh, not a replacement. If the boxes are solid, all they need is a cosmetic facelift.
This practical evaluation helps you pour your limited funds into changes that actually make your kitchen better to use and look at, rather than on expensive structural work that offers very little return on investment.
This chart gives you an idea of how a budget might break down for a small but high-impact kitchen refresh, showing where the money typically goes.

As you can see, cosmetic updates like painting or refacing cabinets often take up the biggest slice of the budget. The good news? They also deliver the most dramatic visual bang for your buck.
Create Your Design Vision
Okay, with a budget locked in and your layout assessed, you get to the fun part: defining your style. This isn’t just about saving pretty pictures online; it’s about creating a cohesive vision that will stop you from making expensive design mistakes down the road. A mood board is your absolute best friend here.
A mood board is just a visual collection of your ideas. It can be a real-life corkboard or a digital one on a platform like Pinterest. The point is to gather inspiration that helps solidify the exact look and feel you’re going for.
Pro Tip: Your mood board should act as a filter, not a free-for-all. Once you nail down your core style—say, “warm modern farmhouse”—only pin images that fit that specific aesthetic. This is how you avoid a jumbled design that feels disjointed and looks cheap.
This disciplined approach will save you from making impulse buys that don’t fit your overall plan. When you’re standing in the store tempted by a trendy backsplash tile that clashes with everything on your board, that visual plan will be the voice of reason that protects your wallet.
Bringing these ideas to life is easier than ever. You can use tools to play around with different finishes and layouts before you spend a dime. For more on this, check out our guide on the best kitchen design software that can help you turn your mood board into a realistic preview. This planning phase is what separates a smart, budget-friendly renovation from an expensive mess.
Choosing Budget Materials That Look High-End
You don’t need a six-figure budget to get a kitchen that looks like it came out of a magazine. I’ve seen it time and time again: the real secret to a stunning, affordable kitchen isn’t about spending more, it’s about choosing smarter. The right materials can give you that high-end feel without the high-end price tag. This is where you can make the biggest impact on your bottom line.

Let’s be real, material costs are what can turn a dream project into a financial headache. When you see numbers like $71,159 for an average kitchen remodel or $137,228 for a larger one, a huge chunk of that is materials. Just think about marble countertops—they can run up to $200 per square foot. You can dig into more detailed cost breakdowns on FloridaRealtors.org, but the lesson is simple: your material choices will make or break your budget.
Luckily, we’re living in a golden age of affordable alternatives that look fantastic and hold up to real life. It’s all about knowing where to look.
Countertops That Don’t Break the Bank
Countertops are a huge focal point in any kitchen, so this decision feels big. While everyone loves the look of granite or marble, they come with a premium price and often require special care. Here are a couple of my favorite go-to alternatives that deliver a serious wow factor for less.
Laminate Countertops Reimagined
First, forget everything you think you know about laminate from your grandma’s house. Today’s high-pressure laminate (HPL) is a whole different ballgame. You can find incredibly realistic patterns that mimic stone and wood, complete with modern edge profiles that give the illusion of a solid slab. Brands like Formica and Wilsonart have some collections that I’ve seen fool even design-savvy friends.
- Cost: Usually lands between $20-$50 per square foot installed.
- Pros: Super low cost, a massive variety of designs, and a breeze to maintain.
- Cons: Can be damaged by heat and sharp knives, and you might see a seam or two.
Warmth and Charm with Butcher Block
If you’re after a warm, inviting vibe, you can’t go wrong with butcher block. Made from affordable woods like birch or maple, it adds a natural, organic feel that stone just can’t replicate. It’s also a fantastic DIY project. If you’re comfortable with a bit of sanding and sealing, you can install it yourself and cut your labor costs to zero.
Cost Comparison: High-End vs. Budget-Friendly Materials
Seeing the numbers side-by-side really puts the savings into perspective. Here’s a quick look at how choosing a budget-friendly alternative can dramatically reduce your overall costs.
| Material Type | High-End Option (e.g., Marble) | Budget-Friendly Alternative (e.g., Laminate) | Average Cost Difference |
|---|---|---|---|
| Countertops | Marble or Quartzite | High-Pressure Laminate or Butcher Block | $100 - $180 / sq. ft. |
| Flooring | Natural Hardwood or Slate | Luxury Vinyl Tile (LVT) or Plank (LVP) | $10 - $20 / sq. ft. |
| Backsplash | Custom Ceramic or Glass Tile | Peel-and-Stick Tile or Paint | $25 - $50+ / sq. ft. |
As you can see, making smart swaps on just these three key elements can free up thousands of dollars in your budget, allowing you to splurge elsewhere or simply save a bundle.
Smart Flooring Solutions for Less
Kitchen flooring takes a beating. It has to stand up to spills, traffic, and dropped pans, all while looking great. This used to be a tough combination to find on a budget, but modern flooring has come a long way.
Luxury Vinyl Tile (LVT) or its cousin, Luxury Vinyl Plank (LVP), is honestly a game-changer. This stuff convincingly replicates everything from rustic hardwood to high-end slate, but it’s tougher and completely waterproof.
Pro Tip: LVT is a fantastic DIY option. Many products today have a simple click-lock system. You can often lay a new floor right over your old one in a weekend, which means no demolition mess and no paying for a professional installer.
The benefits are pretty compelling:
- 100% Waterproof: Ideal for a room with a sink and a dishwasher.
- Highly Durable: Fights off scratches, dents, and stains from daily life.
- Comfortable: It’s much softer and warmer to stand on than traditional ceramic tile.
Creative and Affordable Backsplash Ideas
The backsplash is the perfect place to inject some personality without spending a fortune. Instead of springing for expensive custom tile, think about these clever and stylish workarounds.
Peel-and-Stick Tiles
Much like laminate, peel-and-stick tiles have had a major glow-up. You can find them in sophisticated subway, mosaic, and even marble-look patterns that look surprisingly authentic. The best part? Installation is as easy as it sounds: just peel off the back and stick it to a clean wall. It’s a project anyone can tackle.
A Simple Coat of Paint
Never underestimate the power of a fresh coat of paint! A durable semi-gloss or satin finish is easy to wipe down and creates a clean, minimalist backdrop. This lets your countertops and cabinets be the star of the show. Feeling creative? Use stencils to paint a pattern that mimics expensive cement tile for the cost of a can of paint and an afternoon.
By focusing on these materials, you put your money where it has the most impact. You get that expensive look you’re dreaming of while keeping the project’s costs firmly on the ground. It’s truly the smartest way to pull off a cheap kitchen renovation that feels anything but.
Mastering DIY Upgrades to Slash Labor Costs
Let’s talk about the biggest line item on most renovation quotes: labor. It can easily eat up 20-35% of your total budget. But here’s the secret weapon for anyone trying to figure out how to renovate a kitchen on the cheap: your own two hands. By rolling up your sleeves and tackling a few key projects yourself, you can knock those labor costs way down and put that money toward better materials or appliances.
This isn’t about becoming a master carpenter overnight. The trick is to strategically choose projects that give you the most bang for your buck—high-impact results that don’t require years of experience. You’ll not only save a ton of cash but also get that incredible satisfaction of knowing you did that.
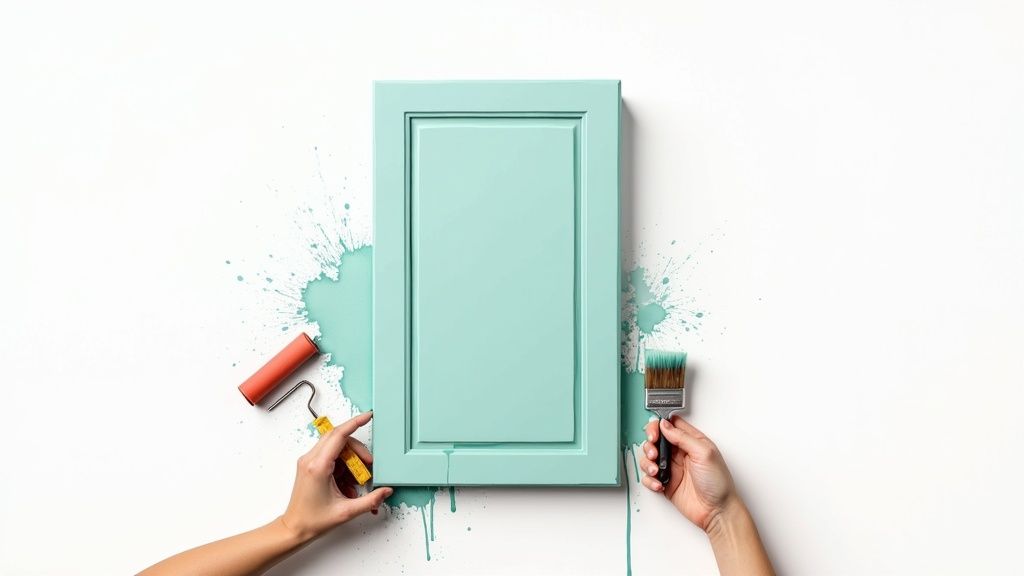
The Game-Changing Cabinet Paint Job
If your cabinet boxes are structurally sound but just look dated, painting them is hands-down the most transformative DIY project you can take on. A professional paint job can run you thousands, but you can get a stunning, factory-smooth finish for just the cost of good paint and some supplies.
I’ve seen it time and time again: the number one mistake people make is rushing the prep work. The secret to a finish that lasts is that 90% of the work happens before you even open the paint can.
- Remove and Label Everything: Take off all the doors and drawers. Use painter’s tape to label each piece and its corresponding spot in the kitchen (e.g., “Upper Left,” “Sink Drawer 2”). Trust me, you’ll thank yourself during reassembly.
- Get Serious About Cleaning: Your kitchen cabinets are covered in years of nearly invisible grease and grime. You have to get it all off with a good degreasing cleaner, otherwise, the paint has nothing to stick to.
- Sand, Sand, Sand: Lightly scuff every single surface with fine-grit sandpaper. You’re not trying to strip off the old finish, just roughing it up a bit to give the primer something to grab onto.
- Prime Like You Mean It: This is non-negotiable. Use a high-adhesion primer made for slick surfaces. This is the magic layer that prevents chips and peeling down the road.
Only after you’ve done all that should you pick up a brush. Apply two thin coats of a quality cabinet enamel, letting each one dry completely. The results will blow you away.
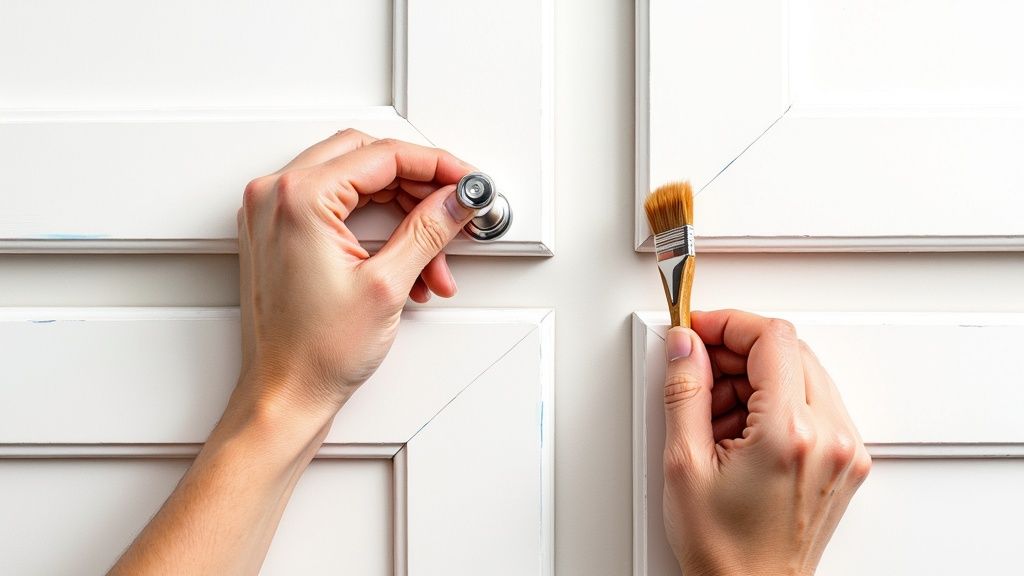
Quick Wins: Hardware and Faucet Swaps
Sometimes the smallest changes pack the biggest punch. Upgrading your cabinet hardware and kitchen faucet are two projects you can knock out in an afternoon that will instantly make the whole space feel more modern and intentional.
- Cabinet Pulls and Knobs: It doesn’t get much easier than this. Just unscrew the old hardware and screw in the new. If you’re switching from knobs to pulls, you might need to drill a second hole—grab a cabinet hardware jig to make sure every handle is perfectly aligned.
- Installing a New Faucet: This sounds more intimidating than it is. Most new faucets come with everything you need, and modern plumbing connections are often designed to be hand-tightened. The golden rule? Turn off the water supply lines under the sink before you start!
Swapping out dated hardware is more than a minor tweak; it’s a design signal. It tells the eye that the space has been thoughtfully updated. It’s one of the fastest and cheapest ways to elevate the entire look of your kitchen.
The Magic of a Peel-and-Stick Backsplash
A backsplash is a huge focal point, but traditional tiling is a messy, time-consuming job that’s expensive to hire out. This is where modern peel-and-stick tiles come in—they are an absolute game-changer for budget renovations.
Forget the flimsy vinyl decals you’re picturing. Today’s options are high-quality, 3D tiles that look and feel remarkably like real ceramic, stone, or glass. They’re designed to resist heat and humidity, so they’re perfectly safe behind a stove or sink.
Installation is a breeze: clean the wall, measure your space, cut the tile sheets with a utility knife, then just peel and stick. You can get the look of a custom-tiled backsplash in a single afternoon. It’s a fantastic first project for a beginner looking for a major visual upgrade. For more inspiration, you can explore other DIY room makeover ideas that follow the same high-impact, low-cost principles.
Knowing When to Call a Professional
While DIY is your best friend on a budget, you have to be honest about your limits. Some jobs are best left to licensed pros because the risks of getting them wrong are just too high.
Always call an expert for:
- Major Electrical Work: Moving outlets, adding new circuits, or anything involving the breaker panel.
- Gas Lines: Never, ever touch a gas line for a stove or cooktop.
- Significant Plumbing: Rerouting pipes inside the walls is not a DIY job.
- Structural Changes: Taking down walls or altering anything that might be load-bearing.
Trying to tackle these yourself can create dangerous situations, lead to code violations, and end up costing you far more to fix than it would have to hire a pro in the first place. Put your sweat equity into the cosmetic upgrades and leave the critical systems to the experts.
Finding Deals on Appliances and Fixtures
New appliances and fixtures can feel like the final boss of a budget renovation, poised to eat up whatever cash you have left. But getting a great kitchen on the cheap is all about mastering the art of the deal. With a bit of strategy and patience, you can land those big-ticket items without the sticker shock.
This isn’t about settling for second-best. It’s about being a savvy shopper and knowing exactly when and where to look. Timing, as they say, is everything.
Shop Smart, Not Hard
You’d be surprised how predictable appliance retailers can be. New models almost always roll out in the fall, which means stores are desperate to clear out last year’s inventory to make room. September and October are prime time for finding huge markdowns on perfectly good, brand-new appliances.
And of course, there are the holiday sales. These are your best friends for scoring a deal:
- Black Friday: It’s the most obvious for a reason. You’ll often find killer deals on entire appliance bundles.
- Memorial Day: This weekend often kicks off the summer sales season and is a fantastic time to shop.
- Labor Day: As summer winds down, retailers push to clear out stock with deep discounts.
- President’s Day: Always a reliable weekend for finding markdowns on major appliances.
Put these dates on your calendar. Seriously. A little planning here can save you hundreds, if not thousands, of dollars, especially if you’re outfitting the whole kitchen.
The Hidden Gems of Appliance Shopping
Beyond the big, advertised sales, there are other ways to score incredible deals. One of my favorite, and most overlooked, options is the scratch-and-dent section. These are brand-new appliances with tiny cosmetic flaws—a small ding on the side of a fridge that will be hidden by cabinets anyway, or a scuff on a dishwasher door.
These little imperfections have zero impact on how the appliance works but can knock 25-50% off the retail price. It’s one of the best-kept secrets for getting high-end gear on a shoestring budget.
Along the same lines, always ask about floor models. When a store discontinues a particular model, they sell the one from the showroom floor at a steep discount. Sure, it’s been handled, but it’s rarely been used, offering another path to serious savings.
Prioritize Your Spending Wisely
Not all appliances are created equal, especially when it comes to their impact on your daily life. A huge part of a smart renovation is knowing where to invest your money and where you can get by with something more basic. Splurge on the items you use the most and that matter for your day-to-day.
When you’re mapping out your new kitchen, it helps to consult an essential kitchen appliance buying guide to make sure your choices fit both your cooking style and your budget.
Here’s a practical way I like to think about allocating funds:
| High Priority (Invest Here) | Lower Priority (Save Here) |
|---|---|
| Range/Cooktop | Microwave |
| Refrigerator | Dishwasher |
| Main Kitchen Faucet | Garbage Disposal |
Think about it: a quality stove can genuinely make cooking more enjoyable and efficient, making it a worthy investment. A basic, reliable microwave, on the other hand, will heat your coffee just as well as a fancy model with a dozen features you’ll never touch.
Refresh Fixtures with a Little DIY Magic
What about your existing fixtures? Before you toss that dated brass chandelier or those old cabinet pulls, think about giving them a quick, modern makeover. A simple can of spray paint designed for metal can work wonders.
With a few light coats of matte black, brushed nickel, or a warm brass spray paint, you can completely transform the look of old light fixtures and hardware. Just make sure you clean and lightly sand the surfaces first so the paint sticks properly. This little project costs less than $20 but can make your fixtures look brand new, saving you hundreds over buying replacements.
Your Top Questions About Budget Kitchen Renovations, Answered
Starting a kitchen remodel on a tight budget can feel like walking a tightrope. You’ve got a vision, but a million questions are probably swirling around. It’s totally normal. Getting those questions answered is the best way to build confidence and keep your project from derailing.
I’ve put together answers to some of the most common questions I hear from homeowners trying to get the most bang for their buck. Think of this as your go-to guide for those “what if” moments.
What’s the Cheapest Way to Get New-Looking Countertops?
When you want a fresh countertop look without the hefty price tag, you’ve got a few solid options. The absolute cheapest method is to work with what you already have.
Believe it or not, you can refinish old laminate or even tile countertops with a specialty paint kit. These kits have improved dramatically over the years and can create a convincing stone or granite look for less than $100. It’s a game-changer for a super-tight budget.
If you’re looking for a replacement, laminate is your best friend. Forget the retro styles you might be picturing; today’s laminate comes in a huge range of sophisticated designs that do an incredible job of mimicking stone, wood, or quartz. It’s still the king of budget-friendly countertop materials.
How Do I Make My Old Kitchen Cabinets Look Modern?
Breathing new life into dated kitchen cabinets is probably the single most impactful thing you can do in a budget-friendly kitchen refresh. And the best part? You don’t need to rip them out and start over.
Here’s my tried-and-true two-part strategy:
-
Give Them a Pro-Level Paint Job: A fresh coat of paint works wonders. The key is in the prep work. You have to thoroughly clean and sand the cabinets so the primer and paint stick properly. Go for a modern color—a clean white, a moody charcoal gray, or a rich navy blue. Using a high-quality cabinet enamel will give you that smooth, durable finish that looks like it came from a factory.
-
Swap Out the Hardware: Don’t ever underestimate the power of new hardware. Changing out tired, old knobs for something more current is a quick and cheap win. Think sleek matte black bar pulls or minimalist brushed brass knobs. It’s the finishing touch that pulls the whole look together.
Combine a great paint job with modern hardware, and you can make 30-year-old cabinets look brand new. This is the cornerstone of a smart, cheap kitchen renovation and will save you thousands compared to buying new.
What Renovation Jobs Should I Absolutely Not DIY?
I’m a huge fan of DIY for saving money, but a crucial part of any project is knowing when to call in a professional. Some jobs are just too risky, and a mistake can cost you far more in repairs than you would have paid a pro in the first place—not to mention the safety hazards.
Don’t even think about tackling these yourself. Hire a licensed professional, period.
- Serious Electrical Work: Changing a light fixture is one thing. But moving outlets, adding new circuits, or touching anything inside your main electrical panel is a job for a licensed electrician. Bad wiring is a massive fire risk.
- Anything Involving Gas Lines: If your stove or cooktop uses gas, do not attempt to move or disconnect the line yourself. A gas leak is incredibly dangerous. This is a non-negotiable job for a licensed plumber or gas fitter.
- Moving Plumbing in the Walls: Swapping out a faucet is a great DIY project. But if you need to move the supply lines or drain for your sink or dishwasher, that’s a job for a plumber. A small leak inside a wall can cause catastrophic water damage before you even know it’s there.
- Installing Heavy Stone Countertops: Materials like granite and quartz are brutally heavy and can easily crack if they aren’t moved and installed correctly with the right tools. Your countertop fabricator will have a specialized team for this—let them handle it.
Pour your DIY energy into the cosmetic stuff where you can make a huge impact safely: painting, installing backsplashes, and swapping hardware.
Ready to see how these budget-friendly ideas could look in your actual kitchen? With RoomGenius, you can upload a photo of your space and play with new cabinet colors, countertop styles, and backsplashes instantly. Stop wondering and start seeing what’s possible. Give it a try now and bring your affordable kitchen vision to life at https://www.room-genius.com.