How to Measure a Room for Furniture Like a Pro
To get the measure of a room for new furniture, you really just need a tape measure, something to write on, and a clear head. Start by getting the room’s basic length and width, check the ceiling height, and then jot down the sizes of every door, window, and built-in feature. This simple groundwork is your best defense against delivery day nightmares and ensures your new furniture settles in perfectly.
Why Getting Your Room Measurements Right is a Game-Changer
Before you commit to that gorgeous oversized sectional or that stunning vintage armoire, pausing to measure is hands-down the most critical step in the entire process. Think of it as your insurance policy against delivery disasters, cramped layouts, and the sheer agony of realizing a piece just won’t fit. Trust me, skipping this part is a rookie mistake you don’t want to make.
We’ve all heard the horror stories—the sofa wedged in the stairwell, the dining table that leaves no room to actually pull out a chair. These aren’t just little oops moments; they’re expensive, stressful mistakes that are completely avoidable.

It’s More Than Just Squeezing It In
Accurate measurements go way beyond just getting a piece through the door. It’s about crafting a space that feels right—functional, comfortable, and visually balanced. This is the real secret behind great interior design; it’s built on data, not just hoping for the best. It’s a bit like packing a storage unit—getting it wrong means wasted space and a lot of frustration, a point driven home in this detailed UK self-storage unit size guide.
With the right numbers in hand, you can:
- Map out clear pathways: No more awkward shuffling. You’ll ensure there’s ample room to walk around furniture comfortably.
- Strike the right balance: Avoid making a room feel either claustrophobic or cavernously empty.
- Shop with total confidence: You can browse online or in-store knowing exactly what will and won’t work in your space.
- Dodge extra costs and headaches: Sidestep the pain of returns, restocking fees, and the hassle of starting over.
Believe it or not, industry insiders estimate that 20-30% of all furniture returns are because the piece simply didn’t fit. That’s a huge, entirely preventable problem.
The Blueprint for a Beautiful Room
Try to see measuring not as a chore, but as the first creative step in bringing your vision to life. Those numbers you’re scribbling down? They’re the blueprint for every decision you’ll make next, from the sofa you choose to where the lamp will go.
This initial effort is the very essence of strategic space planning (you can dive deeper into that here: https://www.room-genius.com/blog/what-is-space-planning/), which is what turns four walls into a welcoming, functional home. Nailing the measurements from the get-go is the difference between a room that just works and one that always feels a little bit off.
Prepping Your Space for Measurement
Before you even think about unspooling a tape measure, the real work begins. Getting the prep right is the secret to getting your numbers right, which in turn saves you from a world of furniture-fitting headaches down the road. Think of it as mise en place for interior design—everything in its place so the main event goes off without a hitch.
First things first: clear the decks. You need a straight shot to every wall, corner, and weird architectural nook. That means moving the kids’ toys, relocating that precarious stack of magazines, and getting anything out of the way that could trip you up or force you to bend your tape measure at an awkward angle. That’s how mistakes happen.
Choosing Your Measurement Tools
The tools you use can make or break the accuracy and speed of this whole process. While you absolutely need a classic tape measure, a couple of other gadgets can make life a lot easier.
- Retractable Metal Tape Measure: This is your MVP. A good 25-foot tape measure is the sweet spot—long enough for most rooms but not a beast to handle. Make sure it has a solid lock and clear markings you can actually read.
- Laser Measuring Tool: These are brilliant for zapping long, straight distances in an instant, like the full length of a room or a long hallway. They’re fast and dead-on accurate for the big stuff, though they can be a bit clumsy in tight spaces like a narrow alcove.
- Yardstick or Rigid Ruler: Don’t sleep on the basics. A simple rigid ruler is perfect for getting ultra-precise measurements on small details, like the width of your window trim or the exact placement of an outlet.
”I always recommend having both a traditional tape measure and a laser tool. The tape is for the detailed work—windows, doors, and alcoves. The laser is for the big picture—getting those long wall-to-wall measurements perfect in seconds.”
This combo gives you the best of both worlds: old-school reliability for the details and modern speed for the major dimensions.
Setting Up for Success
Got your tools? Great. Now, figure out how you’re going to keep track of all these numbers. Trust me, trying to remember them is a recipe for disaster. A single forgotten digit can throw off your entire layout.
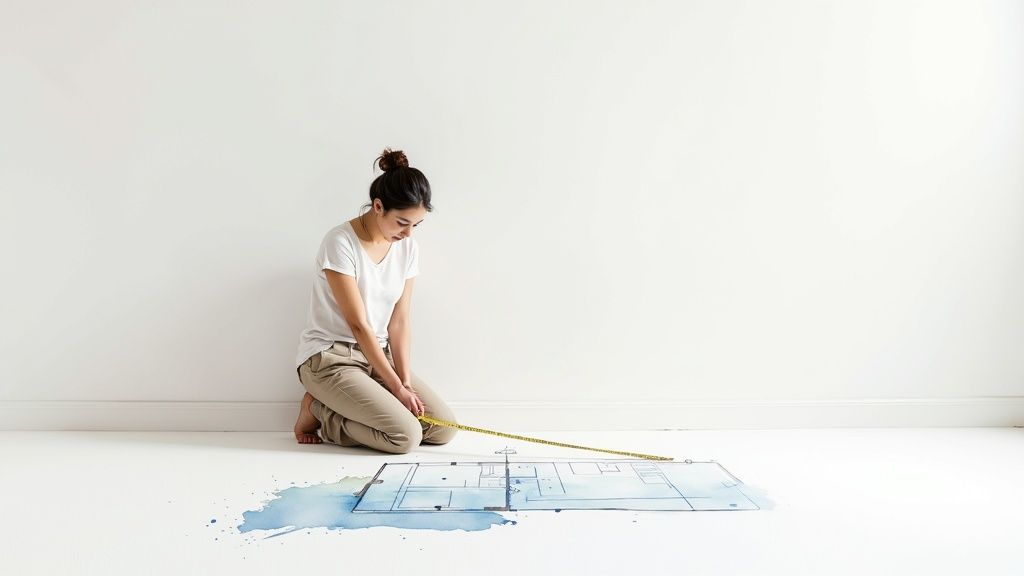
Grab a notepad and pen, or pull up a notes app on your phone. I find that starting with a quick, rough sketch of the room’s bird’s-eye view is a game-changer. It gives you a visual map to plug your measurements into as you take them.
Better yet, grab a friend. Measuring is ten times easier with a second person. One of you can hold the tape tight against the wall while the other reads and records. It completely eliminates that frustrating tape-measure sag and ensures you’re getting a true reading every time.
This idea of standardizing how we measure and fit things into a room isn’t new. Back in the 1920s, German architect Ernst Neufert was already working on systems for modular construction, which really shaped how we think about furniture and architecture working together. You can actually read more about the history of standard sizing on Atlas Obscura.
So, what do you do about the furniture that’s already in the room? If you’re swapping out an old sofa for a new one, it’s always best to measure the empty space where it will go. But if you’re just adding a new piece, measuring around existing items is fine—just be sure to sketch them into your floor plan and note their dimensions, too. A complete picture of your space is the foundation for making smart, confident decisions.
Mastering Core Measurement Techniques
With your space cleared out and your tools in hand, we’re ready to get down to the numbers that will shape your entire project. This is where precision really matters. We’re going to move past rough estimates and use the same techniques the pros rely on to guarantee a perfect fit, every single time. It all begins with the room’s main dimensions.
Your first move is to get the overall length and width. Stretch your tape measure from one wall straight across to the other, making sure it’s pulled taut. But here’s a little trick I’ve learned over the years: never measure a wall in just one spot.
This quick visual guide shows you the essential first steps for planning your room measurements.
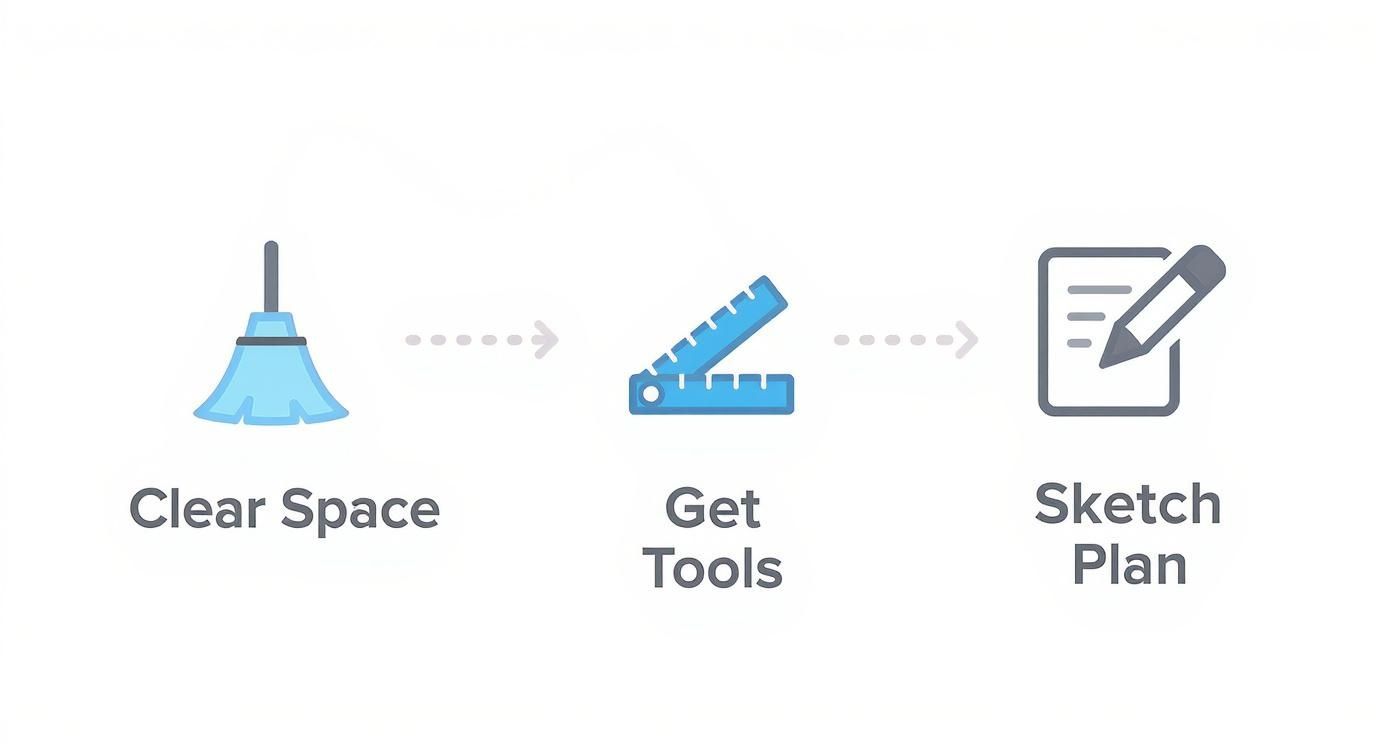
As you can see, success starts before you even pull out the tape measure. Clearing the room and gathering the right tools are the foundation for accurate results.
The Three-Point Measurement Rule
Let’s be honest, houses are rarely perfect. Walls can bow, floors might have a slight slope, and ceilings aren’t always perfectly level. To account for these real-world imperfections, I always measure each and every wall in three places:
- At the bottom: Run your tape measure right along the floor or baseboard.
- In the middle: Take another measurement around waist or chest height.
- At the top: Grab one last measurement up near the ceiling.
If you get three slightly different numbers, always use the smallest one. That’s your “safe” number. It ensures that any piece of furniture you bring in will fit, even in the tightest spot along that wall. Do the same for the room’s width, and don’t forget the ceiling height—measure that from floor to ceiling in a few different spots, too.
Mapping Out Doors, Windows, and Entryways
Once you have the room’s overall shell, it’s time to map all the “interruptions”—the doors, windows, and openings that will ultimately dictate where your furniture can go. Think of these not as obstacles, but as the fixed points your entire layout has to work around.
For every door and window, you need to know more than just its size. You need to know exactly where it sits in the room.
My process for this is simple but incredibly thorough. For any window, I measure its width and height (trim included), plus its distance from the floor (the sill height). Then, and this is crucial, I measure the distance from each side of the window frame to the nearest corner.
This last step is the one most people skip, but it’s a game-changer. Knowing a window is 36 inches from the corner tells you precisely how much wall space is left for that bookshelf or armchair you’ve been eyeing. Repeat this exact process for every single door, archway, and entryway.
Documenting Fixed Features and Obstructions
The final layer of your measurement plan involves all those small but significant features that are permanently stuck in place. These are the non-negotiables that can completely throw off a layout if you forget about them.
Walk around the room and make a detailed list, sketching their locations onto your floor plan as you go. Be sure to include:
- Radiators or Vents: Get their height, width, and how far they stick out from the wall. You have to leave room for air to circulate.
- Light Switches and Outlets: Note their location from the nearest corner and from the floor. The last thing you want is a new cabinet blocking the most convenient outlet in the room.
- Built-in Shelving or Fireplaces: Measure the full dimensions, including the hearth of a fireplace which often extends farther than the mantel.
- Thermostats and Intercoms: These little things are so easy to overlook but can get in the way of hanging art or placing a tall hutch.
Taking these detailed measurements gives you a true architectural blueprint of your space. It might feel like a lot of numbers to jot down, but this data is what allows you to make smart, confident decisions. It’s the difference between guessing and knowing. This level of detail is just as important when you’re trying to figure out how to choose the right rug size, since these fixed elements can determine where a rug can even be placed. With every measurement, you’re one step closer to a perfectly planned room.
Bringing Your Floor Plan to Life
With a notebook full of precise numbers, you’re ready for the most satisfying part: turning that raw data into a visual, functional plan. Your measurements are the language of your room, and a floor plan is how you translate it into a blueprint for a beautiful, livable space. This is where you really start to see how furniture will work long before you move a single heavy object.
Whether you’re a fan of old-school graph paper or prefer a digital tool, the goal is the same—create a simple, to-scale drawing of your room. The most common scale is 1/4 inch = 1 foot. This is an easy-to-manage ratio where every quarter-inch on your paper represents one foot in the actual room.
From Numbers to a Functional Blueprint
Start by drawing the basic shape of the room using your main wall measurements. Once you have the outline, begin adding in the fixed elements you so carefully measured earlier. Mark the exact locations and sizes of windows, doors, radiators, and electrical outlets on your plan.
This visual map is so much more than a sketch; it’s a problem-solving tool. It immediately helps you spot potential issues, like a doorway swing that might collide with a bookshelf or an outlet that would be completely hidden behind a new media console. If you want a deeper dive into this, our guide on how to create effective floor plans walks you through the entire process.
Understanding Clearance and Traffic Flow
A well-designed room isn’t just about cramming furniture in; it’s about creating a space that breathes and flows. This is where clearance—the empty space around and between your furniture—becomes one of your most important design principles. Proper clearance is what lets you move freely and use the room without feeling hemmed in.
This isn’t a new idea. Back in the 1960s, the Parker Morris Committee in the UK helped shift the focus from just room size to the actual space needed for people to use the furniture within it. That functional approach laid the groundwork for modern interior design standards and is as relevant today as it was then.
Think of traffic paths as invisible hallways running through your room. The main walkway, like the one from the door to the sofa, should be at least 30 to 36 inches wide to avoid that awkward sideways shuffle. Lesser-used paths can be a bit tighter, but never less than 18 to 24 inches.
To make it easier to visualize these critical distances, here’s a quick reference table.
Minimum Clearance Guidelines for Common Furniture
This table shows the recommended minimum distances to ensure proper traffic flow and usability in your room. Sticking to these will make your space feel comfortable and function smoothly.
| Area/Furniture Item | Recommended Minimum Clearance (Inches) | Reason |
|---|---|---|
| Main Traffic Paths | 30-36” | Allows for comfortable, unrestricted movement through the primary areas of a room. |
| Sofa to Coffee Table | 16-18” | Close enough to reach items, yet far enough for comfortable legroom and passage. |
| Chairs Side-by-Side | 24-30” | Provides personal space and prevents the seating area from feeling crowded. |
| Furniture to Wall | 3-5” | Creates a sense of airiness and prevents a “pushed-against-the-wall” look. |
| Dining Chair Pull-Out | 24” | The minimum space needed behind a chair to pull it out and sit down comfortably. |
| Desk Chair Space | 30-36” | Allows you to push your chair back and stand up from your desk without issues. |
| Around a Bed | 24-30” | Ensures you have enough space to make the bed and walk around it easily. |
Getting these clearances right is the secret to a room that not only looks good on paper but feels incredible to live in.
Applying Design Rules to Real Scenarios
Let’s translate these rules into practical layouts. The relationship between your sofa and coffee table is a classic example. You want them close enough to be useful but far enough apart for easy movement.
- Sofa to Coffee Table: Aim for 16 to 18 inches of space. This is the sweet spot for reaching your drink without getting up, while still leaving enough room to walk by.
- Seating Arrangement: To encourage conversation, seating should be no more than 10 feet apart. Any farther, and people will feel like they have to shout across a void.
- Rug Placement: Your area rug should be large enough for at least the front legs of your sofa and any chairs to rest on it. This simple trick anchors the entire seating area and makes the room feel cohesive.
Here’s a pro tip: even in a small room, try pulling your sofa out from the wall by just 3 to 5 inches. It’s a tiny adjustment, but it instantly creates a sense of depth and makes the entire room feel larger and more thoughtfully arranged.
Once you have your floor plan ready, you might also consider professional furniture fitting services to ensure your new pieces fit perfectly and are installed without a hitch. These experts can be invaluable, especially with large or complex items.
By combining your accurate measurements with these essential design guidelines, your simple sketch transforms. It becomes a strategic plan for a room that doesn’t just look good but feels right, functions effortlessly, and truly works for your lifestyle.
Visualizing Furniture in Your Space
A hand-drawn floor plan is an incredible starting point, but let’s be honest—seeing your furniture choices in 3D is a complete game-changer. This is the moment you move from a page of abstract numbers and lines to a real vision of your future room. Using a visualization tool bridges that critical gap between planning and reality, letting you “test drive” layouts without any risk.
These tools are where the magic happens. You can plug in your room dimensions, place fixed elements like windows and doors, and then start dropping in virtual furniture. The real power here is seeing your ideas in context. You’ll finally know if that bulky sectional truly overwhelms the space or if it fits just right. It’s your chance to play with rug sizes, check if a new armchair blocks the path to the door, or confirm a console table is the right height—all before spending a dime.
From Blueprint to Realistic Model
First things first, you need to bring your careful measurements into the digital world. Start by building the room’s perimeter, entering the length and width of each wall you measured. From there, it’s time to add all the fixed features you meticulously documented:
- Doors and Windows: Input their dimensions and exact placement on the walls. A small but crucial detail: don’t forget to account for which way the doors swing.
- Architectural Details: Add the fireplace, built-in shelves, or any quirky alcoves to your digital model. These features define the room’s character and its limitations.
- Outlets and Switches: Marking these seems minor, but it’s what stops you from accidentally placing a tall bookcase right in front of a light switch you use every day.
Once the room’s basic structure is built, the fun begins. You can start adding furniture pieces that match the dimensions of items you’re considering. Most modern tools, like RoomGenius, have extensive libraries of common furniture types, and you can easily adjust their sizes to match the specific pieces you have your eye on.
Don’t get hung up on creating a photorealistic render on your first try. The goal here is to build a functional model that respects scale and proportion. Think of it as a digital sandbox where you can catch mistakes, refine your ideas, and build real confidence in your design choices.
This is a perfect example of how a tool like RoomGenius can take your measurements and create an interactive 3D model.
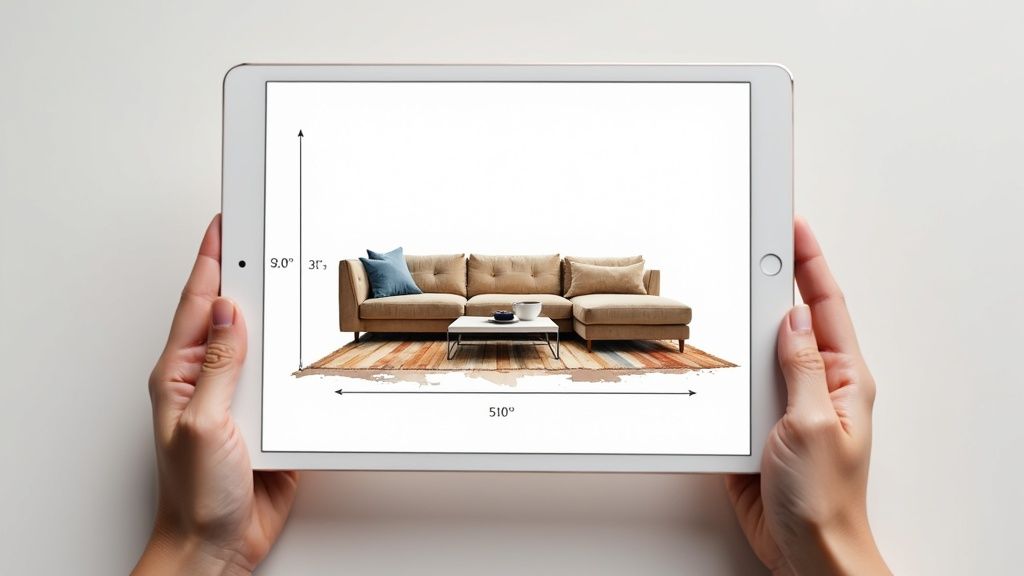
You can see how the software shows not just the sofa itself, but also the clearance around it, making it instantly obvious whether the layout actually works in practice.
Test Driving Your Layout for Livability
A layout might look great from a bird’s-eye view, but the real test is how it feels to live in day-to-day. This is your chance to use the 3D model to simulate daily life and make choices you won’t regret later.
As you play with the layout, ask yourself some practical questions:
- Is there a clear path? Can you walk from the doorway to the sofa and then to the window without performing a clumsy obstacle course? Always aim to keep at least a 30-inch walkway for major traffic routes.
- How does the scale feel? Does that tiny coffee table look lost next to your oversized sofa? As a rule of thumb, your coffee table should be at least half the length of your sofa to feel properly balanced.
- Can you use everything properly? Make sure you can fully open closet doors, pull out dining chairs, and recline your favorite armchair without bumping into a wall or another piece of furniture.
- Does the conversation area work? In a living room, arrange seating so people are no more than 10 feet apart. Any further, and you lose that comfortable, intimate feel for conversation.
Think of this visualization stage as your final sanity check before you start shopping. It confirms that your measurements are solid and that your furniture ideas will create a space that is not only beautiful but, more importantly, perfectly functional for your lifestyle. By taking the time to build and interact with a digital model, you transform what can be a stressful process into an exciting and informed creative project.
Common Measurement Questions Answered
Even with the best preparation, measuring a room for furniture can throw a few curveballs your way. I’ve heard just about every question in the book, so I’ve gathered the most frequent ones here to help you sidestep the common pitfalls that can derail a perfectly good plan.
Think of this as your go-to guide for those “what if” moments. From tricky room shapes to the age-old debate about in-store measurements, these tips come directly from real-world experience.
How Do I Measure an Oddly Shaped Room?
The secret to measuring an irregular room, like one with an alcove or a bay window, is to stop seeing it as one big, complicated shape. Instead, break it down into a series of smaller, simpler geometric forms like squares and rectangles.
For an L-shaped room, for instance, just treat it as two distinct rectangles and measure each one separately. If you have an alcove, measure its width, depth, and height as its own standalone space. I always start by sketching the room’s unique footprint on my notepad and labeling each section (“Main Area,” “Bay Window,” etc.). This method keeps your numbers organized and ensures you don’t miss a single crucial dimension.
The biggest mistake people make is not measuring the path into the room. A beautiful sofa is useless if you can’t get it through the front door or pivot it around a tight corner in the hallway.
Always measure the width and height of every doorway, staircase, and tight turn along the delivery route. This path is just as important as the final destination.
Should I Trust the Dimensions Online?
It’s a great question, and the short answer is: mostly. While online dimensions are a fantastic starting point, you should absolutely measure the furniture yourself in the store if you can. Think of the listed specs as a guide, not gospel.
They often don’t account for things like plush, overstuffed cushions that add extra bulk or non-removable legs that can snag on a doorway. When you’re in the store, pay special attention to the piece’s diagonal depth—that’s the measurement from the top back corner to the bottom front corner. This is often the narrowest dimension and the key to knowing if a bulky item will successfully pivot through a tight spot.
How Much Breathing Room Is Enough?
Leaving adequate “breathing room” around furniture is what makes a space feel functional and uncluttered, not just full. The amount of space you need really depends on what you’re doing in that area.
Here are the key guidelines I always follow:
- Main Walkways: For any primary path you’ll walk through daily, you need at least 30 to 36 inches of clear space. This ensures you can move comfortably without having to shuffle sideways.
- Coffee Table Placement: The sweet spot between a sofa and a coffee table is 16 to 18 inches. It’s close enough to be useful but still provides ample legroom.
- Dining Table Clearance: You need a minimum of 36 inches from the edge of your dining table to the nearest wall or piece of furniture. This lets guests pull out their chairs and allows others to walk behind them when they’re seated.
Even something as simple as pulling a sofa 3 to 5 inches away from the wall can make the entire room feel significantly larger and more thoughtfully designed. It’s a small adjustment with a big impact. These clearance rules are the foundation of a room that not only looks good but is a genuine pleasure to live in.
Ready to turn your precise measurements into a stunning, realistic 3D model of your room? With RoomGenius, you can upload your dimensions, experiment with countless furniture layouts, and see exactly how your space will look and feel before you buy a single item. Stop guessing and start designing with confidence. Visualize your new room today at RoomGenius.