How to Design My Room A Practical Guide

It all starts with a simple plan. Before you even think about furniture or paint colors, you need to get clear on your vision for the space. Taking the time to measure your room, set a realistic budget, and define the room’s purpose will save you from expensive headaches down the road.
Defining Your Vision Before You Start

Jumping straight into shopping is tempting, I know. But the most crucial work happens before you spend a single dollar. This is where you lay the foundation, turning a random collection of stuff into a room that genuinely feels like you.
It’s no surprise that people are more invested than ever in their home environments. The global interior design market is projected to hit around $148.5 billion in 2025, which just shows how much we all crave spaces that are not only beautiful but also work for our real lives.
What Is the Room’s Core Purpose?
First things first, ask yourself the most important question: What is this room for? The answer will guide every single decision you make from here on out. A bedroom that’s a pure sanctuary for sleep is going to have a completely different design than one that also has to pull double duty as a home office.
Think about the possibilities:
- A Living Room: Is this a formal spot for entertaining, or is it where the family piles on the couch for movie night? Maybe it’s just a quiet corner for reading.
- A Bedroom: Is it strictly for rest and relaxation, or do you need a small, dedicated zone for work, a yoga mat, or a vanity?
- A Spare Room: Will this be a welcoming guest room, a creative studio, a home gym, or a clever mix of all three?
If you’re trying to make one room do it all, especially in a smaller home, you can find some great inspiration from these studio apartment layout ideas to maximize space. Pinpointing the room’s function right from the start makes choosing furniture and planning the layout so much easier.
Gather Inspiration with a Mood Board
Once you know what the room needs to do, it’s time for the fun part: collecting ideas. A mood board is essentially your visual blueprint for the project. I always recommend using a tool like Pinterest to create a board and just start saving images that you’re drawn to—entire rooms, color palettes, interesting textures, a cool lamp, you name it.
Don’t censor yourself during this phase. Just pin what you love! The idea is to cast a wide net and gather a bunch of visuals. The magic happens when you step back and see what you’ve collected.
After you have around 30-50 images, take a look at your board as a whole. You’ll start to notice patterns. Maybe you pinned a dozen rooms with light, airy wood tones, or you keep saving spaces with deep, moody colors and plush velvet fabrics. This is how you discover your personal style organically, instead of trying to fit into a pre-defined box like “bohemian” or “mid-century modern.” From this point on, your mood board is your North Star.
Figuring Out Your Personal Design Style
https://www.youtube.com/embed/MaB34LzIEwE
Are you feeling a little lost in a sea of design jargon like “minimalist,” “bohemian,” or “industrial”? Don’t sweat it. The goal isn’t to cram your taste into a pre-defined box but to truly understand what you love and why. This is all about creating a space that feels like you.
The best place to start is by looking for clues in the spaces you already find yourself drawn to. That mood board you started putting together? Think of it as your personal treasure map.
Start looking for patterns. Are you consistently pinning rooms with clean lines and a calm, neutral color scheme? Or do your saved images burst with vibrant patterns and eclectic, one-of-a-kind furniture? These recurring themes are the first breadcrumbs leading to your unique style.
Pinpointing Your Aesthetic
Once you’ve got a good collection of inspirational images, it’s time to play detective. Move beyond the overall “vibe” of a room and start looking at the individual pieces that make it up. This is where you really get to the bottom of why you like what you like.
Break it down and ask yourself about these specific components:
- Furniture Shapes: Do the pieces you save have soft, curvy silhouettes, or are they all sharp, geometric lines? Do you prefer a big, cozy sofa that’s low to the ground or something more delicate with slim, raised legs?
- Color Palettes: Is your board a wash of calming neutrals like beige, white, and gray? Or is it a riot of bold jewel tones and deep, moody shades? Pay attention to how the colors are combined, too.
- Textures and Materials: What materials keep showing up? Is it a lot of natural wood, chunky knits, and worn leather? Or do you see more sleek metal, polished marble, and smooth velvet?
This kind of analysis is so much more useful than just trying to slap a label on your taste. It gives you a practical list of ingredients to work with.
Your personal style isn’t about fitting into one category. It’s about knowing the individual ingredients you love and learning how to mix them into a recipe that is uniquely yours.
How to Blend Different Styles
Here’s a little secret: almost no one fits neatly into a single design category. Maybe you love the raw, unfinished look of industrial design but also crave the cozy comfort of a rustic farmhouse. That’s fantastic! The most compelling and personal spaces are almost always a thoughtful blend of different influences.
The trick to mixing styles without it looking like a mess is to find a common thread that ties everything together. This could be a consistent color palette, a material that you repeat throughout the space, or even a similar scale among your furniture pieces.
For example, you could absolutely pair a chunky, rustic wooden dining table with sleek, modern metal chairs. They work together because they both share a simple, functional form.
Or, you might want to create a serene, spa-like atmosphere in your bathroom. This is a perfect opportunity to combine minimalist fixtures with natural stone and rich wood textures. If you’re looking for inspiration on how to pull this off, these spa bathroom ideas to create a serene retreat are packed with great visual examples of this kind of style-blending.
At the end of the day, your home should tell your story, not just follow a trend. When you can identify the specific elements you’re drawn to and learn how to artfully combine them, you’re on your way to creating a look that feels both timeless and deeply personal.
Visualize Your Ideas with AI Design Tools
Okay, you’ve gathered your inspiration and defined your style. Now for the fun part: seeing it all come to life. This is the moment your abstract ideas on a mood board start to look like a real, tangible room. Forget trying to guess how that bold paint color will actually look with your lighting—modern AI tools let you see it before you even touch a paintbrush.
The use of this technology has exploded. In fact, the global interior design software market hit a valuation of $5,373.8 million in 2024, and it’s projected to nearly double soon. That surge tells you one thing: people are tired of guesswork and are using these tools to make smarter, more confident design decisions. You can read more about the growing interior design market on renub.com.
From Photo to Realistic Render
Getting started is surprisingly simple. Most of the best AI interior design platforms work off a single photo of your current room. You just snap a picture, upload it, and the software gets to work analyzing the dimensions, lighting, and even the furniture you already have.
From there, you can generate a whole slew of design concepts in a matter of minutes. No more agonizing for hours over whether a navy blue accent wall is a good idea. You can see it—and a dozen other variations—instantly. This freedom to experiment without commitment is a game-changer, especially for trying out bold ideas you might have been too nervous to consider. If you’re ready to jump in, our guide to the best AI interior design software is a great place to start.
The image below breaks down a classic design principle for creating a balanced color palette. This is exactly the kind of thinking that will help you guide an AI to create a cohesive look.
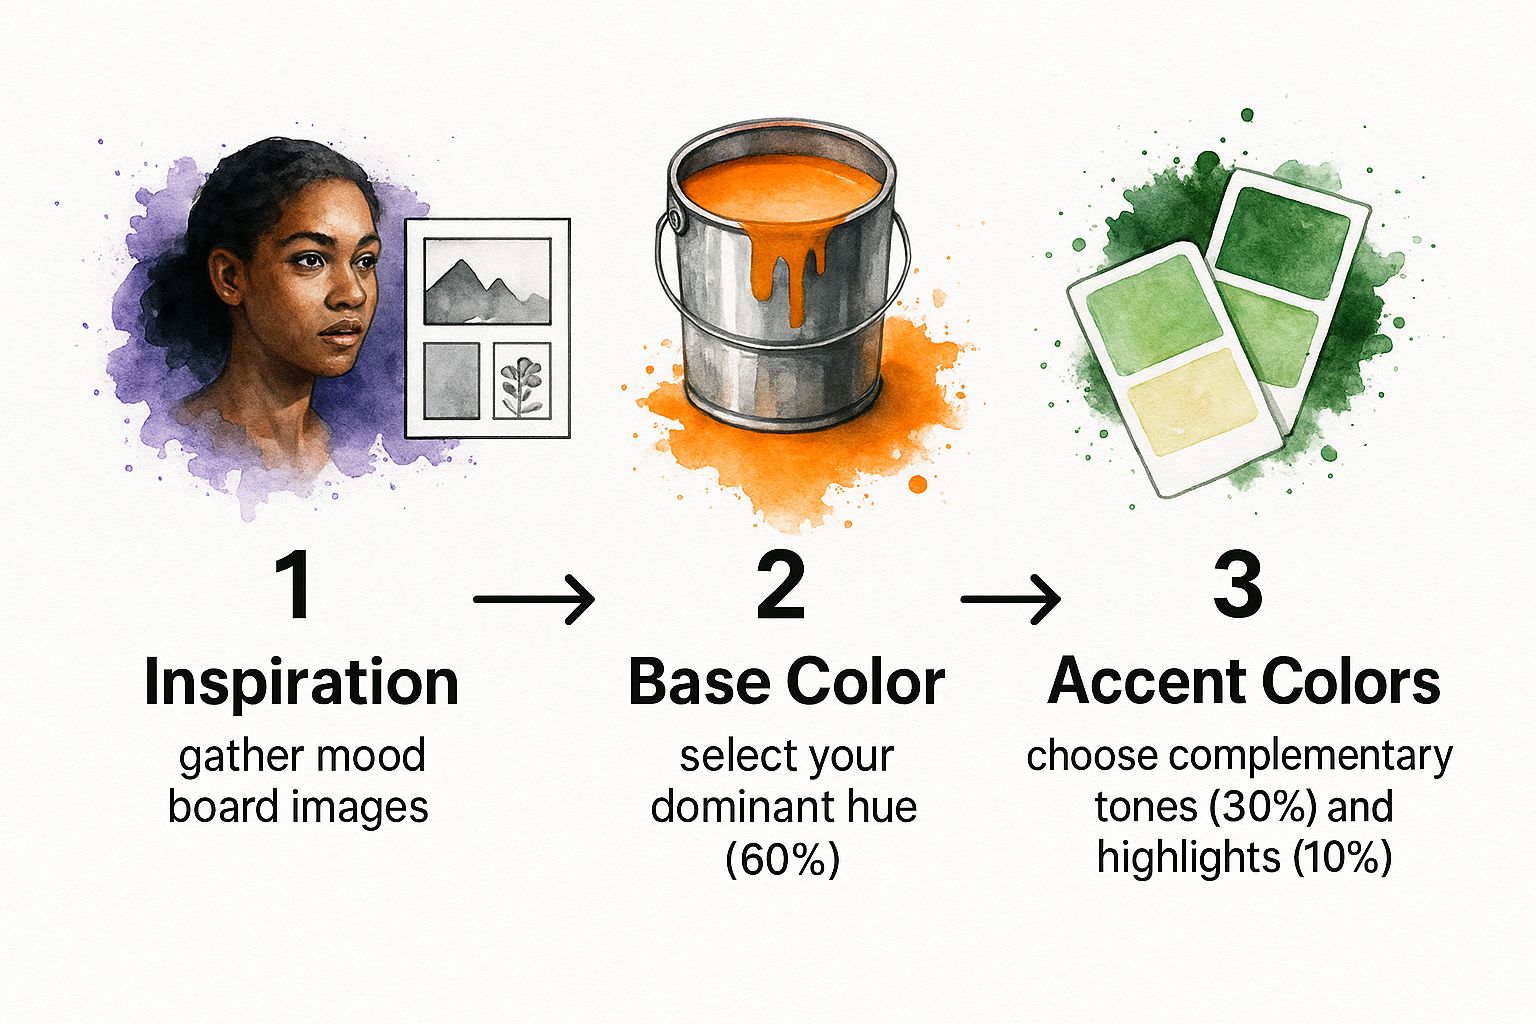
What you’re seeing is the 60-30-10 rule in action. It’s a time-tested technique for creating visual harmony, and it’s a brilliant framework to use when crafting your instructions for an AI.
Choosing Your AI Room Design Tool
With so many options out there, picking the right AI tool can feel overwhelming. Some are built for quick, fun visualizations, while others offer more professional-grade features. This table should help you narrow down the choices based on what you really need for your project.
| Tool Feature | What It’s Best For | Typical Cost | Ease of Use |
|---|---|---|---|
| Simple Photo Upload & Restyling | Quick visualizations and exploring different styles for an existing room. | Free to low-cost subscriptions. | Very Beginner-Friendly |
| 3D Modeling & Floor Plans | Planning new layouts, structural changes, or designing a room from scratch. | Mid-to-high-tier subscriptions. | Intermediate |
| AI Furniture & Decor Shopping | Finding and placing real-world products into your design to buy later. | Often free, with in-app purchases or affiliate models. | Beginner-Friendly |
| Advanced Rendering & Lighting | Creating photorealistic images for a professional-level finish. | Premium subscriptions or per-render fees. | Advanced |
Ultimately, the best tool is the one that aligns with your project’s complexity and your comfort level with technology. Don’t be afraid to try out the free versions first to get a feel for the interface before committing to a subscription.
Writing Prompts That Deliver Stunning Results
Here’s a crucial piece of advice: the quality of your AI-generated designs is directly tied to the quality of your instructions, or prompts. If you’re vague, you’ll get generic, uninspired results. But if you’re specific, you’ll get stunning visuals that feel like they were pulled straight from your imagination.
Think of it like you’re commissioning a piece of art. You wouldn’t just tell an artist to “paint a nice landscape.” You’d describe the time of day, the type of trees, the feeling you want to evoke. The same goes for AI.
Here are a few examples of what a powerful prompt looks like:
- For a Bedroom: “A serene, minimalist bedroom with a light oak platform bed, sheer white curtains, and a single piece of abstract art above the bed. The color palette should be neutral with beige, cream, and soft gray tones.”
- For a Living Room: “A cozy modern farmhouse living room centered around a stone fireplace. Feature an olive green accent wall, a comfortable cream-colored sectional sofa, and add touches of black metal in the light fixtures and coffee table legs.”
- For an Office: “A bright and airy home office with built-in white bookshelves. Place a large wooden desk facing the window and put a dark teal accent chair in the corner to create a reading nook.”
The magic is in the details. Mentioning specific materials (like ‘light oak’), textures (‘chunky knit throw’), and even the placement of items (‘facing the window’) helps the AI produce a much more accurate and inspiring render.
This approach gives you the power to visualize countless possibilities, ensuring the final result is something you’ll truly love. It turns the daunting question of “how to design my room” into an exciting, creative adventure.
Choosing Colors and Materials Like a Pro
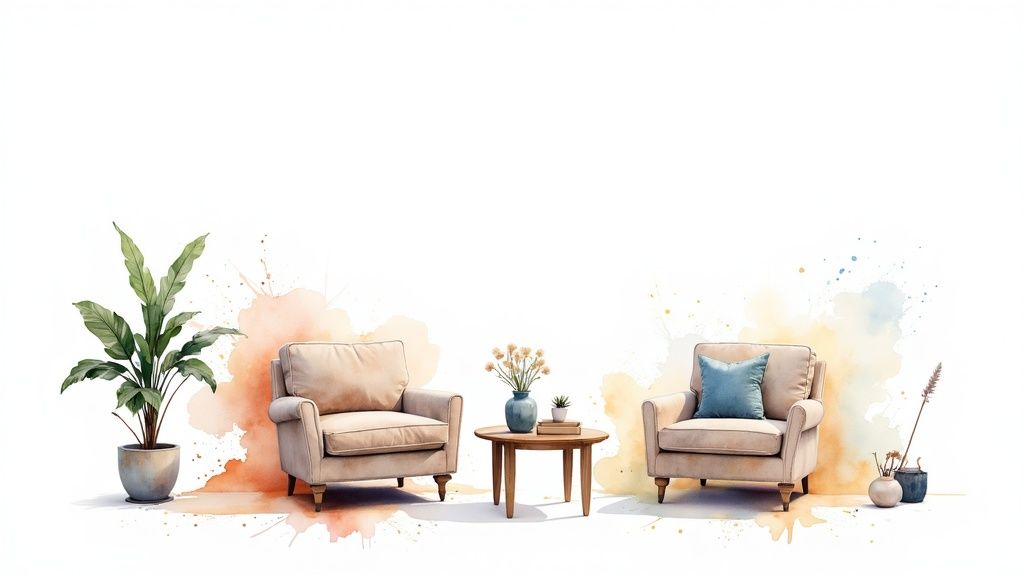
Alright, you’ve got your vision. Now for the fun part: picking the colors and materials that bring it all to life. These are the building blocks of your room’s personality. Get them right, and the rest of the design process feels like it just clicks into place.
Many people get hung up on color theory, but it doesn’t have to be complicated. A tried-and-true trick of the trade is the 60-30-10 rule. It’s a classic for a reason—it works, and it gives you a simple framework for creating a balanced, professional-looking space.
Mastering the 60-30-10 Rule
This isn’t some rigid formula, but rather a guide to help you distribute color harmoniously. Think of it as a recipe that keeps your room from feeling either too bland or completely overwhelming.
- 60% is your dominant color. This is the main event, the shade that sets the overall mood. It’s usually your wall color, but it could also be a large sectional sofa or an expansive area rug.
- 30% is your secondary color. This color should support the main one but be different enough to create interest. It’s perfect for accent chairs, curtains, or maybe a painted bookcase.
- 10% is your accent color. Here’s where you add the spice! This is your pop of color for things like throw pillows, artwork, vases, or a bold lamp. It’s a low-risk way to play with exciting hues.
So, in a real room, that might look like soft, warm greige on the walls (60%), a rich navy blue for the sofa (30%), and pops of burnt orange in the cushions and a piece of art (10%). See? It’s a simple way to build a palette that feels cohesive and intentional.
Beyond Paint: The Power of Texture
Color gets all the attention, but texture is what gives a room its soul. Honestly, a room with a perfect color palette can still fall flat if everything has the same smooth, uniform finish. Layering in different textures is what creates depth, comfort, and that sophisticated, lived-in feel.
A great design is about more than just what you see—it’s about how the room feels. The interplay between a cool, smooth tabletop and a soft, cozy throw is what makes a space inviting and memorable.
Start thinking about creating interesting pairs. A buttery leather armchair next to a chunky knit blanket. A sleek marble coaster on a rough, natural wood coffee table. It’s the contrast that makes each element shine.
- For an organic, earthy vibe: Mix things like raw wood, linen, jute, and ceramics.
- For a luxe, glamorous feel: Combine plush velvets with polished brass, smooth marble, and mirrored surfaces.
As you start pulling these elements together, you’ll need to make decisions on everything from flooring to window coverings. For some extra guidance on that last one, check out these great tips for choosing the right window treatments.
Always, Always Order Samples
If you take only one piece of advice from this section, let it be this: order samples. I can’t stress this enough. Colors look wildly different on a screen than they do in your home. The way the light hits a wall at sunrise versus under a lamp at night can completely change a paint color or a fabric’s appearance.
Before you buy gallons of paint or invest in a custom piece of furniture, get your hands on physical samples. Tape paint swatches to your walls and watch them throughout the day. Lay out fabric and rug swatches on the floor next to each other. A virtual room design app is an amazing tool for getting a general idea, but nothing beats seeing the real thing in your own space. This one step will save you from so many costly mistakes and headaches down the line.
Bringing Your Room Design to Life
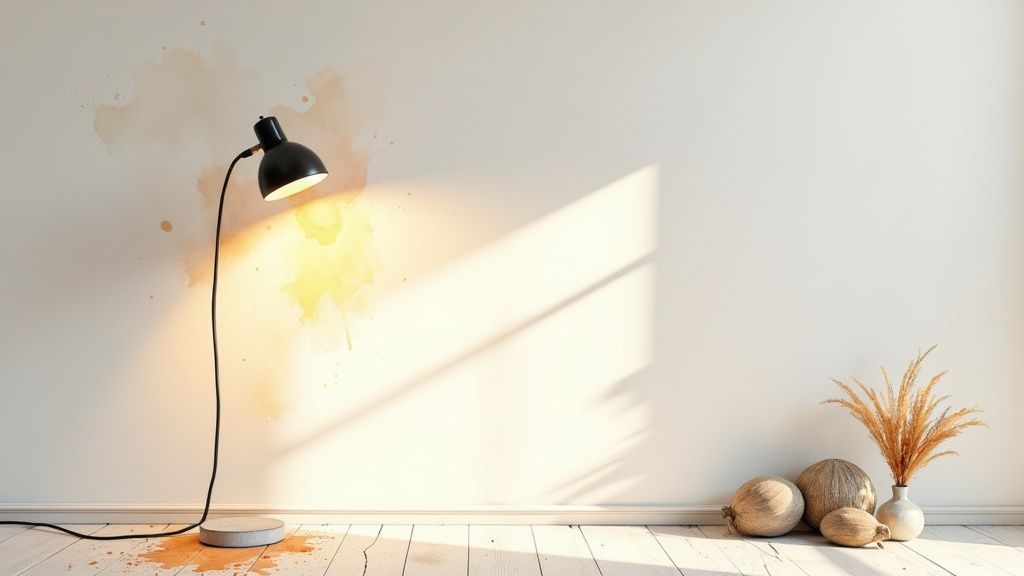
You’ve done the planning and have a crystal-clear vision. Now for the fun part: making it all real. This is where your digital concept finally becomes a beautiful, livable space. Trust me, following a logical sequence here is your best friend. It’s the difference between a smooth project and, well, literally painting yourself into a corner.
The trick is to work from big to small. Always start with the largest surfaces and move down to the finest details. That means you’re painting walls or hanging wallpaper before anything else. Get all the messy jobs done before a single piece of new furniture crosses the threshold. This keeps your big-ticket items pristine and gives you a clean canvas to work with.
Arranging Furniture for Flow
With the walls and floors sorted, it’s time to bring in the furniture. Go back to that floor plan you created. It’s not just a rough guide; it’s your roadmap to a room that actually works. Start with the biggest piece—usually the sofa in a living room or the bed in a bedroom. This becomes the anchor for everything else.
Arrange the rest of your furniture around that anchor, but keep a close eye on your traffic flow. You need to be able to move through the room without bumping into sharp corners or doing an awkward shuffle around an ottoman. As a rule of thumb, leave about 3 feet of space for main walkways and at least 18 inches between your sofa and coffee table. An https://www.room-genius.com/blog/online-room-layout-planner/ can be a lifesaver here, letting you nail the layout before you start the heavy lifting.
Your furniture layout should feel intuitive. If you have to awkwardly sidestep a chair to get to the window, the flow is wrong. The goal is to create a space that feels effortless to live in.
Layering Your Lighting
A single, lonely light fixture hanging from the ceiling rarely makes a room feel warm and inviting. The secret to fantastic ambiance is all in the lighting layers. To get that professional, balanced feel, you really need to use three distinct types.
- Ambient Lighting: This is your room’s main light source—think recessed lights or a central ceiling fixture. It provides the overall brightness.
- Task Lighting: This is focused light for getting things done. It could be a reading lamp tucked beside your favorite armchair or under-cabinet lights for your workspace.
- Accent Lighting: This is the fun part, the jewelry of the room. Use it to highlight artwork, a cool architectural detail, or even a beautiful plant.
When you combine all three, you create a dynamic space that can adapt to any mood or activity. It’s what makes a room feel truly complete.
Adding the Finishing Touches
Okay, this is where your personality really comes out to play. The final layer of decor is what turns a well-arranged room into a home that tells your story. When you hang artwork, aim for the center of the piece to be at eye level, which is roughly 57 to 60 inches from the floor. This creates a much more natural and pleasing sightline.
Next, style your shelves. Mix it up with books, personal mementos, and a bit of greenery. Varying the height and texture of these objects is what creates real visual interest. Finally, bring in the textiles—throw pillows, cozy blankets, and curtains. These elements are perfect for softening the space, injecting pops of color, and tying the whole design together.
Have Questions? Let’s Talk Room Design
Every design project, big or small, comes with its own set of questions. It’s completely normal. Getting ahead of a few common roadblocks can make the whole process of designing your room feel less like a puzzle and more like a creative adventure.
Let’s dig into some of the things that tend to trip people up.
I’m Starting with a Blank Slate. Where Do I Even Begin?
When you’re staring at an empty room, the possibilities can feel overwhelming. The best way to cut through the noise is to focus on two things: function and inspiration.
Before you even think about paint colors or that gorgeous sofa you saw online, ask yourself what this room needs to do. Is it a cozy reading nook? A bustling hub for family game nights? A hybrid office-guest room? Defining its job is your first filter—it immediately helps you decide what kind of layout and furniture you actually need.
At the same time, start collecting images that you love. I always tell people to create a mood board on a tool like Pinterest and just go wild. Don’t censor yourself. After you’ve pinned a bunch of images, take a step back and look for patterns. You’ll start to see your own personal style emerge. This mix of practicality and passion creates a rock-solid foundation.
My Room is Tiny. How Can I Make It Feel Bigger?
This is probably the number one question I hear. Making a small room feel more spacious is all about visual tricks. It’s not magic, just smart design.
A few tried-and-true techniques can completely change how a room feels:
- Lighten Up: It’s a classic for a reason. Lighter colors on the walls—think soft whites, pale grays, or warm beiges—reflect light and make a space feel more open and airy.
- Use Mirrors Strategically: A big mirror is your best friend in a small room. Placing one across from a window is a pro move; it doubles your natural light and creates a real sense of depth.
- Get Leggy with Furniture: Choose sofas, chairs, and tables with visible legs. When you can see the floor underneath, it creates an illusion of more space. Heavy, blocky furniture just eats up the room.
- Think Vertically: Draw the eye upward. Hang your curtains higher and wider than the actual window frame to make the window (and the ceiling) feel taller. A tall, slender bookshelf can do the same thing.
The single biggest mistake people make is choosing furniture that’s the wrong scale for the room. That oversized sofa might look amazing in the showroom, but in your small living room, it will just feel suffocating.
A simple tip: use painter’s tape on the floor to mark out the dimensions of a piece of furniture before you buy it. This gives you a real-world feel for its footprint and helps you see if you’ll have enough space to walk around. Another common misstep is lighting. Don’t rely on a single ceiling light. A well-lit room uses layers—ambient, task, and accent lighting—to feel warm, inviting, and functional.
Ready to stop guessing and start seeing what’s possible? The RoomGenius AI can take a photo of your room and show you countless design ideas in seconds. It’s the perfect way to explore your room’s potential before you lift a paintbrush. Try it now and bring your vision to life.