Getting Started with home design software for beginners: A practical guide
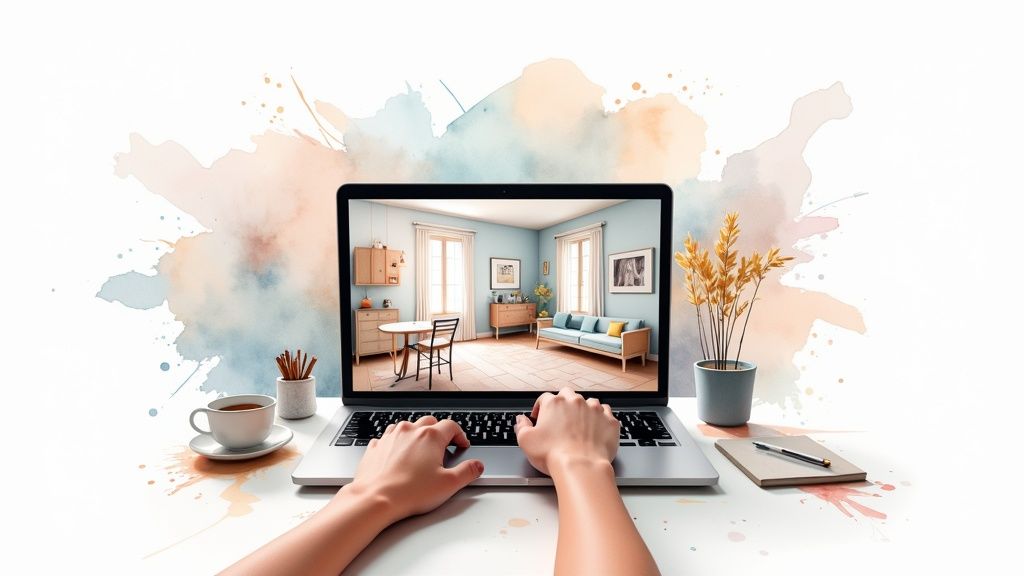
Ever sketched a room layout on a napkin, only to realize later the sofa won’t actually fit through the door? We’ve all been there. Home design software for beginners is here to replace that guesswork with a fun, digital playground where you can build, furnish, and visualize your perfect space—all before you spend a dime or lift a hammer.
Your First Step Into Digital Home Design
Think of this software as a virtual sandbox for your home. It’s a powerful tool that lets you turn fuzzy ideas into a concrete, visual plan, but it’s much simpler to use than you might imagine. You get to move walls, swap out furniture, and splash new paint colors around with just a few clicks. It’s all the fun of rearranging a room with none of the back-breaking work.
This guide is your friendly roadmap. We’re going to break down everything you need to know, from the absolute basics. No architecture degree or tech genius credentials required. The whole point is to give you—the homeowner, renter, or DIY enthusiast—the confidence to take charge of your own design projects.
What You Will Learn
To make sure you get off to a great start, we’ll walk through the essentials every beginner needs to master:
- Core Concepts: We’ll demystify what home design software is and how it works, using simple analogies that stick.
- Must-Have Features: You’ll learn the key features that separate a helpful tool from a frustrating one.
- Getting Started: A straightforward, step-by-step walkthrough will guide you in creating your very first room layout.
- Avoiding Common Mistakes: We’ll cover the common trip-ups that new users make so you can skip the headaches.
By the end of this guide, you won’t just know about home design software; you’ll feel genuinely ready to dive in and start creating. You’ll have the skills to visualize a small refresh, plan a major renovation, or completely reimagine a room from the ground up.
Ultimately, this is all about making interior design feel less intimidating and a lot more exciting. Instead of getting bogged down by endless choices, you’ll have a clear, easy-to-follow process. For more tips, you can also check out our guide on how to design my room online for some extra inspiration.
Let’s start building the home you’ve always wanted.
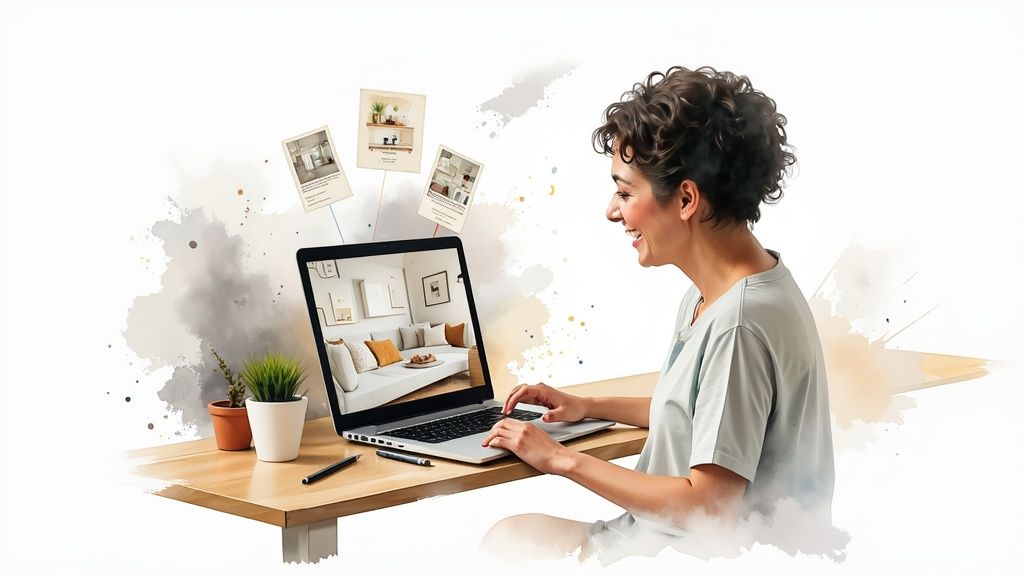
What Exactly Is Home Design Software?
So, what are we really talking about when we say home design software for beginners? The simplest way to think about it is as a digital sandbox for your home. It’s like having a perfect, to-scale model of your space where you can try out any idea without lifting a hammer or spending a dime.
Instead of just imagining how that new sofa might look, you can drop a 3D model of it right into your virtual living room. You can walk around it, view it from every angle, and see if it really fits before you even think about buying it. This ability to experiment without risk is the real magic behind these tools.
Ultimately, home design software closes the gap between the vision in your head and the reality of your space. It lets you see potential changes clearly, helping you make smarter decisions and avoid those all-too-common mistakes, like buying a rug that’s too small or a paint color that looks great on the swatch but terrible on the wall.
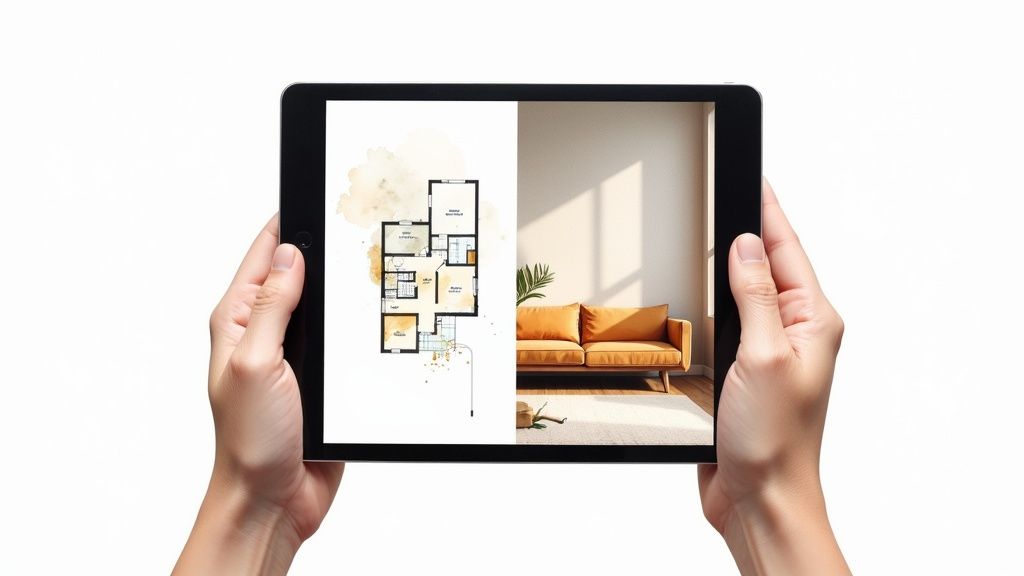
The Two Fundamental Views
When you first jump into any design software, you’ll find yourself working with two main perspectives. Getting comfortable with both is the key to creating a design that’s both beautiful and practical. Each one has a specific job.
- The 2D Floor Plan: This is your blueprint—a simple, top-down view of your room. It’s where you handle the structural basics with precision. You’ll draw walls, get the dimensions just right, and map out where doors and windows go.
- The 3D Model: This is where the fun begins. With a click, your flat floor plan transforms into a realistic, walk-through model. This view is all about feel and aesthetics, letting you see how light, color, and furniture all come together from a real-life perspective.
You’ll constantly toggle between these two views. The 2D plan is for accuracy and layout; the 3D model is for checking the vibe and visuals.
A Playground for Your Creative Ideas
Good design software is so much more than just a floor planner. It’s a full-blown creative suite that puts you in control of every last detail.
Think of it this way: Your home is the canvas, and the software is your complete art kit. You have total freedom to play around with ideas, and best of all, there’s always an “undo” button.
This means you can cycle through dozens of ideas in the time it would take to move one piece of furniture. You can explore all sorts of creative avenues, like:
- Experimenting with Room Layouts: Find the most practical and pleasing furniture arrangement without breaking a sweat.
- Testing Color Palettes: “Paint” your walls with different colors in seconds to find the shade that perfectly matches your decor.
- Trying Out Materials: See how hardwood floors look versus carpet or tile before you ever call a contractor.
- Visualizing Lighting: Understand how daylight from your windows or the glow from a new lamp will change the entire mood of the room.
The ability to iterate so quickly is what makes modern online interior design tools so powerful for everyone, not just the pros. It takes the guesswork out of decorating and turns a potentially stressful project into a genuinely fun and creative process.
Must-Have Features for Any Beginner
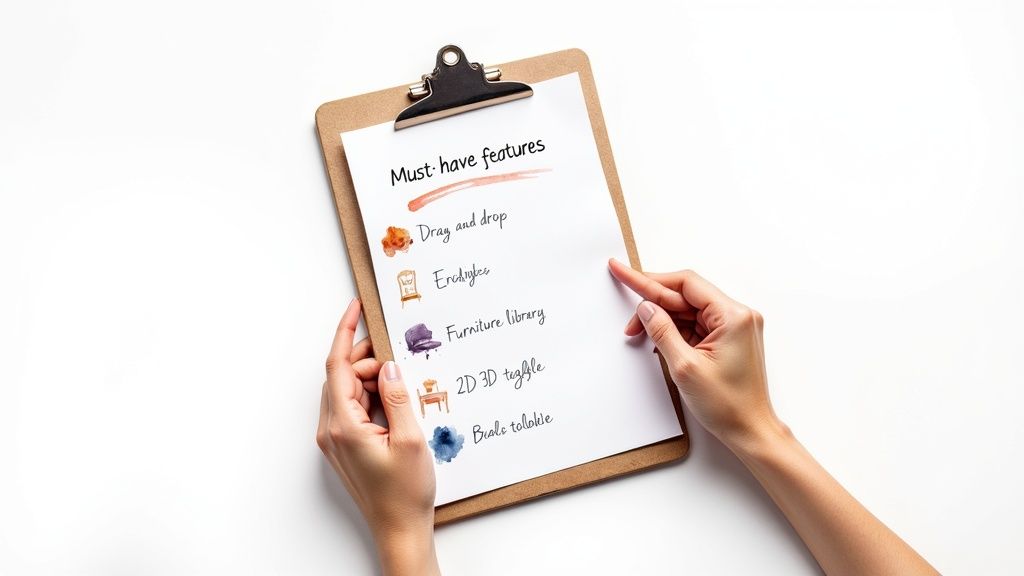
Diving into the world of home design software for beginners can feel like a lot to take in. There are so many options, each promising the world. So, how do you cut through the noise? It really comes down to a handful of core features that separate a genuinely helpful tool from a frustrating one.
Think of it like learning to cook. You wouldn’t start with a recipe that demands a dozen specialized gadgets you’ve never heard of. You’d grab a good knife, a cutting board, and a clear, simple recipe. The same idea applies here. You need software that guides you, not one that gets in your way with a steep learning curve.
This is your practical checklist for spotting those essential features. Let’s break down exactly what you should be looking for to make sure your first design project is a creative success, not a technical headache.
An Intuitive Drag-and-Drop Interface
If there’s one feature that’s an absolute deal-breaker, it’s a drag-and-drop interface. This is the digital version of sliding furniture around your living room, but without scratching the floors or pulling a muscle.
You should be able to simply click on a sofa in a catalog, drag it over to your floor plan, and drop it exactly where you want it. This single feature removes the biggest technical barrier for beginners, letting you focus on what really matters: your design vision.
With a good drag-and-drop system, you can test out five different bedroom layouts in just a few minutes. Without it, you’d be stuck fumbling with coordinates and clunky menus. It’s the difference between effortless creation and total frustration.
A Comprehensive Object Library
What good is an empty digital room? A solid 3D object library is what breathes life into your floor plans. This is your virtual warehouse of furniture, fixtures, and decor.
A great library should feel like you’re walking through a massive home goods store. Look for one that includes:
- Furniture: A wide selection of sofas, chairs, beds, and tables in different styles.
- Appliances: Realistic models of everything from refrigerators to washing machines.
- Decor: The little things that make a space feel real, like rugs, lamps, plants, and art.
- Structural Elements: The basics like doors, windows, and stairs that you can easily pop into place.
The real goal here is to find a library so complete that you can find items that closely match what you already own or plan to buy. This transforms your design from a rough sketch into a true-to-life preview of your future space.
2D and 3D View Toggling
We touched on this earlier, but the ability to jump between a 2D floor plan and a 3D model is non-negotiable. Think of these as two sides of the same coin, each with a critical job.
The 2D view is your blueprint. It’s where you get precise, making sure walls are the right length and that you’ve left enough space to walk around the dining table. It’s all about measurements and accuracy.
The 3D view is where you experience the space. It lets you check sightlines from the doorway, see how the afternoon sun will hit the armchair, and get a genuine feel for the room’s atmosphere. The best tools let you toggle between these views instantly, so you can make a tiny adjustment in 2D and immediately see how it looks and feels in 3D.
Customization and Sharing Options
Your design should feel like yours, and that’s where customization comes in. Good software won’t just give you a generic grey sofa; it will let you change its color, fabric, and texture.
You should be able to experiment with different paint colors on the walls, test out light vs. dark wood flooring, or see if a velvet couch works better than a leather one. These details are what make a design personal.
Finally, what’s the point of creating a beautiful design if you can’t show it to anyone? Make sure the tool allows you to easily save and share your work. Exporting a design as an image or a shareable link is essential for getting a second opinion from a partner, a friend, or your contractor. It turns your vision into a clear plan that everyone can get behind.
How to Start Your First Design Project
Staring at a blank digital canvas can feel a little intimidating. Where do you even begin? The secret is to break the whole process down into small, manageable steps. Think of it less like creating a masterpiece from scratch and more like putting a puzzle together, one piece at a time. This simple shift in mindset takes the pressure off and turns what feels like a huge task into a fun, creative exercise.
Before you even open the software, it helps to gather some inspiration. Browsing through modern bedroom design ideas can spark your imagination and give you a clearer vision for your project. Once you have a general style in mind, you’re ready to dive into the practical side of building your room.
This guide is your roadmap. We’ll walk you through each stage, from capturing your room’s real-world dimensions to arranging digital furniture and adding those final, personal touches.
Step 1: Start with Accurate Measurements
I can’t stress this enough: this is the most critical first step, and it’s the one beginners almost always rush. If your measurements are off, you’ll end up with an unrealistic plan where furniture doesn’t fit and the flow is just plain awkward. So, don’t eyeball it—grab a tape measure and get precise numbers.
Be sure to measure these key dimensions:
- Wall Lengths: Measure each wall from corner to corner.
- Ceiling Height: Get the distance from the floor to the ceiling.
- Doors and Windows: Note their height and width, but also their exact position. Measure from the corner of the wall to the edge of the door or window frame.
Pro Tip: Always measure twice. It’s a simple rule, but it will save you from major headaches down the line. An error of just a few inches can be the difference between that dream sofa fitting perfectly or not at all.
Once you have these numbers, you’re ready to build the digital foundation of your room. In the software, you’ll use these measurements to draw the walls, creating an accurate 2D outline of your space. Then, you’ll place the doors and windows exactly where your notes say they are. This simple framework is the skeleton for your entire design.
Step 2: Add Furniture and Experiment with Layouts
With your room’s structure in place, it’s time for the fun part: adding furniture. Most home design software for beginners comes with a drag-and-drop library, which makes this super easy. But to keep from feeling overwhelmed, it’s best to have a strategy.
Start with the largest and most important pieces first. For a living room, that’s the sofa; in a bedroom, it’s the bed. These are your “anchor” pieces, and the rest of your layout will naturally fall into place around them. Once your anchor is set, bring in secondary items like coffee tables, nightstands, and chairs.
As you place each item, constantly think about traffic flow. Can you walk through the room comfortably without bumping into things? A good rule of thumb is to leave at least 30-36 inches for your main walkways. Go ahead and experiment with different arrangements. This is where the software really shines—you can try out five different layouts in five minutes, all without breaking a sweat.
Step 3: Apply Colors and Textures
Once you’ve landed on a layout you love, you can bring the design to life with colors and materials. This is where you really inject your personality into the space. Most programs let you simply click on a surface—a wall, the floor, a piece of furniture—and apply different finishes from a library.
Tackle the largest surfaces first to make the biggest impact:
- Walls: Try out different paint colors. Keep in mind that colors on a screen can look a bit different in real life, but this will give you a fantastic idea of the room’s mood.
- Floors: See how different materials like hardwood, carpet, or tile change the overall feel of the room.
- Furniture: Finally, customize your furniture. See what that armchair looks like in a bold blue versus a neutral beige.
To create a look that feels put-together, try sticking to a simple color palette of two or three main colors. This helps your design feel intentional and harmonious rather than chaotic. And just like that, you have a complete, realistic preview of your vision.
Common Beginner Mistakes to Avoid
Diving into your first project with home design software for beginners is a blast, but a few common slip-ups can quickly turn that creative rush into a headache. Think of this as a friendly heads-up to help you sidestep the usual hurdles. Honestly, learning from the mistakes others have made is the fastest way to create a design that not only looks great but actually works in your space.
One of the biggest traps is getting so lost in the fun of designing that you forget about the real-world limitations. It’s easy to do! But with a little bit of foresight, you can nail down a plan that’s both beautiful and practical right from the start.
Overlooking the Importance of Accurate Measurements
This is, hands down, the most common and costly mistake a beginner can make. An inaccurate measurement—even off by just a few inches—can derail your entire project. A design built on guesswork is really just a pretty picture, not a blueprint you can actually use.
When your measurements are off, that sofa you placed perfectly in your digital living room might end up blocking a doorway in real life. To avoid this disaster, stick to the old carpenter’s rule: measure twice, cut once. In our case, it’s measure twice, design once.
Crowding the Virtual Room
It’s so tempting to fill your digital room with every cool piece of furniture you find in the software’s library. I get it. But just because you can add another armchair, that stylish side table, and a giant fiddle-leaf fig doesn’t mean you should. Overstuffing a virtual room is a classic rookie move that results in a cluttered and impractical design.
A well-designed room isn’t just about what you put in; it’s also about what you leave out. Negative space—the empty areas around your furniture—is what makes a room feel open, balanced, and comfortable to be in.
To get it right, start with your anchor pieces—like the sofa or bed—and build out from there. Always keep clear pathways and a sense of breathing room at the top of your mind. This simple approach helps ensure your final design feels spacious and livable.
Forgetting About Traffic Flow
What good is a beautiful room if you can’t walk through it without bumping into things? Beginners often arrange furniture in a way that looks fantastic from one angle but creates awkward or completely blocked pathways. This is what designers call poor traffic flow, and it’s a make-or-break element of any good design.
Think about having to shimmy sideways past the dining table every time you walk into the kitchen. That’s the kind of daily annoyance you can easily avoid during the planning stage. As a rule of thumb, try to leave at least 30 to 36 inches of clear space for major walkways to allow for comfortable movement.
This simple infographic breaks down the foundational process of starting a design, which is key to preventing these kinds of planning mistakes right from the get-go.
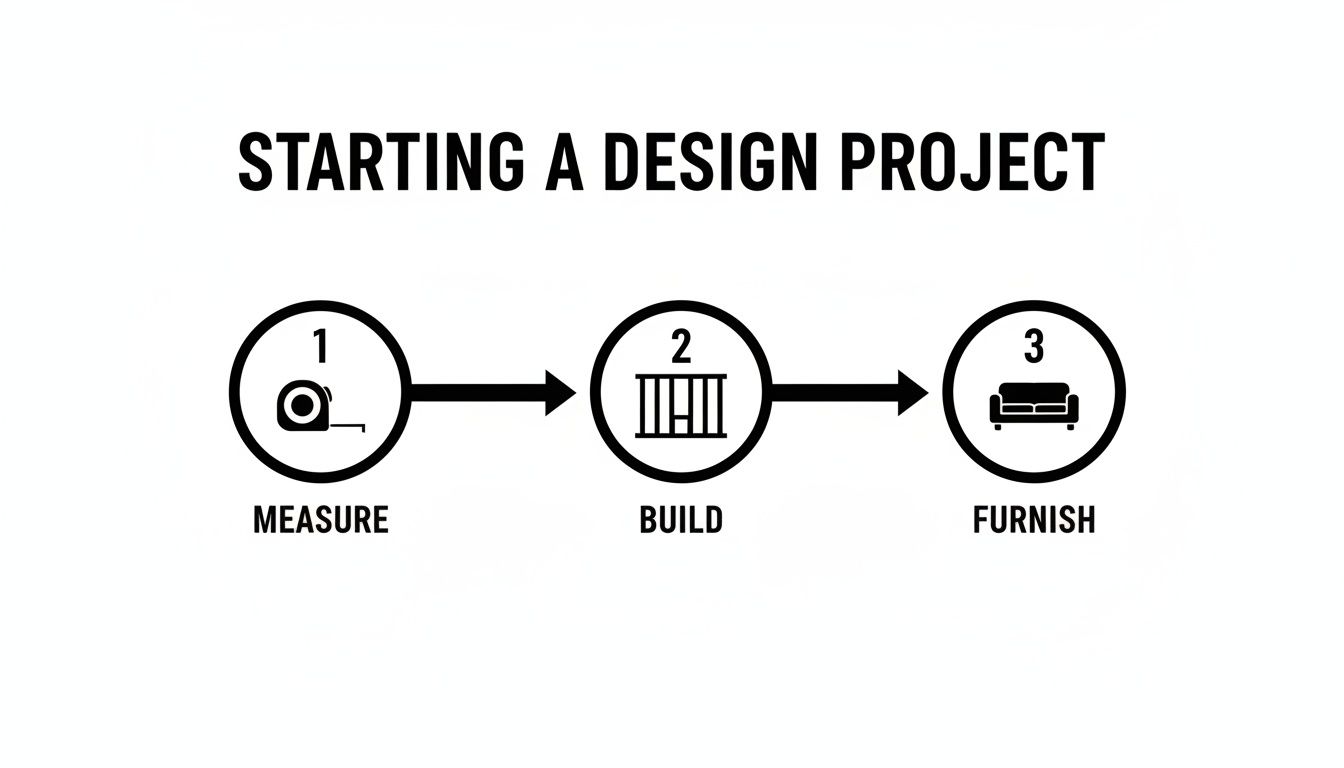
This Measure-Build-Furnish flow is a great reminder that solid measurements and structure have to come first, long before you get to the fun part of adding furniture.
Misjudging Colors and Lighting
Last but not least, remember that colors on a glowing computer screen almost always look brighter and more intense than they will in your home. That perfect shade of sage green in the software can look totally different under the specific natural and artificial light in your room.
To avoid a color catastrophe, use the software as a starting point to explore your palette. But before you commit to gallons of paint, always get physical samples. Test them on your walls and see how they look at different times of the day. This one simple step is the best way to bridge the gap between your digital dream and real-world results.
Bringing Your Vision to Life with RoomGenius
Knowing what design software does is one thing. Finding a tool that feels like a creative partner is something else entirely. For anyone just starting, the best software isn’t the one with the most complicated features—it’s the one with the right features, presented in a way that feels inspiring, not intimidating. That’s exactly why we built RoomGenius to be the perfect home design software for beginners.
Instead of getting bogged down by a steep learning curve, you get to jump right into the fun part. We designed RoomGenius to solve the biggest headaches new users face, from the paralyzing fear of a blank canvas to the struggle of turning a mental picture into a realistic plan. It makes the whole process less about fighting with software and more about bringing your creativity to life.
The focus shifts from technical roadblocks to pure possibility. It’s the perfect next step for anyone who feels overwhelmed by traditional design programs but is eager to see their ideas take shape.
Removing the Learning Curve
The biggest hurdle for most beginners is a cluttered, confusing interface. Let’s be honest, a lot of powerful programs feel like they were made for professional architects, not for someone planning their living room. RoomGenius flips that around with a clean, intuitive layout that just makes sense from the moment you open it.
You won’t have to hunt for hidden menus or memorize complex commands. Everything you need is laid out clearly, guiding you naturally from one step to the next. That means you can spend your first hour actually designing your space, not watching tutorials just to figure out how to draw a simple wall.
By simplifying the user experience, RoomGenius ensures that your creative momentum is never broken by technical frustration. The software gets out of your way, allowing your ideas to flow directly onto the screen.
A Library That Sparks Inspiration
A great design depends on having great elements to work with. RoomGenius comes packed with a huge, constantly growing library of realistic, 3D furniture and decor. This isn’t just a pile of generic shapes; it’s a curated catalog of stylish, on-trend pieces that will help you create a space that feels both modern and uniquely you.
You can browse thousands of items—from sofas and coffee tables to light fixtures and houseplants—and just drag and drop them right into your design. This massive library makes it easy to find pieces that match your personal style or even furniture you already own, giving you a true preview of how your real-world space will look. For a jolt of inspiration, looking at finished projects, like those showcasing various design projects and services, can show you what’s possible.
Intelligent Assistance When You Need It Most
So, what happens when you hit a creative wall? This is where RoomGenius really separates itself from other home design software for beginners. It has helpful AI-powered suggestions built right in to guide you whenever you feel stuck.
Imagine you’ve placed a sofa and a rug but aren’t sure what to do next. The software can analyze your layout and style choices, then offer smart recommendations for accent chairs, color palettes, or even entirely new configurations. It’s like having a friendly interior designer looking over your shoulder, offering a little nudge in the right direction. It’s a game-changer for building confidence and discovering ideas you might never have thought of on your own. To learn more about how this works, check out our guide on using an AI app for interior design.
This smart support system makes the whole process feel collaborative. It helps turn moments of frustration into opportunities for discovery. With RoomGenius, you’re not just using a tool—you’re partnering with it to create something amazing.
Your Home Design Software Questions, Answered
Jumping into home design software can feel like a big step, and it’s totally normal to have a few questions swirling around. Let’s clear up some of the most common ones we hear from beginners.
Think of this as your final checklist before you dive in. We’ll cover everything from how long it takes to get the hang of things to whether you can start without spending a dime.
How Long Does It Take to Learn This Stuff?
You’ll be pleasantly surprised. For software built specifically for beginners, you can go from zero to a finished room layout in a single afternoon. Most intuitive tools, like RoomGenius, can be picked up in just a few hours.
This isn’t like professional-grade CAD software that demands weeks of training. The best beginner tools are designed to get you designing, not fumbling through menus. The goal is to spend your time bringing ideas to life, not hunting for the right button.
Can I Really Design My Own House Online for Free?
Yes, you absolutely can. Many of the best platforms have fantastic free versions that are more than capable of handling your first few projects. These free tiers give you all the core tools needed to draw accurate floor plans, experiment with furniture placement, and test out different decor ideas.
While paid plans will unlock premium features like photorealistic 3D renderings or massive product libraries, a free plan is often the perfect starting point for planning a room refresh or figuring out if that new sofa will actually fit.
What Is the Easiest Software for a Beginner to Use?
The easiest tools feel intuitive from the moment you open them. They have clean, simple layouts and a drag-and-drop system that just makes sense. When you’re starting out, you want a tool that guides you, not one that overwhelms you with a hundred different options.
Look for these signs of a truly beginner-friendly tool:
- Simple Menus: You can find what you need without a map.
- Helpful Onboarding: It offers quick pop-up tips or short video tutorials to get you started.
- Ready-to-Use Templates: You can start with a pre-made room layout instead of a scary blank canvas.
This focus on a smooth, friendly experience is what really separates the best home design software for beginners from the more intimidating, expert-level programs.
Ready to stop wondering and start designing? RoomGenius uses AI to make creating your dream space incredibly simple. Get your first design ideas in seconds and see your vision come to life. Try RoomGenius for free today!