Help With Designing a Room A Practical Guide
Getting help with designing a room starts with a simple, foundational step professionals never skip: assessing your space.
Where to Start When You Feel Stuck
We’ve all been there. You’re standing in an empty room, staring at four walls, and a feeling of paralysis sets in. It’s tempting to jump straight to the fun stuff—picking out paint colors or scrolling through furniture websites—but that’s like trying to build a house without a blueprint.
The single most important thing you can do first, the step that makes every other decision a hundred times easier, is to get to know your room. I mean really know it.
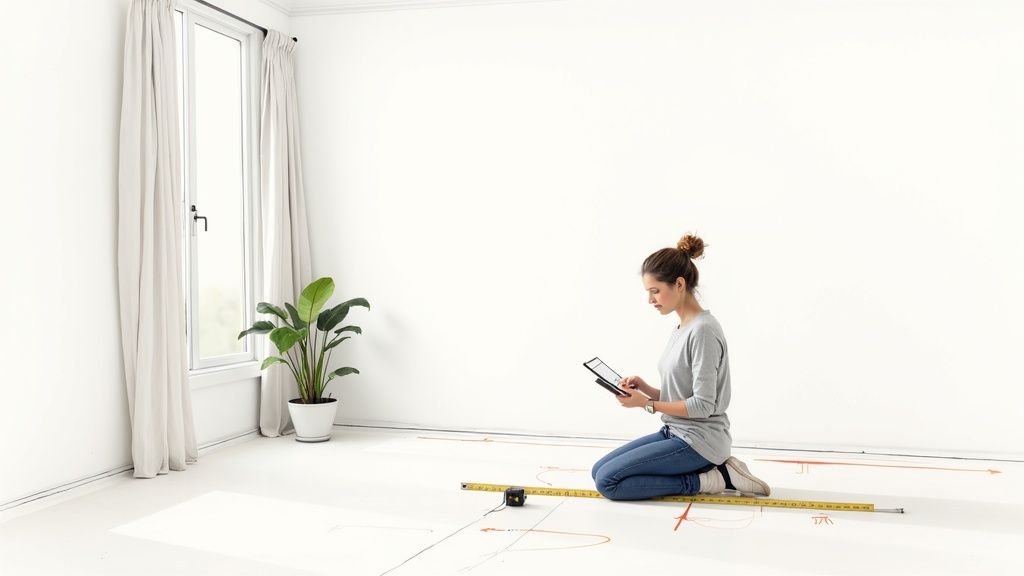
This isn’t just about pulling out a tape measure. It’s about becoming an expert on your space—understanding its quirks, its strengths, and its limitations. Think of it as creating a personalized “user manual” for your room that will guide every choice you make from here on out.
Taking the time to do this groundwork empowers you to make smart, confident decisions. It’s what prevents those costly mistakes, like ordering a beautiful sofa only to find it completely swallows the room, or arranging furniture in a way that blocks natural foot traffic. You’re building a solid foundation for a room that doesn’t just look good, but feels right.
Understand Your Canvas
Before you can create a masterpiece, you have to understand the canvas you’re working with. A proper room assessment means looking at the space with a purely practical eye. For just a moment, forget about style and focus on the cold, hard facts of the room.
I like to break this initial audit down into a few key areas:
- Dimensions and Scale: Get precise measurements of the room’s length, width, and height. Don’t forget to measure windows, doors, and any built-ins like bookshelves or fireplaces.
- Architectural Quirks: Take note of any odd corners, sloped ceilings, or permanent fixtures like radiators and support columns. These aren’t problems—they’re opportunities. Often, these unique features can become the most interesting parts of your design.
- Functional Mapping: This is a big one. Pinpoint the exact location of every single power outlet, light switch, and overhead fixture. Your electrical layout will have a huge impact on where furniture can realistically go, especially lamps and electronics.
- Natural Light and Views: Pay attention to how sunlight moves through the space at different times of the day. A south-facing room gets bright, all-day light, while a north-facing one offers a softer, cooler glow. This will dramatically affect how paint colors look on the walls.
This process gives you all the essential data you need before you even think about picking up a color swatch. It’s a logical flow: measure, map, and then document.
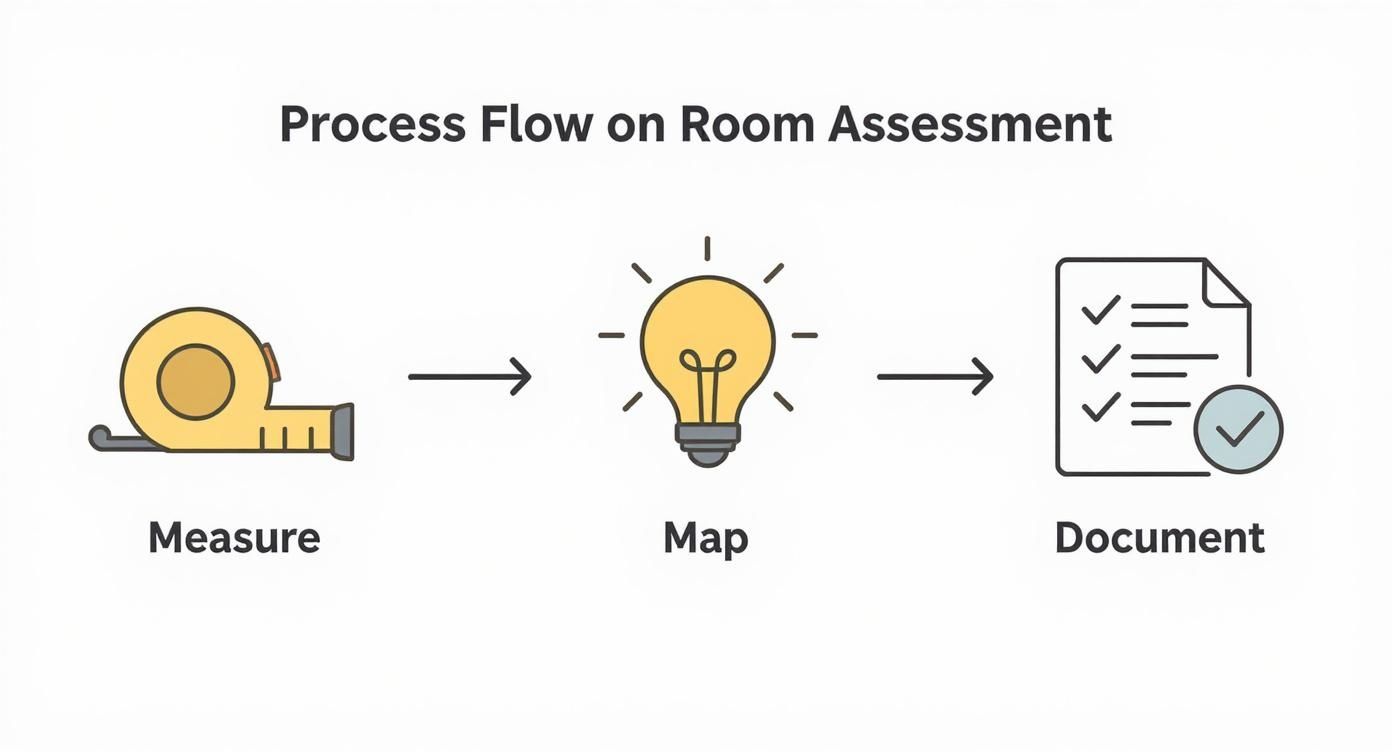
As you can see, a great room assessment isn’t random; it’s a step-by-step progression that turns raw numbers into a practical map of your space’s potential.
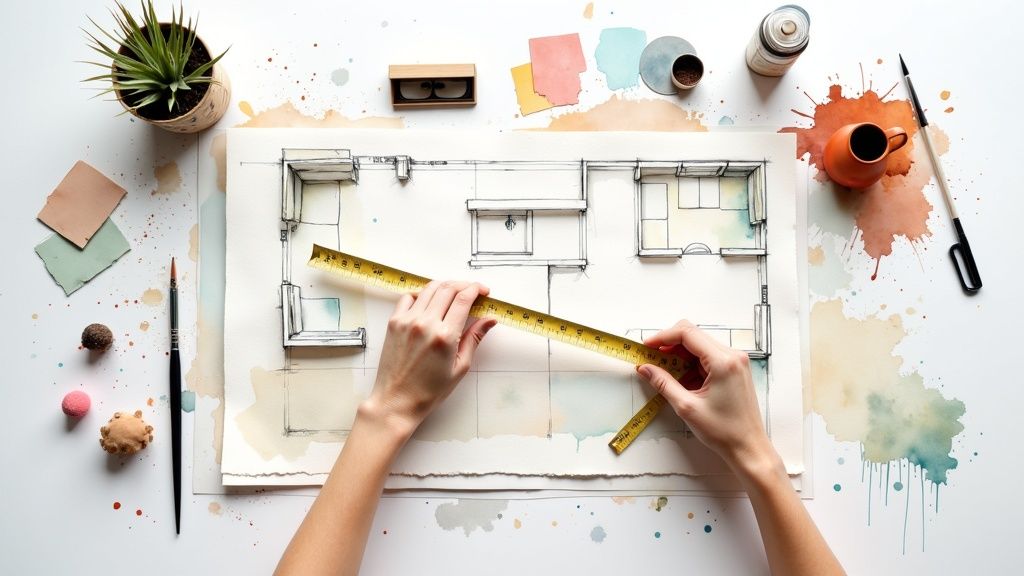
Document Your Room’s Reality
Once you’ve gathered all this info, you need to put it on paper. A simple, hand-drawn sketch is all you really need—don’t worry about being an artist. The goal here is clarity, not a masterpiece. Mark down all your measurements and the locations of the key features you just identified.
Next, it’s time to add the human element. Think about how you and your family actually use the room, or more importantly, how you want to use it. Consider the flow of traffic. Where do people naturally walk when they move through the space? You’ll want to keep these pathways clear to avoid creating a layout that feels clumsy or crowded. For more on this, check out our interior design tips for beginners.
This little checklist can help you make sure you haven’t missed anything crucial.
Room Assessment Checklist
Use this quick guide to capture all the essential details of your space before you start designing.
| Assessment Area | Key Details to Note | Why It Matters |
|---|---|---|
| Dimensions | Length, width, and ceiling height. Window and door sizes. | Ensures furniture is properly scaled and fits through doorways. |
| Architectural Features | Sloped ceilings, awkward corners, columns, built-in shelves, fireplace. | These “quirks” must be incorporated into the layout and can become focal points. |
| Light & Views | Direction of windows (N, S, E, W), time of day for best light, any desirable views. | Informs color choices, furniture placement, and window treatment needs. |
| Functional Points | Location of all outlets, switches, vents, and existing light fixtures. | Dictates the placement of lamps, electronics, and large furniture. |
| Traffic Flow | Natural pathways from one door to another or through the space. | Keeps the room functional and prevents a cluttered or awkward layout. |
Having these details documented takes the guesswork out of the entire process.
The most successful room designs don’t fight the room’s inherent architecture; they work with it. Understanding your space’s “bones” is the first step toward creating a room that feels both effortless and intentional.
The desire to create personalized, functional spaces is a major reason why the global interior design market, valued at around USD 138 billion recently, is projected to grow to over USD 208 billion by 2033. People are investing in making their homes truly their own.
Ultimately, this detailed assessment demystifies everything. It turns that vague, “I’m stuck” feeling into a clear set of parameters to work within. Armed with this knowledge, you’re no longer guessing—you’re making informed, strategic decisions that will lead to a beautiful and practical room. For those tackling a larger project, you may find more ideas in a guide to designing the perfect villa.
Defining a Design Style That’s Truly Yours
It’s so easy to get lost in the sea of design labels. We hear terms like “mid-century modern,” “bohemian,” or “Japandi” thrown around and feel like we have to pick a team. But here’s the thing I’ve learned over years of designing spaces: most people are a mix of different styles, and trying to cram your personality into a single box usually creates a room that feels a little… off.
The real goal isn’t to perfectly copy a look from a magazine. It’s to create a space that feels like you. That means we need to get past the predefined categories and do a little self-discovery to figure out what you’re consistently drawn to—the colors, textures, and general feeling that makes you feel genuinely at home.
Building Your Personal Mood Board
This is where a mood board becomes your best friend. Think of it as a visual diary that helps you spot patterns in what you love, without the pressure of having to name the style right away. This isn’t about just grabbing pretty pictures; it’s about curating a collection that truly resonates with you.
You can go digital with a tool like Pinterest or get hands-on with a real corkboard and some magazine clippings. The tool itself doesn’t matter nearly as much as the mindset. As you start pulling images, try not to overthink it. If a room, a piece of art, or even a photo of a landscape catches your eye, save it.
- Look Beyond a Single Room Type: Don’t just search for “living rooms.” Inspiration is everywhere. Pin images of hotel lobbies, cool restaurants, and even fashion photography that has a vibe you want to capture.
- Focus on Feeling, Not Furniture: At first, try to ignore the specific sofa or coffee table in an image. Instead, pay attention to the overall mood. Does it feel calm and serene, or is it vibrant and full of energy?
- Gather Generously: Try to collect at least 30-40 images before you start trying to make sense of it all. This gives you enough raw data to start seeing real trends emerge.
The first part of this process is all about intuition. Let your gut guide you. Once you have a good collection, you can switch gears from gathering to analyzing.
Decoding Your Aesthetic Clues
Alright, now it’s time to step back and look at your mood board as a whole. This is the moment where your personal style starts to come into focus. You’re basically playing detective, looking for the common threads that tie your collection of images together.
Start by asking yourself a few simple questions:
- What Colors Keep Popping Up? Are you gravitating toward warm, earthy tones like terracotta and olive green? Or is your board filled with cool blues, grays, and crisp whites?
- Which Textures Do You See Over and Over? Do you notice a lot of soft, cozy materials like velvet and shearling? Or are you pinning rooms with raw wood, worn leather, and exposed brick?
- What Shapes and Lines Stand Out? Is the furniture in your saved images clean and linear, or does it have soft, curved, and organic shapes?
Don’t be surprised if you find a mix. Maybe you love the clean lines of modern furniture but also crave the warmth of rustic, natural textures. That isn’t a conflict—that’s your unique style profile starting to form. For a deeper dive, our guide on how to find your home decor style can walk you through more specific exercises.
Your personal style is found in the overlap of what you consistently admire. It’s the recurring colors, materials, and feelings that show up again and again in the things you choose.
Translating Vision into a Plan
Once you’ve identified these patterns, you can finally translate them into a real, actionable plan. This is how your abstract “vibe” becomes a practical roadmap for designing your room.
First, define your primary color palette. I usually recommend picking three to five colors that will be the foundation of the space. Understanding some basics of color theory for designers is incredibly helpful here, as it helps you create a room that feels harmonious and has the right psychological impact.
Next, make a list of the key materials and textures you want to feature—things like light oak, black metal, linen fabrics, or chunky knits.
This simple exercise gives you a powerful filter for every decision you make from here on out. When you’re looking at a new sofa, you won’t just ask yourself if you like it; you’ll ask if it fits the palette and textures you’ve already defined. This thoughtful approach is the best kind of help with designing a room you can get because it ensures the final space is a cohesive and authentic reflection of you.
Creating a Room Layout That Actually Works
A stunning room with a terrible layout is like a beautiful car with a flat tire—it looks great, but you won’t want to spend any time in it. Getting the layout right is the secret to a space that feels effortless and intuitive. This is where we move from abstract ideas to the practical art of space planning, guaranteeing your room is as functional as it is stylish.
At its core, a good layout is about making a room easy and pleasant to live in. It guides movement, creates balance, and ensures every piece of furniture serves a purpose. It’s the invisible framework that makes a room feel welcoming and complete, offering the most tangible help with designing a room.
Establish Your Focal Point
Every great room has a focal point. It’s the first place your eyes land when you walk in, the anchor that holds the entire design together. Sometimes, the room gives you an obvious one, like a fireplace or a large picture window with a stunning view.
If your room doesn’t have a built-in star, you get to create one. This could be a dramatic piece of art, a bold accent wall, or even a statement piece of furniture like a uniquely shaped sofa or a canopy bed. Once you’ve decided on your focal point, you can start arranging your main furniture pieces around it to draw attention and create a natural sense of order.
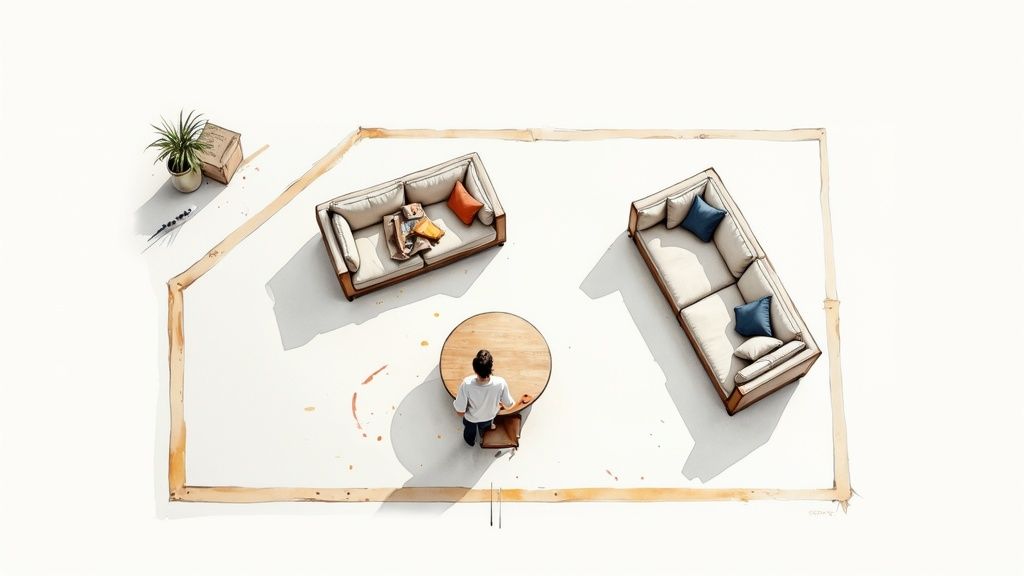
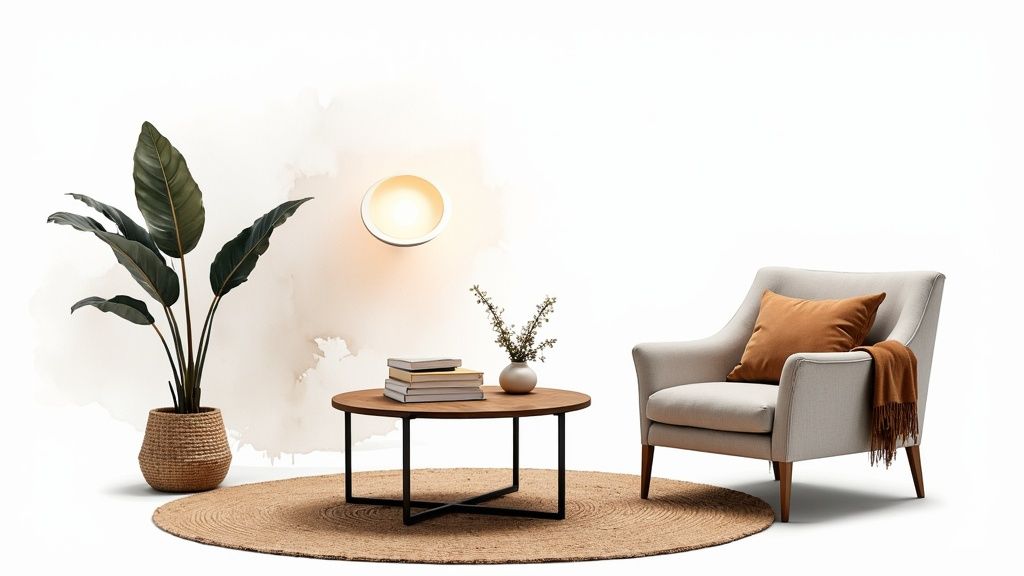
Create Functional Zones
Modern life often requires our rooms to be multi-functional. A living room might also need to be a home office, a playroom, and a spot for entertaining. Instead of letting these functions jumble together, the key is to create distinct zones for each activity.
Think about how you’ll actually use the space and carve out specific areas for those tasks. For example:
- A cozy reading nook: All you need is a comfortable armchair, a small side table, and a good task lamp tucked into a quiet corner.
- A dedicated conversation area: Arrange a sofa and two chairs facing each other, centered around a coffee table, to encourage interaction.
- A small workspace: Place a slim desk against a wall with a comfortable chair and focused lighting to create a clear work zone.
Zoning makes a room feel larger and more organized because each area has a clear, defined purpose. It prevents the space from feeling chaotic and ensures every square foot is being used effectively.
A well-planned layout considers not just where the furniture goes, but how people will move around it. The best designs prioritize clear, unobstructed pathways that make the room feel open and easy to navigate.
Map Out Your Traffic Flow
Traffic flow is just a fancy term for the natural pathways people take to walk through a room. A common mistake I see is placing furniture in a way that blocks these paths, forcing people to awkwardly weave around things. A good rule of thumb is to leave at least 30 to 36 inches for major walkways.
Before you commit to a layout, think about the room’s entry and exit points. Can you walk from one door to another without bumping into a coffee table or the arm of a sofa? Maintaining clear, logical traffic patterns is crucial for a room that functions smoothly in daily life.
One of the best professional tricks for visualizing this is completely free. Use painter’s tape to outline the footprint of your key furniture pieces directly on the floor. This simple act lets you physically walk around the “furniture” and get a real sense of scale and spacing. You’ll see instantly if that oversized sectional is going to feel cramped or if you have enough room to pull out dining chairs.
This hands-on approach takes the guesswork out of layout planning. It lets you experiment with different arrangements and make confident decisions before you spend a single dollar or move a heavy piece of furniture. To take this a step further, you can explore our detailed guide on how to create floor plans that delves into digital tools for even more precise planning. This combination of physical and digital mapping ensures your final layout is perfect.
How to Choose and Source Key Furnishings
This is where the magic really starts to happen. Your mood board and floor plan are about to jump off the screen and into your home. Choosing furniture isn’t just about filling a space; it’s about making your vision tangible with pieces that perfectly match your style, budget, and, most importantly, the room itself. A little strategy here turns an overwhelming task into a genuinely fun and rewarding process.
The secret? Prioritize. Not every single item needs to be a showstopper. I always tell my clients to start by identifying the “hero” pieces—those foundational items that will anchor the entire room. In a living room, that’s almost always the sofa. For a bedroom, it’s the bed. Once you’ve nailed down these crucial items, you have a solid foundation to build upon, making every other decision that much easier.
This approach is the most practical way to get help with designing a room because it cuts through the noise and prevents that dreaded decision fatigue. With your hero piece selected, everything else, from accent chairs to side tables, naturally falls into place around it.
Mixing High and Low for a Curated Look
Ever wondered how professional designers achieve that high-end, collected-over-time look? It’s all about the artful mix of investment pieces and budget-friendly finds. A room where everything comes from the same big-box store can feel a bit flat and impersonal. On the flip side, a space filled only with designer labels can feel stuffy (and, let’s be honest, decimate your budget). The real sweet spot is right in the middle.
Think strategically about where your money will make the biggest impact. Your hero pieces—the furniture that gets the most daily use—are where you want to invest in quality. This means your sofa, your mattress, or your dining table. These items need to withstand real life, so spending a bit more on solid construction and durable materials is a smart move that will pay off for years.
On the other hand, you can absolutely save on pieces that are more decorative or trend-driven.
- Accent tables: These are perfect for finding unique, inexpensive gems at flea markets, thrift stores, or budget retailers.
- Throw pillows & blankets: Textiles are the easiest and most affordable way to inject personality and color. Plus, you can swap them out whenever you feel like a change.
- Decorative objects: Vases, trays, and other accessories can be found at every price point, letting you add character without a huge investment.
This high-low strategy is what gives a room soul. It makes your space feel personal and curated, not like it was pulled from a catalog.
Mastering Scale and Proportion
Have you ever walked into a room where something just felt off? Maybe a massive, puffy sofa was crammed into a small room, or a tiny rug looked like a postage stamp in a huge living area. That’s a classic scale and proportion problem, and it’s one of the most common design mistakes I see.
Scale is about how an object’s size relates to the room itself, while proportion is how different objects’ sizes relate to each other. Getting both right is the key to creating a space that feels balanced and just plain good.
Before you fall in love with a piece of furniture online, go back to your floor plan and measurements. Remember that painter’s tape trick we talked about? It’s your best friend right now. Tape out the footprint of that sofa or dining table on your floor to get a real-world feel for how it will fit.
Don’t just trust the product photo. Furniture always looks different in a massive, perfectly lit photo studio than it will in your actual home. Always, always check the dimensions.
A handy rule of thumb for a coffee table is that it should be about two-thirds the length of your sofa and a similar height to the sofa’s cushions. For a dining room, you’ll want to leave at least 36 inches of clear space between the table’s edge and the wall (or any other furniture) so people can move around comfortably.
Creating a Smart Shopping Plan
Okay, let’s pull all this together into an actual plan. Before you even open a browser tab, create a prioritized shopping list. Put your hero pieces right at the top, followed by secondary furniture (like coffee tables and bookshelves), and finally, all the decorative accessories.
Next to each item, jot down a target budget. It doesn’t need to be exact to the dollar, but having a range keeps you focused and prevents that one “must-have” chair from derailing your entire project. This simple document is your roadmap, ensuring your money goes where it will have the most impact.
To help you decide where to splurge and where to save, I’ve put together a quick guide.
Investment vs. Budget-Friendly Pieces
This table breaks down where to allocate your budget for maximum impact and longevity in your new room design.
| Piece Category | Splurge (Invest Here) | Save (Budget-Friendly Options Work Well) |
|---|---|---|
| Upholstery | Sofas, armchairs, and any high-use seating. | Decorative accent chairs in a guest room. |
| Surfaces | Dining table, kitchen countertops. | Coffee tables, side tables, and consoles. |
| Lighting | Statement chandeliers or quality task lighting. | Decorative table lamps and floor lamps. |
| Textiles | Area rugs in high-traffic areas, quality bedding. | Throw pillows, curtains, and decorative blankets. |
| Storage | Dressers, media consoles used daily. | Bookshelves and occasional storage units. |
Using this framework will help you make intentional, smart purchasing decisions. The end result will be a beautiful, functional room that not only looks great but is built to last.
Pulling It All Together with Finishing Layers
With your main furniture in place, all the heavy lifting is done. But this last stage—adding the finishing layers—is what turns a well-arranged room into a space that truly feels like you. This is the fun part.
Think of it as the final 10% of effort that delivers 90% of the room’s personality. We’re talking about weaving in character through lighting, textiles, and decor. It’s the difference between a house that looks staged and a home that tells a story. Getting this part right is what makes a design feel complete and uniquely yours.
The Art of Layered Lighting
Lighting is one of the most powerful—and most often overlooked—tools in a designer’s kit. A single, harsh overhead light can make even the most beautiful room feel flat and sterile. The secret to creating a warm, inviting atmosphere is to layer different types of lighting.
A professional approach always includes three key layers:
- Ambient Lighting: This is your room’s overall illumination. Think recessed lights or a central ceiling fixture that provides a base layer of light.
- Task Lighting: This is focused light for specific activities, like a reading lamp next to a cozy armchair or under-cabinet lighting in a kitchen.
- Accent Lighting: This is the “jewelry” of your lighting plan. Use it to highlight a piece of art, a plant, or an interesting architectural detail.
When you combine all three, you gain total control over the room’s mood. You can create a bright, energetic space for a party or a soft, intimate setting for a quiet evening at home—all with the flick of a few different switches.
Styling Surfaces with Personality
Empty shelves and bare coffee tables are missed opportunities. Styling these surfaces is your chance to inject your personality and story into the space. The trick is to create curated vignettes, not cluttered piles.
Start by gathering a collection of objects you love: books, framed photos, small sculptures, candles, and treasured souvenirs from your travels.
A designer’s secret weapon for styling is the rule of threes. Grouping objects in odd numbers—especially threes—is naturally more appealing and balanced to the human eye. Try arranging a stack of books, a small vase, and a decorative object together for an instant, polished look.
Remember to vary the height, shape, and texture of the items in your groupings. It creates so much more visual interest. For instance, place a tall, slender vase next to a low, wide bowl. Mix smooth ceramic with the rough texture of natural wood. This kind of thoughtful arrangement turns everyday objects into a meaningful display.
Bringing in Warmth with Textiles
Textiles are the fastest way to add color, pattern, and softness to a room. Rugs, curtains, pillows, and throws are the essential layers that make a space feel cozy and complete. A great area rug, for example, can define a seating area, anchor all the furniture, and add a crucial layer of texture underfoot.
When you’re choosing textiles, pull up your mood board and refer back to your color palette and material plan. Create depth by mixing different textures—a smooth leather sofa paired with a chunky knit throw and velvet pillows is a classic combination for a reason. And don’t be afraid to mix patterns! As long as they share a common color, a floral print can look incredibly chic next to a simple stripe.
It’s no surprise that the global interior design software market is set to nearly double, growing from USD 5.4 billion to almost USD 9.7 billion by 2030. This growth is fueled by a surge in home renovation projects, showing a real trend of homeowners using technology to get hands-on with every detail. You can read more about these interior design market trends and see how tech is shaping the way we design our homes.
The Final Touch of Life
The last, most transformative layer is life itself. Nothing makes a room feel more vibrant and lived-in than plants and art. Plants introduce a natural, organic element that purifies the air and adds a welcome pop of green. Even a small succulent on a side table or a large fiddle-leaf fig in a corner can make a huge impact.
Art is the ultimate expression of your personal style, and it doesn’t have to be an expensive oil painting. It can be a gallery wall of family photos, a large-scale print you found online, or even a framed piece of beautiful fabric. The only rule is that it has to speak to you.
For the perfect placement, hang your art at eye level—that’s about 57-60 inches from the floor to the center of the piece. It’s the final touch that completes your beautifully designed room.
Common Questions About Designing a Room
 Even with the most perfect mood board and a solid plan, questions always pop up when you’re in the thick of designing a room. It happens to everyone. This is where a little practical help with designing a room can make all the difference, turning those “what if” moments into confident choices.
Getting these details right is what separates a nice room from a truly stunning one. Let’s walk through some of the most common questions I hear all the time so you can keep your project moving forward without a hitch.
How Do I Choose the Right Size Rug?
This is easily the number one hang-up for most people, and it’s a big one. A rug that’s too small can make an entire room feel like it’s shrinking. The golden rule is simple: your rug should be big enough to anchor the main furniture in a space.
Here’s how I break it down:
- In the living room: You want at least the front legs of your sofa and any armchairs to be sitting on the rug. This is what pulls the whole seating arrangement together into a cohesive, inviting group.
- For a dining room: The rug needs to extend at least 24 inches past the table on all sides. This is purely functional—it ensures that when people pull their chairs out to sit down, the chair legs don’t get caught on the edge of the rug.
- In the bedroom: A rug should frame the bed. My favorite placement is to have it start about a third of the way down from the headboard, extending past the foot of the bed and giving you a soft place to land on either side.
A well-sized rug defines the space and makes it feel more expansive. When in doubt, it’s almost always better to go a size up. A too-small rug can shrink the perception of your room.
Can I Mix Different Wood Tones?
Not only can you, but you absolutely should! A room where every piece of wood is the exact same shade can feel really flat and a bit dated—like you bought everything from a single catalog set in the ’90s. Mixing wood tones brings in so much depth and character, giving your space that curated, collected-over-time vibe.
The trick is to find a dominant wood tone to be your anchor. This is usually the largest wood element in the room, like your flooring or a big dining table.
From there, you can layer in one or two other complementary tones as accents. To make sure it all works together, look at the undertones. Woods with warm undertones (like cherry, mahogany, and hickory) naturally pair well. The same goes for woods with cool undertones (like ash, maple, or poplar). Just be sure to spread the different tones around the room to create a sense of balance.
How High Should I Hang My Curtains?
This is one of my favorite designer tricks because it instantly makes any room feel taller and more elegant. The rule is simple: hang your curtain rod high and wide.
Instead of installing the rod right above the window frame, which is what most people do, mount it 4 to 6 inches above it. Then, extend the rod 3 to 6 inches beyond the frame on each side. This simple change creates the illusion of much larger windows and lets in a ton of natural light when the curtains are open.
For the length, aim for curtains that either just “kiss” the floor or puddle slightly for a more luxurious, dramatic look.
Feeling inspired but need a little push to bring your vision to life? RoomGenius uses powerful AI to generate stunning redesigns of your space in seconds. Simply upload a photo, and let our technology provide the expert-level help with designing a room you’ve been looking for. Start your free trial today at RoomGenius.