10 Inspiring DIY Interior Decorating Projects for 2025
Feeling the itch to refresh your living space but worried about the cost and complexity? You’re in the right place. High-end design doesn’t have to come with a hefty price tag or require a professional contractor. With a little creativity and some hands-on effort, you can execute stunning updates that reflect your unique style and personality. This comprehensive guide is designed to empower you with the skills and inspiration needed to tackle transformative home updates yourself.
We will walk you through 10 impactful diy interior decorating projects, perfect for everyone from absolute beginners to seasoned crafters looking for their next challenge. Each item on our list is broken down into manageable, actionable steps, detailing the necessary materials, estimated costs, and expert tips to ensure a flawless, professional-looking finish. We’ll cover everything from creating a dramatic accent wall and installing stylish floating shelves to upcycling old furniture and crafting custom window treatments.
Get ready to roll up your sleeves and create a home that feels uniquely yours. This listicle proves that the most beautiful and personal spaces are often the ones you create yourself, one project at a time. Let’s dive in and unleash your inner designer.
1. Accent Wall with Peel-and-Stick Wallpaper
Creating a dramatic focal point doesn’t have to be a permanent, labor-intensive task. Peel-and-stick wallpaper is one of the most transformative diy interior decorating projects for renters and homeowners alike, offering a high-impact update without the commitment of traditional wallpaper. This adhesive-backed paper applies directly to your wall and can be removed cleanly, making it perfect for experimenting with bold patterns or textures.
This method is ideal for adding personality to any room. Imagine a nursery featuring a whimsical forest pattern, a home office energized by a sharp geometric design, or a bedroom made serene with botanical prints. Even small spaces like a powder room can feel luxurious with a marble-effect or textured grasscloth-look wallpaper.
Implementation Tips
To ensure a professional-looking finish, follow a few key steps for a bubble-free, seamless application.
- Prep the Surface: Begin with a clean, dry, and smooth wall. Wipe away any dust or grime and allow it to dry completely.
- Start from the Top: Align your first panel with the ceiling, leaving a slight overhang you can trim later. Work your way down, peeling the backing off slowly.
- Use a Squeegee: As you apply the paper, use a plastic smoother or squeegee to push out any air bubbles, working from the center outwards.
- Match the Pattern: When applying subsequent panels, carefully overlap and align the pattern for a continuous look. It’s wise to order about 15% extra material to account for this.
For those in rental properties, this technique provides a powerful way to personalize your space without risking your security deposit. Learn more about choosing the right temporary wallpaper for apartments and find the best removable wallpaper for your apartment on Room-Genius.com.
2. Gallery Wall Installation
Transforming a blank wall into a personal statement piece is one of the most rewarding diy interior decorating projects. A gallery wall allows you to curate a collection of art, photographs, and meaningful objects, creating a dynamic display that tells your unique story. This project is infinitely customizable and serves as a powerful focal point that grows with you over time.

A gallery wall can be adapted to any style or space. You could create a hallway filled with a black and white family portrait collection, design a living room feature with mixed media like vintage mirrors and botanical prints, or showcase your travel photography from world adventures. To gather more inspiration for arranging your cherished memories, explore various creative photo display ideas.
Implementation Tips
Achieving a balanced, cohesive look requires a bit of planning, but the results are well worth the effort.
- Plan Your Layout: Before making any holes, arrange all your pieces on the floor to visualize the composition.
- Create Paper Templates: Trace each frame onto paper, cut it out, and tape the templates to the wall. This lets you adjust the layout without any damage.
- Start with an Anchor: Position your largest piece first, typically near the center, and build the rest of your arrangement around it.
- Measure for Precision: Hang the center of the entire gallery at eye level (usually 57-60 inches from the floor) and use a level to ensure every frame is straight. Maintain about 2-3 inches of space between each piece for a clean look.
3. DIY Floating Shelves
Adding both functional storage and minimalist style, DIY floating shelves are among the most versatile diy interior decorating projects for any home. These shelves appear to float on the wall without visible brackets, creating clean, modern lines that declutter a space. This project involves building a simple box or solid shelf and mounting it with hidden hardware, offering a custom solution that maximizes vertical storage.
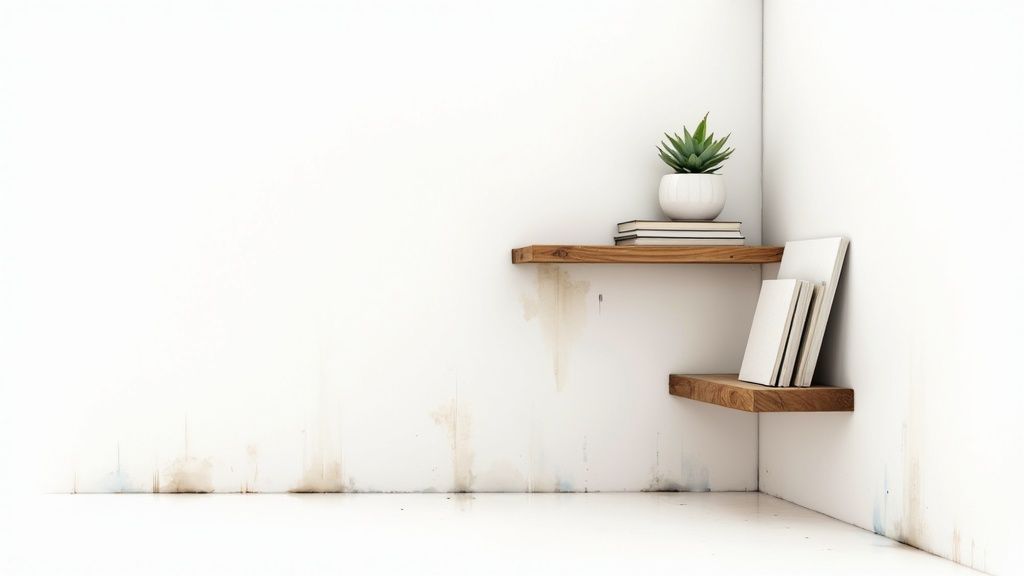
The applications are nearly endless. In a kitchen, they can elegantly display dishes and cookbooks. A bathroom can benefit from floating shelves holding toiletries and fresh towels, while a living room can showcase plants, art, and photo frames. This project allows you to tailor the size, material, and finish to perfectly match your room’s aesthetic, from rustic stained wood to sleek, painted finishes.
Implementation Tips
To ensure your shelves are both beautiful and structurally sound, focus on a precise and secure installation.
- Locate Studs: Always use a stud finder to locate wall studs. Anchoring the brackets directly into studs is critical for supporting weight safely.
- Drill Pilot Holes: Before driving screws into your wood or the wall, drill pilot holes to prevent the wood from splitting and ensure an easier installation.
- Sand and Finish: For a professional look, thoroughly sand the wood before painting or staining. Apply multiple thin coats, sanding lightly between each, and finish with a durable polyurethane coat for protection.
- Level Meticulously: Use a level multiple times during the installation process: once when marking your bracket position and again before securing the shelf to ensure it’s perfectly straight.
DIY furniture expert Ana White offers extensive free plans that can guide beginners through building sturdy and stylish shelves. This project is a fantastic way to gain basic woodworking skills while creating a high-impact, custom feature for your home.
4. Furniture Upcycling and Refinishing
Breathing new life into old, tired, or outdated furniture is one of the most rewarding diy interior decorating projects you can undertake. Upcycling transforms thrift store finds, inherited pieces, or even your existing furniture into custom-designed items that perfectly match your style. This sustainable approach saves money and diverts items from the landfill, allowing you to create something truly unique.

This method is incredibly versatile. A dated mid-century dresser can become a modern statement piece with a coat of navy paint and new brass hardware. You can also refinish a coffee table with a dark walnut stain for a sophisticated look or reupholster dining chairs in vibrant velvet to add a touch of luxury to your space. Even simple IKEA bookshelves can be upgraded with wood veneer and custom trim for a built-in appearance.
Implementation Tips
Achieving a professional, durable finish requires careful preparation and the right techniques.
- Prep the Surface: Thoroughly clean and degrease the furniture first. For painting, a light sanding creates a better surface for primer and paint to adhere to.
- Use Primer: Don’t skip the primer, especially on laminate or glossy surfaces. It prevents chipping and ensures even color coverage.
- Sand Between Coats: For an ultra-smooth finish, lightly sand with fine-grit sandpaper between each coat of paint, wiping away dust before applying the next layer.
- Seal for Durability: Protect your work with a top coat. A polyurethane or wax sealer will guard against scratches, stains, and daily wear and tear.
5. Custom Window Treatment Creation
Designing and sewing your own window treatments is one of the most rewarding diy interior decorating projects, offering complete creative control over style, fabric, and function. Store-bought options can be expensive and limited, but creating custom curtains, shades, or valances ensures a perfect fit for your windows and a seamless match with your room’s decor. This project allows you to select the ideal material and pattern to achieve a truly bespoke look.
This method is perfect for tailoring window coverings to specific needs. Envision a bedroom with luxurious, floor-puddling velvet drapes that block out light, a kitchen brightened by charming patterned Roman shades, or a formal living room framed by elegant, floor-to-ceiling linen panels. Even simple café curtains made from vintage fabric can add privacy and personality to a bathroom.
Implementation Tips
To achieve a polished, professional finish, precision and preparation are crucial.
- Measure Meticulously: Measure your window’s width and height multiple times before cutting any fabric. Add at least 4-6 inches to the width for adequate fullness and gather.
- Prepare Your Fabric: Always pre-wash and iron your chosen fabric to prevent shrinking after your project is complete. This ensures the treatments hang correctly for years to come.
- Use Drapery Weights: Insert small drapery weights into the bottom hem to help your curtains or drapes hang straight and look more professional.
- Consider No-Sew Options: If sewing isn’t your strong suit, you can achieve a similar custom look using fusible hem tape and a hot iron for a quick and easy alternative.
Understanding your options is key to a successful outcome. Learn more about how to choose window treatments for every room and find the best style for your home on Room-Genius.com.
6. Macramé Wall Hangings and Plant Hangers
Embrace bohemian flair and artisanal texture with one of the most satisfying diy interior decorating projects: creating macramé decor. This ancient craft of knotting cord into intricate patterns has made a major comeback, offering a way to add warmth, dimension, and a personal handmade touch to any space. It’s an accessible art form that requires minimal tools but yields stunning results.
This versatile technique can be used to create much more than simple plant hangers. Consider a large-scale wall hanging as a unique headboard alternative in a bedroom, a delicate macramé curtain to act as a soft room divider, or a collection of smaller pieces to add texture to a gallery wall. Decorative macramé shelves are also perfect for displaying small plants or cherished trinkets, combining beauty with function.
Implementation Tips
Getting started with macramé is easier than it looks. Following a few key principles will help you create uniform, beautiful knots from your very first project.
- Master the Basics: Start by learning fundamental knots like the square knot and half hitch. Practicing with scrap cord before beginning your project will build confidence.
- Choose the Right Cord: For most beginner projects, a 3mm or 4mm single-strand or 3-ply cotton cord provides a great balance of sturdiness and ease of use.
- Maintain Consistent Tension: The key to a professional-looking piece is keeping the tension of your knots uniform throughout the entire project.
- Create a Fluffy Fringe: To achieve a soft, feathery fringe on your wall hanging, use a pet brush or a fine-tooth comb to gently brush out the ends of the cord.
7. Statement Lighting Fixture Upgrade
Nothing dates a room faster than a generic, builder-grade light fixture. Upgrading your lighting is one of the most effective diy interior decorating projects for transforming a space, as it serves as both functional hardware and a piece of sculptural art. Replacing an outdated fixture with a modern statement piece can instantly elevate the room’s aesthetic, draw the eye upward, and define the overall style.
This project offers endless possibilities to match any decor. Consider a dramatic Sputnik chandelier for a mid-century modern dining room, a series of industrial-style pendants over a kitchen island, or a woven rattan shade to bring a warm, bohemian feel to a bedroom. Even a simple geometric brass pendant can add a touch of sophisticated glamour to an entryway.
Implementation Tips
While this project involves electrical work, it’s manageable for a careful DIYer. Safety and scale are the most important considerations.
- Safety First: Always turn off the power to the fixture at the circuit breaker box before you begin any work.
- Get the Scale Right: Measure your room’s dimensions and ceiling height. A dining room chandelier should hang 30-36 inches above the table and be about one-third the width of the table’s surface.
- Consider Ambiance: Test different bulb types and brightness levels to achieve the desired mood. Installing a dimmer switch is a great way to add versatility and control the atmosphere.
- Keep Original Fixtures: If you’re renting, store the original fixture safely so you can reinstall it when you move out. When in doubt about wiring, always hire a licensed electrician.
This upgrade is a fantastic way to add a high-end, custom feel to your home. For inspiration on classic and vintage-inspired styles, brands like Rejuvenation and Schoolhouse Electric offer a wide range of beautiful designs.
8. Indoor Plant Display and Vertical Garden
Bringing the outdoors in is one of the most effective diy interior decorating projects for breathing life and color into a space. Creating an indoor plant display or a vertical garden goes beyond placing a single pot on a windowsill; it’s about strategically using greenery as living decor. This approach uses plants of various sizes, textures, and colors to purify the air, create stunning focal points, and cultivate a calming atmosphere.
This project is incredibly versatile. You can create a living wall with mounted pocket planters for a dramatic statement in your living room, style a ladder shelf with cascading pothos and sculptural snake plants, or suspend a collection of hanging plants in a sunny window for a bohemian feel. Even a small kitchen can host a functional and beautiful herb garden on floating shelves, adding both beauty and fresh flavors to your home.
Implementation Tips
To cultivate a thriving indoor garden that enhances your decor, focus on smart plant selection and placement.
- Assess Your Light: Before buying plants, observe the natural light in your chosen spot. South-facing windows are bright and direct, while north-facing windows offer less intense light. Match plants to the available light.
- Group by Needs: Place plants with similar watering and humidity requirements together. This makes care routines simpler and helps them thrive as a community.
- Vary Heights and Textures: Create visual interest by combining tall, upright plants like a Fiddle Leaf Fig with trailing plants like a String of Pearls and bushy plants like a Calathea.
- Choose the Right Planters: Use cachepots (decorative outer pots without drainage holes) to catch excess water and protect your furniture and floors. Ensure your inner pot has drainage.
- Start Simple: If you’re new to plant care, begin with low-maintenance varieties like ZZ plants, snake plants, or pothos that are famously resilient.
Popularized by plant experts like Hilton Carter and retailers like The Sill, this trend empowers anyone to become a “plant stylist.” A well-curated plant display is a dynamic and rewarding way to personalize your home.
9. Decorative Molding and Trim Installation
Adding architectural interest is one of the most effective diy interior decorating projects for elevating a room from standard to sophisticated. Installing decorative molding and trim, such as crown molding, wainscoting, or board and batten, introduces depth, character, and a custom-built feel. This technique transforms plain, flat walls into elegant surfaces that mimic high-end millwork for a fraction of the cost.
This method can be adapted to suit any style. Imagine a formal dining room with classic picture frame molding, a cozy bedroom featuring a rustic board and batten accent wall, or a traditional hallway protected and beautified by wainscoting. Even simple additions like a chair rail can create a powerful visual divide for two-tone paint schemes, adding a layer of architectural polish to your space.
Implementation Tips
Achieving a professional, seamless finish requires precision and patience. Follow these key steps for a successful installation.
- Measure Twice, Cut Once: Accuracy is crucial. Use a quality miter saw for clean, angled cuts. For crown molding, consider using pre-made corner blocks to simplify difficult joints.
- Prep and Paint First: It’s much easier to prime and paint your trim pieces before they are installed on the wall. You can then do minor touch-ups after installation.
- Secure Properly: Locate and mark wall studs before you begin. Use a nail gun with finishing nails to attach the trim securely, then fill the nail holes with wood filler.
- Finish with Caulk: Apply a thin bead of paintable caulk to all seams where the trim meets the wall and at the joints. This creates a flawless, built-in appearance once painted.
This project is perfect for homeowners looking to add lasting value and timeless elegance to their interiors. To start with a classic and functional trim, learn more about the purpose and placement of a chair rail on Room-Genius.com.
10. Textile Layering and Custom Pillow Covers
Adding warmth, color, and personality to a room is often best achieved through soft furnishings. Textile layering is one of the most versatile diy interior decorating projects, allowing you to introduce new patterns and textures without making permanent changes. This involves strategically combining items like throw blankets, area rugs, and custom-made pillow covers to create a rich, inviting atmosphere.
This project is perfect for seasonal updates or refreshing your decor on a budget. Imagine a sofa styled with a mix of velvet, linen, and patterned pillows for visual interest, or a bed layered with euro shams and accent cushions. Even a simple reading nook becomes cozier with a coordinated throw blanket and custom pillow, demonstrating how fabric can instantly elevate a space.
Implementation Tips
To achieve a professional, designer-inspired look, focus on a balanced mix of textures, patterns, and sizes.
- Mix and Match: Combine one large-scale pattern, one smaller-scale pattern, and one solid color for a cohesive arrangement.
- Vary Pillow Sizes: Use different sizes, such as 22”, 20”, and 18” pillows, to create dimension and avoid a flat, uniform look.
- Follow the Rule of Odds: Style pillows in odd-numbered groups (three on a loveseat, five on a larger sofa) for a more dynamic and visually appealing result.
- Sew Your Own Covers: Create perfectly fitted covers by adding one inch to your pillow insert’s measurements. Pre-washing fabric prevents shrinking, and an envelope closure makes covers easy to remove and wash.
Beyond simple fabric choices, consider adding unique details to your pillow covers. For example, you can learn to create custom fringed pillows for a bespoke, high-end touch that truly personalizes your space.
DIY Interior Decorating Projects Comparison Table
| Item | Implementation Complexity 🔄 | Resource Requirements ⚡ | Expected Outcomes 📊 | Ideal Use Cases 💡 | Key Advantages ⭐ |
|---|---|---|---|---|---|
| Accent Wall with Peel-and-Stick Wallpaper | Low - Beginner friendly, no tools needed | Moderate - wallpaper rolls ($50-300) | Dramatic focal wall, non-permanent, 3-5 years life | Renters, quick room refresh | Easy to apply/remove, cost-effective |
| Gallery Wall Installation | Medium - Requires planning and layout | Moderate - frames, art prints ($100-500) | Personalized, curated visual display, flexible | Personal art display, large wall coverage | Highly customizable, sentimental |
| DIY Floating Shelves | Medium - Woodworking skills and tools needed | Low to Moderate - $30-100 per shelf | Custom storage, modern look, floor space saving | Storage solutions, minimalist decor | Custom fit, adds value, sleek appearance |
| Furniture Upcycling and Refinishing | Variable - beginner to advanced skills | Low to Moderate - $30-150 materials | Renewed furniture style, eco-friendly, unique pieces | Sustainable decor, creative projects | Cost-saving, creative expression |
| Custom Window Treatment Creation | Medium - Sewing skills required | Moderate - $50-200 per window | Perfect fit, tailored style, professional finish | Window décor, seasonal updates | Cost-effective custom style, fabric choice |
| Macramé Wall Hangings and Plant Hangers | Low to Medium - simple to complex knotting | Low - $15-50 materials | Textured, bohemian decor, handmade feel | Boho style, plant displaying, gifting | Affordable, therapeutic, minimal tools |
| Statement Lighting Fixture Upgrade | Medium - Basic to advanced electrical skills | Variable - $50-500+ fixtures | Dramatic lighting impact, room ambiance upgrade | Lighting upgrade, style statement | Quick transformation, adds value |
| Indoor Plant Display and Vertical Garden | Low - Beginner friendly | Moderate - $50-300 plants and planters | Adds life, air quality improvement, visual interest | Greenery indoors, wellness enhancing | Flexible, therapeutic, budget-friendly |
| Decorative Molding and Trim Installation | High - Advanced carpentry skills | Moderate to High - $100-500 materials | Architectural detail, upscale look, wall protection | Home remodeling, high-end decor | Adds value, hides imperfections |
| Textile Layering and Custom Pillow Covers | Low - Beginner sewing | Low to Moderate - $50-200 fabrics | Warmth, texture, seasonal refresh | Soft furnishings, color updates | Affordable, easy style update |
Bringing Your Vision to Life
You have now explored a diverse collection of ten impactful diy interior decorating projects, each offering a unique pathway to personalize and elevate your living space. From the immediate transformation of a peel-and-stick wallpaper accent wall to the subtle, textural warmth of custom pillow covers and macramé hangings, the power to create a home that reflects your personality is firmly in your hands. We have moved beyond mere ideas and into the realm of actionable plans, outlining the specific materials and steps needed to turn your creative vision into a tangible reality.
The true value of these projects lies not just in the beautiful outcomes but in the process of creation itself. Each brushstroke on an upcycled dresser, every carefully measured cut for your DIY floating shelves, and each knot in a macramé plant hanger builds not only a more beautiful home but also a deeper connection to it. You are no longer just a resident; you are the curator, the designer, and the craftsperson of your own environment.
Key Takeaways for Your Decorating Journey
As you prepare to embark on your next project, keep these core principles in mind to ensure a successful and rewarding experience:
- Start with Impact: Choose a project that offers a significant visual return for your effort. Projects like a gallery wall or a statement lighting fixture upgrade can instantly change the entire mood of a room with relatively focused work.
- Embrace Your Skill Level: Be honest about your current abilities. If you are a beginner, starting with a simpler task like creating custom pillow covers or installing peel-and-stick wallpaper can build crucial confidence for more complex undertakings, such as installing decorative molding.
- Plan and Prepare: The success of any DIY project hinges on preparation. Gather all your materials, clear your workspace, and read through all the steps before you begin. This simple discipline prevents mid-project frustration and ensures a smoother, more enjoyable process.
- Texture is Transformative: Never underestimate the power of texture. Layering textiles, adding a vertical garden, or hanging a woven wall art piece introduces a depth and coziness that paint alone cannot achieve.
Your Actionable Next Steps
Feeling inspired is the first step; taking action is what creates change. To move from inspiration to implementation, consider this simple approach:
- Select Your Space: Identify one room or even just one small corner that you want to improve.
- Choose One Project: Review the list and select the single project that excites you the most and feels achievable for that specific space.
- Create a Budget and Timeline: Determine how much you can spend and realistically when you can complete the work. Breaking it down makes the entire process feel less overwhelming.
Embarking on diy interior decorating projects is a journey of continuous improvement and self-expression. Each completed task refines your skills and brings you one step closer to a home that is a true sanctuary, perfectly tailored to your life. So, roll up your sleeves, embrace the creative process, and begin building the space you have always envisioned.
Feeling inspired but struggling to visualize how these changes will look in your own home? Take the guesswork out of your design decisions with RoomGenius. Upload a photo of your room to experiment with different wall colors, furniture layouts, and decor styles in seconds, ensuring your next DIY project is a perfect fit before you even start. Discover your home’s full potential at RoomGenius.