Distressing Furniture How To Get That Perfect Vintage Look
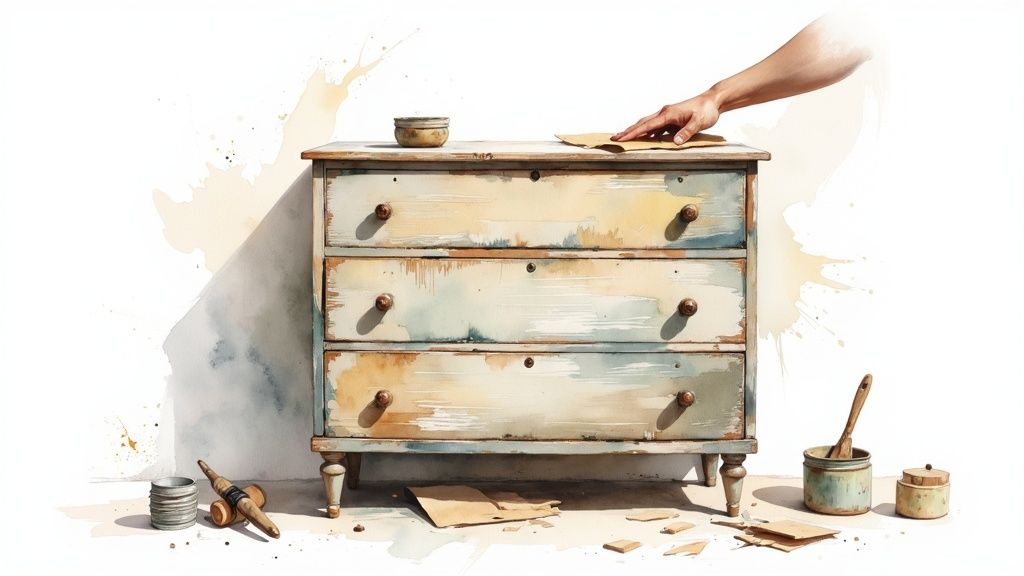
Distressing furniture is a fantastic way to give a piece of furniture that charming, well-loved vintage look. It’s a simple process, really—a bit of sandpaper, some layered paint, and you can add a whole lot of character and story to an otherwise plain item, turning it into something truly unique.
Why That Perfectly Imperfect Look Works
Before you start sanding away, let’s talk about why a distressed finish is so appealing. This isn’t just about making new furniture look old. It’s about giving a piece a soul—a sense of history and warmth that you just don’t get from sterile, mass-produced items.
A good distressed finish tells a story. It suggests a piece has been used and loved for years, making a house feel more like a home. It’s how you turn a generic dresser or a boring side table into a real statement piece. This is a core concept in the world of DIY, and understanding how to upcycle furniture is a great foundation for any distressing project.
Finding Your Distressing Style
Distressing isn’t a one-size-fits-all technique. For the final look to feel intentional and not just like you’ve made a mistake, you need a clear design vision. Knowing the nuances between popular styles is the secret to getting an authentic finish that truly elevates your home decor.
Here are a few popular aesthetics where distressed furniture really shines:
- Shabby Chic: This is all about soft, romantic vibes. Think gentle sanding over pastel colors like creamy whites, soft pinks, and powder blues to create a delicate, chippy paint look. The goal is elegance that feels comfortable and lived-in.
- Rustic Farmhouse: This style is sturdy, practical, and incredibly warm. It often calls for heavier distressing, letting the natural wood grain peek through darker or neutral paint colors. It’s all about creating that cozy, countryside feel.
- Coastal or Beach House: Imagine how the sun, sea, and salt would naturally weather wood. That’s the look you’re after. Light blues, seafoam greens, and sandy whites are perfect, often applied with techniques like dry brushing to get that sun-bleached finish.
The key is to make your distressing look authentic, not just random. You’re trying to replicate the natural wear and tear that happens over decades. Think about where a piece would naturally get bumped, rubbed, and worn down.
This trend toward personalized, unique home décor has exploded globally. In fact, furniture with distressed finishes makes up a huge part of the market, both in new manufacturing and the furniture flipping world. For a deeper look into the industry, you can explore the furniture market data from IBISWorld.
Ultimately, settling on a style will guide every decision you make, from your paint color to the specific distressing methods you choose. If you’re still figuring out your home’s aesthetic, our guide on the https://www.room-genius.com/blog/different-types-of-home-interior-design-styles/ is a great place to start.
Setting Up Your Workspace for Success
A beautifully distressed finish doesn’t just happen. It’s born from good prep work. Before you even touch a paintbrush or a piece of sandpaper, getting your space and supplies in order will save you from a world of frustration and those mid-project runs to the hardware store. This isn’t just about ticking boxes on a checklist; it’s about setting the stage for a great result.
Think of your work area as your creative studio. You’ll want a spot with decent ventilation—a garage with the door cracked or a well-aired basement works perfectly. This keeps the paint fumes from getting overwhelming. Throw down some drop cloths to protect your floors from the inevitable drips, dust, and general mess. Having everything you need within arm’s reach means you can stay in the creative zone instead of constantly hunting for a tool.
Assembling Your Distressing Toolkit
You don’t need to spend a fortune on tools, but you do need the right tools for the job. Investing in a few quality basics will make the entire process feel less like a chore and more like a fun project.
Your core supplies really fall into a few key groups:
- Cleaning and Prep: You have to start with a clean slate. A good degreasing cleaner like Simple Green or even a simple mix of vinegar and water will slice through years of built-up grime. Grab some lint-free cloths for both cleaning and applying finishes later on.
- Sanding Essentials: Sandpaper is your main distressing weapon. I recommend getting a variety pack with different grits. Coarse grits (60-80) are for the heavy lifting, like knocking down a stubborn old finish. A medium grit (120-150) is your workhorse for general scuff-sanding and creating that classic worn look. Fine grit (220+) is what you’ll use for smoothing between paint coats or for a much more subtle, soft-to-the-touch distressing.
- Application Tools: A decent set of paint brushes is non-negotiable. An angled brush is a lifesaver for cutting into corners and details, while a standard flat brush is great for bigger, open surfaces. It’s also smart to have a few cheap chip brushes on hand for applying things like wax or glaze.
One of the most common mistakes I see is people grabbing the cheapest sandpaper they can find. It just falls apart and clogs up. Spend a few extra dollars on a quality brand—it works faster and gives you a much more consistent result, which is everything when you’re trying to create a believable distressed finish.
Choosing the Right Paint for Your Distressing Project
The paint you pick is probably the single biggest factor that will influence your final look and how easy (or hard) the distressing process is. Different paints behave in completely different ways, so matching the paint to your vision is critical.
To help you decide, here’s a quick rundown of the most popular options you’ll find.
Choosing the Right Paint for Your Distressing Project
| Paint Type | Key Characteristics | Best For | Ease of Distressing |
|---|---|---|---|
| Chalk Paint | Ultra-matte, thick, requires minimal prep, and adheres to almost any surface. | Beginners, shabby chic, rustic looks. | Very Easy |
| Milk Paint | Comes as a powder you mix with water. Creates an authentic, chippy, aged finish. | Achieving a genuinely old, flaky look. | Easy (but less predictable) |
| Latex/Acrylic | Standard wall paint. Durable and available in endless colors. Requires primer for adhesion. | Modern farmhouse, projects needing specific colors. | Moderate |
| Oil-Based | Extremely durable but has strong fumes and long dry times. | High-traffic pieces where durability is key. | Difficult |
Honestly, chalk paint is incredibly forgiving and feels like it was made for distressing. It sands away beautifully, creating those soft, worn edges with very little muscle.
But if you want a truly authentic, chippy finish that looks like the paint has been flaking away for decades, nothing beats milk paint. It has this unique quality where it naturally chips and cracks as it dries, giving you a head start on the whole aging process. It’s a bit unpredictable, but that’s part of its charm.
Final Touches and Safety Gear
Beyond the absolute basics, a couple more items will really elevate your project and, more importantly, keep you safe.
You’ll definitely need a topcoat to protect all your hard work. Your main options are a soft furniture wax, which gives a beautiful matte, hand-rubbed look, or a water-based polycrylic. Polycrylic is the way to go for a durable, non-yellowing seal on high-use surfaces like tabletops or chairs.
And please, don’t skip the safety gear. A simple dust mask is essential when you’re sanding to keep from breathing in all those fine particles. A good pair of gloves will also save your hands from paint, stains, and a whole lot of scrubbing.
With your space prepped and your toolkit ready to go, you’re all set to start the fun part—the transformation.
Getting to Know the Core Distressing Methods
Alright, your workspace is set, and your tools are laid out. Now for the fun part—this is where your piece of furniture really starts to come alive. We’re going to dive into the hands-on techniques that take a freshly painted item and give it genuine character and a story to tell. The real art here is to make the aging process look natural, not like you just took a sander to it without a plan.
Every method creates a different vibe, from a soft, sun-bleached fade to a heavily chipped, rustic finish. Knowing which technique to use for the style you’re going for is what really elevates the final product. Let’s walk through the core methods you can use, either on their own or mixed together, to get that perfect look.
Think of any furniture project as a simple three-act play: Prepare, Paint, and Protect. Nailing these fundamentals in order is your ticket to a great finish.
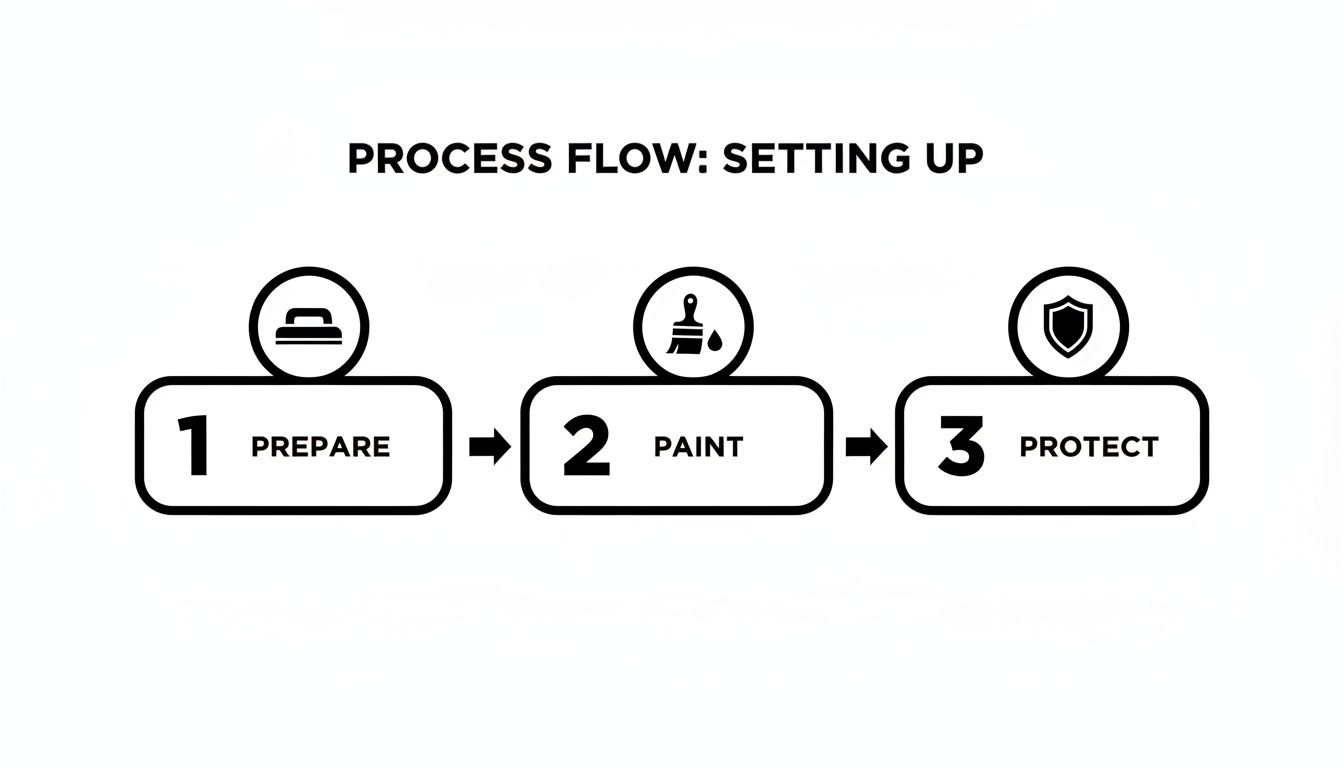
Getting this sequence right provides a solid foundation before you even start the creative work of distressing.
The Art of Sanding for a Worn Look
Sanding is probably the most straightforward and popular way to distress furniture. It’s a beautifully simple approach that gives you a ton of control over the end result. The secret? Focus your efforts on the spots that would naturally get worn down over years of use, and don’t go overboard.
Just picture a piece of furniture that’s been in a family for generations. Where does it show its age?
- Edges and Corners: These areas are always the first to get bumped and rubbed.
- Around Hardware: The spots around knobs and pulls see a lot of action.
- Raised Details: Carvings, mouldings, and decorative trim naturally lose paint on their high points.
- Legs and Feet: The base of any piece inevitably gets scuffed and kicked.
Grab a medium-grit sandpaper (around 150-grit is a good starting point) and start gently rubbing these key areas. You don’t need a lot of muscle; let the sandpaper do the work. The idea is to remove just enough of the top coat of paint to let the wood or a base color show through.
One of the biggest mistakes I see beginners make is sanding the big, flat surfaces, like the middle of a drawer front or a tabletop. It just doesn’t look authentic and can make the piece look damaged instead of gracefully aged. For a believable finish, stick to those high-contact zones.
Layering Paint with the Wax-Resist Method
If you’re after a more complex, multi-toned look, the wax-resist method is a total game-changer. This technique creates the illusion that layers of paint have worn away over decades, revealing an older color underneath. It’s absolutely perfect for that classic shabby chic or farmhouse style.
The process itself is surprisingly simple. Start by painting your base color—this will be the color that peeks through. Once that’s completely dry, grab a wax block (honestly, even a plain old candle works) and rub it on the spots where you want the distressing to happen, like those edges and corners we talked about.
Now, paint your top coat right over the whole piece, wax and all. After the top coat dries, just take a fine-grit sanding block or a soft cloth and gently buff the waxed areas. The paint won’t stick to the wax, so it will flake away beautifully, revealing that hint of base color.
Creating Texture with Dry Brushing
Dry brushing is a fantastic technique for when you want to add subtle texture and a soft, weathered look. It’s less about removing paint and more about adding just a whisper of color, almost like the sun has naturally faded it over time. This works wonders for coastal or rustic styles where you want a hint of age without heavy-handed distressing.
Here’s how you do it: dip the very tips of your paintbrush bristles into your paint. Then—and this is the key—blot almost all of it off on a paper towel until the brush looks nearly dry.
Using a very light touch, just skim the brush over the surface of your furniture. The tiny bit of pigment left will catch on raised details and textures, creating these beautiful, feathery streaks. It’s a great way to add dimension and is a versatile skill for all sorts of https://www.room-genius.com/blog/diy-interior-decorating-projects/.
Achieving Soft Edges with Wet Distressing
Working with a porous paint like chalk or milk paint? Wet distressing is a wonderful, low-mess alternative to sanding. It gives you a much softer, more blended effect because you’re gently wiping the paint away instead of sanding it off.
Wait until your final coat of paint is dry to the touch but hasn’t fully cured (this timing can vary, but usually within an hour or two). Take a damp, lint-free cloth and just gently rub the areas you want to distress. The moisture softens the paint, letting you wipe it away smoothly to create a gorgeous, feathered edge.
Adding Authentic Dings and Dents
The final touch for true authenticity is physical distressing—the little nicks and dents that tell a story. You can easily add some believable wear and tear before you seal your piece with a few common items you probably have lying around.
- Hammer: Use the side of a hammer to gently tap along edges and legs for small dents.
- Chain: Lightly whipping a piece with a small chain creates wonderfully random, organic-looking marks.
- Screws in a Sock: Toss a few screws or nuts into an old sock, and you’ve got the perfect tool for creating a cluster of varied dings.
The key here is subtlety. A few thoughtfully placed marks will always look better than covering the whole piece in damage. It’s a technique with deep roots; historically, artisans would distress new furniture to make future wear and tear blend in. Today, it’s a design trend in its own right, with some market surveys showing that 25-30% of furniture buyers actively seek out distressed or antique-style finishes.
Of course, before you start any of these creative techniques, having a good handle on the basics is essential. A solid understanding of the painting process, like the steps outlined in this guide on how to paint kitchen cabinets, will give you the confidence you need for a fantastic result.
Adding Depth with Glazes and Waxes
You’ve done the sanding, maybe even chipped some paint away, but something’s still missing. This is where the real artistry comes in. Simply scuffing up the edges can look a bit one-dimensional, but the secret to a truly authentic, time-worn piece is creating a patina—that subtle accumulation of grime and oils that naturally happens over decades.
This is exactly where glazes and waxes shine. They settle into all the little details—the carvings, the corners, the crevices—to create shadows and highlights that give your finish incredible dimension. This layer is what separates a piece that looks “painted and sanded” from one that feels genuinely old.
Mastering Antiquing Glaze
Think of antiquing glaze as liquid shadow. It’s a translucent, tinted liquid that you brush on, and it’s designed to stick in the low spots while you wipe it off the high spots. It’s absolutely perfect for making ornate details on a dresser or the carved legs of a table pop with aged, three-dimensional character.
The technique is a simple push-and-pull. You’ll brush the glaze over your painted surface, making sure to push it into every nook and cranny. Then, before it dries, you take a clean, lint-free cloth and gently wipe the glaze off the flat, raised surfaces. What’s left behind is a beautiful, dark accent in all the recessed areas.
A Few Tips for a Flawless Glaze Application:
- Work in small, manageable sections. Glaze starts to dry pretty quickly. To avoid a tacky, unworkable mess, focus on one area at a time, like a single drawer front or one table leg.
- Keep two cloths handy. Use your first cloth for the initial wipe-down to remove the bulk of the glaze. Then, grab a second, cleaner cloth to soften and blend the edges for a much more natural, feathered look.
- Seal first, then glaze. This is a pro-level trick. Applying a thin coat of clear, water-based polycrylic before glazing gives you a safety net. It creates a barrier that prevents the glaze from staining the paint, so you have more time to work and can easily wipe back any excess.
Want a truly custom look? Make your own glaze. Just mix a tiny amount of dark paint—brown or black usually works best—into a clear glazing medium. Keep adding and mixing until you hit the perfect transparency for your project.
Getting the tone right is everything. If you’re planning more projects, getting a handle on how to choose color schemes for your home will give you a huge advantage in creating a cohesive, professional-looking space.
The Power of Dark Wax
For a softer, hand-rubbed look, turn to dark furniture wax. Where glaze creates sharp, defined shadows, dark wax provides an all-over warmth and a soft, aged luster. It’s especially gorgeous over chalk paint because it both deepens the color and seals the porous finish in one go.
The process feels more like polishing than painting. You’ll work the wax into the details with a cloth or a dedicated wax brush, then use a clean cloth to buff away the excess from the high points. This leaves a rich patina that looks like it’s been building for years. The more you buff, the more it shines.
A Tale of Two Finishes: Glaze vs. Wax
| Feature | Antiquing Glaze | Dark Wax |
|---|---|---|
| Final Look | Creates defined shadows and sharp contrast in crevices. | Gives a soft, all-over aged warmth with a subtle sheen. |
| Application | Brush on, then wipe off the excess from high points. | Apply with a cloth or brush, then buff to the desired finish. |
| Best For | Highlighting ornate carvings, deep textures, and details. | Pieces with smoother lines or for creating a mellow, lived-in feel. |
| Protection Level | Almost none. It needs a separate topcoat for any real durability. | Offers light protection and a water-resistant finish on its own. |
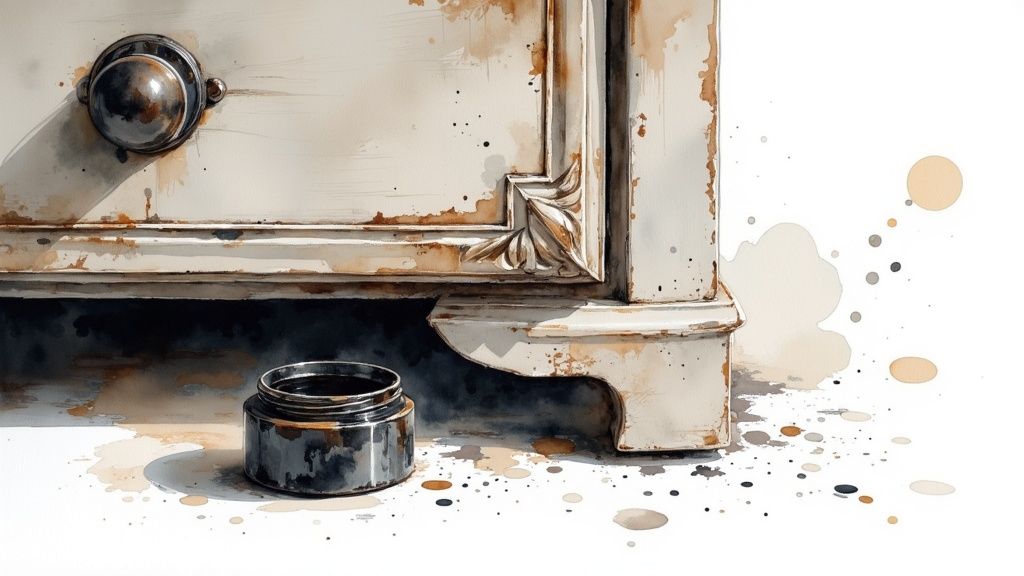
Don’t Forget the Hardware
Nothing screams “fake” like shiny new knobs on a beautifully aged piece of furniture. Authenticity lives in the details, so making sure your hardware looks the part is a crucial final step.
Thankfully, you don’t need to be a blacksmith to get it right. While you can use chemical solutions on solid brass to speed up natural oxidation, a simple paint technique works on just about any metal.
- First, give the hardware a good cleaning to get rid of any grime or oils.
- Next, hit it with a light coat of matte black or dark brown spray paint.
- Once it’s fully dry, take a tiny bit of metallic craft paint (bronze or dark silver works well) on a dry brush and lightly skim it over the raised edges and details.
This technique perfectly mimics years of use, where the original finish has been rubbed away from the most-touched spots. It’s a small detail that makes a world of difference, ensuring every element of your furniture tells the same cohesive, time-worn story.
Protecting Your Finish for the Long Haul
You’ve spent all this time sanding, painting, and perfectly aging your piece. Now comes the most critical step: protecting all that hard work. Without a good topcoat, your beautifully imperfect finish is vulnerable to spills, dust, and the general chaos of daily life. This final layer is what ensures your distressed masterpiece actually lasts.
The sealant you pick does more than just protect; it’s a design choice that fine-tunes the final look. Different topcoats offer various sheens and durability levels, so it’s all about matching the product to the piece’s future. A decorative console table in a low-traffic hallway has completely different needs than a kitchen table that sees homework, dinner, and coffee every single day.
Choosing Between Wax and Polyurethane
When it comes to sealing a distressed finish, you’re generally looking at two main options: furniture wax or a liquid topcoat like polyurethane. Each one has its place, and the right choice really depends on the look you want and the protection you need.
Furniture wax is my go-to for achieving that soft, hand-rubbed finish that just feels authentic. It beautifully deepens the color of chalk or milk paint, giving it a subtle luster without a plastic-y shine. It’s absolutely perfect for pieces that won’t see a ton of action, like a bedroom dresser, a nightstand, or a decorative accent table.
For high-use surfaces that need to be bomb-proof, you have to go with a water-based polyurethane (often sold as polycrylic). I’m talking dining tables, coffee tables, and kitchen chairs—anything that has to stand up to moisture and scratches. It creates a much harder, more resilient barrier.
My rule of thumb is pretty simple: if you’re going to put a wet glass on it, it needs polycrylic. If it’s more for looks and gentle use, wax will give you a far more authentic, matte finish that feels true to the vintage vibe.
How to Apply Furniture Wax Correctly
Applying wax is simple, but your technique makes all the difference between a beautiful glow and a sticky, dust-collecting mess. Just remember the golden rule: less is more.
- Get Your Tools Ready: Grab a dedicated wax brush or a clean, lint-free cloth. I prefer a round wax brush because it’s great for getting into all the little details and crevices of a piece.
- Apply a Thin Coat: Scoop just a tiny bit of wax and work it into the surface with circular or back-and-forth motions. You’re not icing a cake; you’re aiming for a thin, even layer that just covers the paint.
- Wipe Off the Excess: This is key. Immediately after you apply the wax, take a clean cloth and gently wipe away any excess.
- Buff it to a Sheen: Let the wax sit for about 15-20 minutes. It should feel just slightly tacky to the touch. Now, take another clean cloth and buff the surface until you see a soft, beautiful sheen emerge.
Application Tips for Polycrylic Topcoats
When durability is the name of the game, water-based polycrylic is your best friend. The big advantage over traditional oil-based polyurethane is that it won’t yellow over time—a non-negotiable for preserving the true color of white or light-colored paint.
Best Practices for a Flawless Finish:
- Invest in a Good Brush: A high-quality synthetic bristle brush makes a world of difference in minimizing brush strokes.
- Thin Coats are Better: Never try to get it done in one thick coat. You’ll get a far more durable and professional-looking finish with 2-3 thin, even coats.
- Sand Lightly Between Coats: Once a coat is completely dry, give it a quick, gentle sanding with very fine-grit sandpaper (320-grit or higher). This knocks down any tiny dust specks and gives the next coat the perfect surface to grab onto.
- Respect the Cure Time: Your piece might feel dry to the touch in just a few hours, but don’t be fooled. Most water-based topcoats take a full 21-30 days to completely cure and reach maximum hardness. Be extra gentle with it during this time to avoid dings and scratches.
Got Questions? We’ve Got Answers.
When you’re in the middle of a project, it’s easy to get stuck. Even the best of us run into a snag or two, especially when you’re just learning how to distress furniture. We’ve been there, so we’ve pulled together some of the most common questions and troubleshooting tips that come up.
Think of this section as your personal cheat sheet for getting through those tricky spots and making sure your project turns out great.
Is Every Piece of Furniture a Good Candidate for Distressing?
You can distress almost anything, but for the most authentic and beautiful results, solid wood is king. There’s just no substitute for the way real wood grain peeks through the paint, giving you that genuinely aged look we’re all after.
Now, that doesn’t mean you can’t tackle laminate or veneer. It’s just a different ballgame. You’ll need to use a heavy-duty, shellac-based primer to get the paint to stick. If you sand through that thin top layer, you’ll hit particleboard, which isn’t the look you want. My advice? If it’s your first time, stick with solid wood. You’ll have a much more forgiving and enjoyable experience.
Help! I Got Carried Away and Sanded Too Much.
It happens. You get in the zone, the dust is flying, and next thing you know, you’ve got a big, raw spot that looks more like a mistake than intentional wear. Don’t worry, this is an easy fix.
All you have to do is paint right over the over-sanded area. Just brush a thin coat of your top color over the spot, let it dry completely, and then come back with a much lighter hand. This time, use a fine-grit sanding block for better control, or try wet distressing with a damp cloth for a subtler effect.
Here’s a pro tip I swear by: Step away from your piece every few minutes. Seriously, just walk to the other side of the room. It gives you a fresh perspective on the overall balance and helps you see where you might need a little more love—or where it’s time to stop.
Why Does My Finished Piece Feel Tacky?
A sticky finish is almost always caused by one of two things: high humidity or applying your topcoat too thickly. Paint and sealants need dry air to cure properly. If you’re working in a damp basement or on a humid day, the moisture in the air will dramatically slow down the process, leaving the surface feeling tacky for what seems like forever.
The other common culprit is laying on wax or polycrylic too heavily. With finishing products, less is always more. Several thin coats will give you a much better—and harder—finish than one thick, goopy one. If you’ve got a sticky wax finish, try applying another super-thin layer of wax. This often re-activates the layer underneath, allowing you to buff away all the excess with a clean cloth.
How Do I Pick the Right Colors for a Layered Look?
For that classic, layered style, a good rule of thumb is to start with a darker base coat and finish with a lighter top coat. This mimics the way furniture naturally aged over time, as darker stains or paints were often covered up with a fresh, light coat years later. When you sand back the top layer, that dark base provides a gorgeous, high-contrast pop.
The demand for unique, customized pieces is a huge part of why the global furniture market was valued at around $568.60 billion in 2024. People want furniture with character! You can dive deeper into these trends in this comprehensive report on the furniture industry.
Ultimately, the key is to choose colors that work well together. Sticking to a cohesive palette will make your finished piece look thoughtfully designed instead of accidental.
Ready to see how your new masterpiece will look in your home? With RoomGenius, you can visualize how your distressed furniture will fit into your space before you even open a can of paint. Just upload a photo of your room, and our AI will generate incredible design ideas to help you nail the perfect look. Start bringing your vision to life at https://www.room-genius.com.