10 Inspiring Before and After Renovations for 2025
Ready for a change? There’s nothing more satisfying than seeing a dated, dysfunctional space transform into a beautiful, modern sanctuary. The power of a well-executed project lies not just in the visual appeal but in its ability to enhance daily life and add significant value to your property. These dramatic before and after renovations serve as a masterclass in creative problem-solving, strategic design, and smart budgeting.
In this curated gallery, we break down 10 real-world projects, from gut-renovated kitchens to serene outdoor patios. We’ll dive deep into the specific choices, budget considerations, and actionable takeaways behind each success story. You won’t just see the final result; you’ll learn the strategic “why” behind every decision. We will explore how simple changes like new flooring or a coat of paint can deliver a massive impact, as well as the considerations for larger structural updates.
Understanding which updates yield the highest return is crucial. When planning your transformations, understanding the best home improvements for resale value can help you prioritize projects that are both beautiful and financially savvy. This guide provides the practical inspiration you need, showcasing replicable strategies to get you started. Plus, we’ll show you how RoomGenius can help you visualize similar transformations in your own home in seconds, taking the guesswork out of your next renovation.
1. The High-ROI Kitchen Overhaul: From Cramped to Culinary Heaven
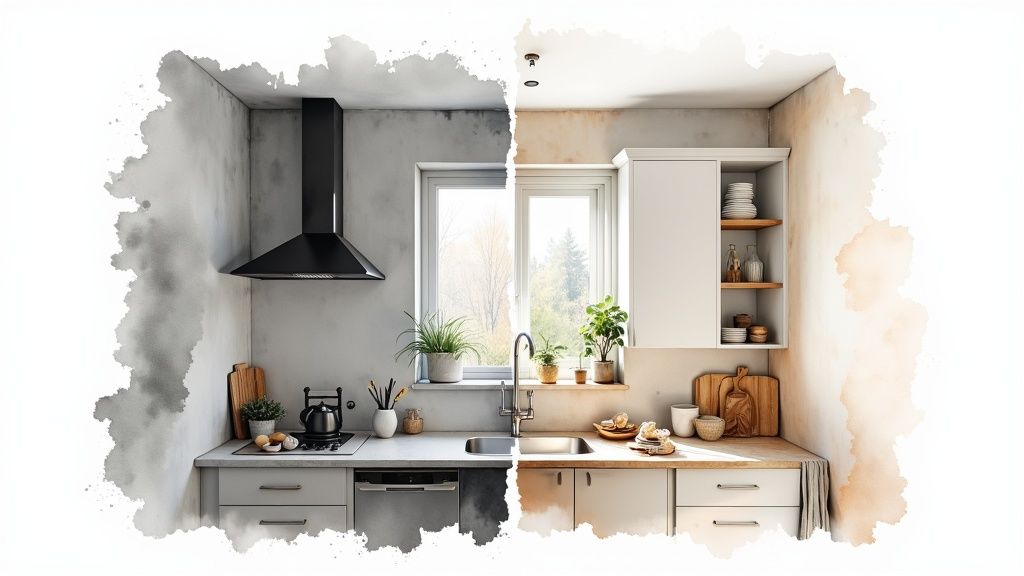
This kitchen transformation is a prime example of how strategic demolition and smart material choices can yield a massive return on investment and enjoyment. The original 1980s layout featured dark wood, minimal counter space, and a non-load-bearing wall that isolated the kitchen, creating a cramped and inefficient work area. These types of layouts are common in older homes and represent a fantastic opportunity for one of the most impactful before and after renovations you can undertake.
Strategic Analysis
The core success of this project hinged on two key decisions. First, removing the peninsula and the non-structural wall between the kitchen and dining area instantly created an open-concept flow. This single change made the entire ground floor feel larger and more connected.
Second, the choice of materials was crucial for balancing aesthetics and budget. Opting for durable quartz countertops provided the high-end look of natural stone without the maintenance or cost of premium marble. Shaker-style cabinets in a bright white finish further amplified the new sense of space and light.
Key Insight: The most significant changes often involve altering the layout, not just updating finishes. Prioritizing the removal of a non-essential wall delivered more value than any single cosmetic upgrade could have.
Actionable Takeaways
- Assess Structural Changes First: Before planning finishes, consult a contractor to identify non-load-bearing walls. Removing one can be a relatively low-cost, high-impact starting point for your renovation.
- Invest in Hardworking Surfaces: Countertops are a kitchen’s workhorse. Materials like quartz offer exceptional durability and a clean, modern aesthetic that appeals to most buyers and homeowners.
- Maximize Light: Combine light-colored cabinets with effective task and ambient lighting to make the space feel larger and more welcoming. If you’re looking for more ways to update your space, explore these ideas for renovating a kitchen on a budget.
2. The Spa-Like Bathroom Transformation: From Outdated to Oasis
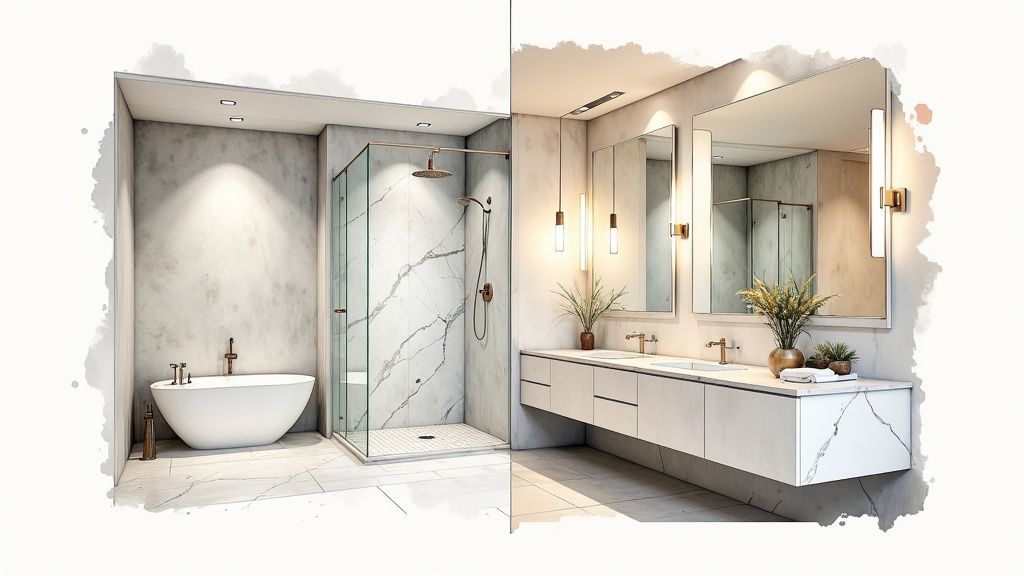
This bathroom remodel showcases how modernizing fixtures and rethinking the layout can transform a purely functional space into a personal retreat. The original bathroom suffered from a bulky, built-in tub, a single cramped vanity, and dated tile that made the room feel dark and small. Such outdated bathrooms are ripe for before and after renovations that significantly boost a home’s value and daily comfort.
Strategic Analysis
The project’s success was driven by two foundational changes. First, replacing the oversized tub-shower combo with a glass-enclosed walk-in shower and a separate freestanding tub created a more luxurious and open feel. This not only modernized the aesthetic but also improved the room’s functional flow.
Second, installing a floating double vanity was a strategic move to enhance both utility and the perception of space. The wall-mounted design frees up floor area, making the room appear larger, while the dual sinks add practical value for shared use. Large-format porcelain tiles with minimal grout lines further contribute to a clean, expansive look.
Key Insight: In bathrooms, perceived space is as important as actual square footage. Using glass, floating fixtures, and consistent, large-format tiles can make even a modest bathroom feel like a spacious, high-end spa.
Actionable Takeaways
- Prioritize a Functional Layout: Consider how you use the space daily. Separating the shower and tub can create a more spa-like experience if space allows. If not, a high-quality tub-shower combination can still feel luxurious with the right tile and fixtures.
- Invest in Proper Waterproofing: The longevity of a bathroom renovation depends on what’s behind the walls. Ensure your contractor uses modern waterproofing membranes in all wet areas to prevent costly mold and water damage down the line.
- Select Finishes for Light and Durability: Opt for light-colored, non-porous tiles like porcelain for both walls and floors. They are durable, easy to clean, and reflect light, making the bathroom feel brighter and more open. For more inspiration, check out these affordable bathroom remodel ideas.
3. The Statement Living Room Update: From Dated to Dynamic
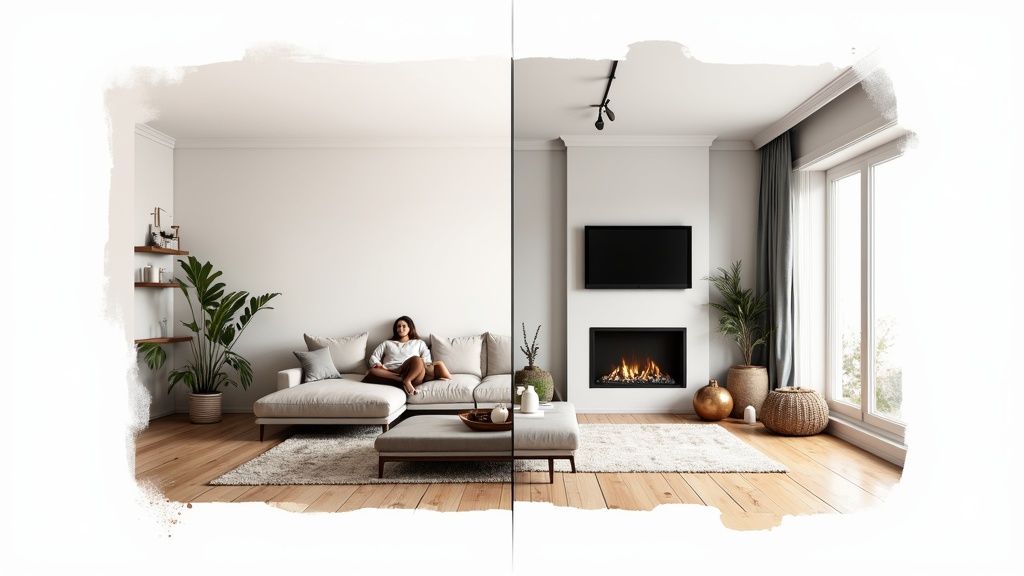
This living room makeover showcases how a focused approach on color, texture, and layout can completely redefine a home’s primary social hub. The original space, while functional, suffered from a muted color palette, mismatched furniture, and a lack of a clear focal point, making it feel disjointed and uninspired. These types of cosmetic and spatial challenges are common and provide a perfect opportunity for one of the most rewarding before and after renovations.
Strategic Analysis
The success of this transformation was driven by two foundational strategies. First, establishing a strong focal point by re-centering the room around the minimalist fireplace and mounting the television above it. This immediately gave the space a sense of purpose and order.
Second, the deliberate use of a cohesive color palette with a bold accent wall brought depth and personality. Shifting from generic beige to a deep, dramatic hue created a sophisticated backdrop, allowing the lighter-colored furniture and décor to stand out. This contrast adds visual interest without overwhelming the senses.
Key Insight: A living room renovation doesn’t always require structural changes. The biggest impact often comes from establishing a clear focal point and implementing a disciplined color and texture strategy to create a cohesive, inviting atmosphere.
Actionable Takeaways
- Define a Focal Point: Identify or create a central feature like a fireplace, a large window, or a striking piece of art. Arrange your furniture to honor this point to create natural flow and conversation areas.
- Layer Your Lighting: Combine ambient (overhead), task (reading lamps), and accent lighting (to highlight art) to create a versatile and warm environment suitable for any occasion.
- Use Rugs to Anchor Spaces: In open-concept or large living rooms, an area rug is essential for defining the seating area and adding texture and color. For more tips, check out our guide on how to arrange living room furniture.
4. The Serene Bedroom Retreat: From Dated to Dreamy
A bedroom should be a sanctuary, but this one started as a cluttered and uninspired space with poor lighting and mismatched furniture. The transformation into a serene retreat showcases how focusing on atmosphere and function can produce one of the most personally rewarding before and after renovations. The goal was to create a restful environment that promotes better sleep and relaxation, moving beyond simple cosmetic updates to a full-scale atmospheric overhaul.
Strategic Analysis
The project’s success was driven by a holistic approach to comfort and aesthetics. The first major decision was to establish a calming color palette. Painting the walls a soft, muted green immediately created a tranquil backdrop and made the room feel more cohesive.
Secondly, a layered lighting plan was implemented. The harsh, single overhead fixture was replaced with a combination of a dimmable chandelier for ambient light, bedside sconces for task lighting, and floor lamps for a warm glow. This provided versatile control over the room’s mood at any time of day.
Key Insight: A successful bedroom renovation is less about dramatic structural changes and more about creating a multi-sensory experience. Prioritizing elements like a soothing color scheme and layered lighting has a greater impact on a room’s feel than any single piece of furniture.
Actionable Takeaways
- Choose a Calming Palette: Start with a foundation of soft, neutral, or muted colors known to promote relaxation. Use textiles and decor to add pops of personality.
- Implement Layered Lighting: Combine ambient (overhead), task (bedside), and accent lighting. Ensure all are on dimmers to give you complete control over the room’s brightness and mood.
- Invest in Quality Textiles: High-quality bedding, plush area rugs, and effective blackout curtains are functional investments that significantly elevate the comfort and luxury of the space.
5. The Unfinished Basement: From Forgotten Space to Functional Foundation
Transforming an unfinished basement is one of the most effective ways to add significant square footage and value to a home. The “before” is often a dark, damp, and underutilized area filled with concrete and exposed utilities. The “after” reveals a versatile space, perfect for a family room, home gym, or guest suite. These before and after renovations demonstrate how addressing foundational issues first paves the way for a successful and lasting upgrade.
Strategic Analysis
The success of a basement finish hinges entirely on proactive moisture and climate control. Before any drywall or flooring is installed, the primary focus must be on creating a dry, insulated envelope. This involves sealing foundation cracks, installing a proper drainage system like a French drain and sump pump, and adding rigid foam insulation against the concrete walls. This foundational work prevents future issues like mold and water damage.
Once the space is sealed, the design can focus on overcoming the inherent challenges of a basement, like low light and exposed ductwork. Strategic use of recessed lighting, light-colored paints, and creative soffits to conceal utilities are key.
Key Insight: A basement renovation is less about decoration and more about construction science. Investing 80% of your initial effort into waterproofing and insulation guarantees the longevity and comfort of the final 20% of cosmetic finishes.
Actionable Takeaways
- Prioritize a Dry Foundation: Before any other work, get a professional assessment for water intrusion. Implement comprehensive waterproofing solutions, as this is the single most critical step.
- Use Mold-Resistant Materials: Opt for materials designed for below-grade applications, such as vinyl plank flooring, inorganic insulation, and moisture-resistant drywall, to prevent future problems.
- Plan for Light and Egress: Maximize light with a layered lighting plan (recessed, task, and accent). If adding a bedroom, installing an egress window is a legal necessity and a major safety feature.
6. The Outdoor Oasis: From Barren Backyard to Alfresco Retreat
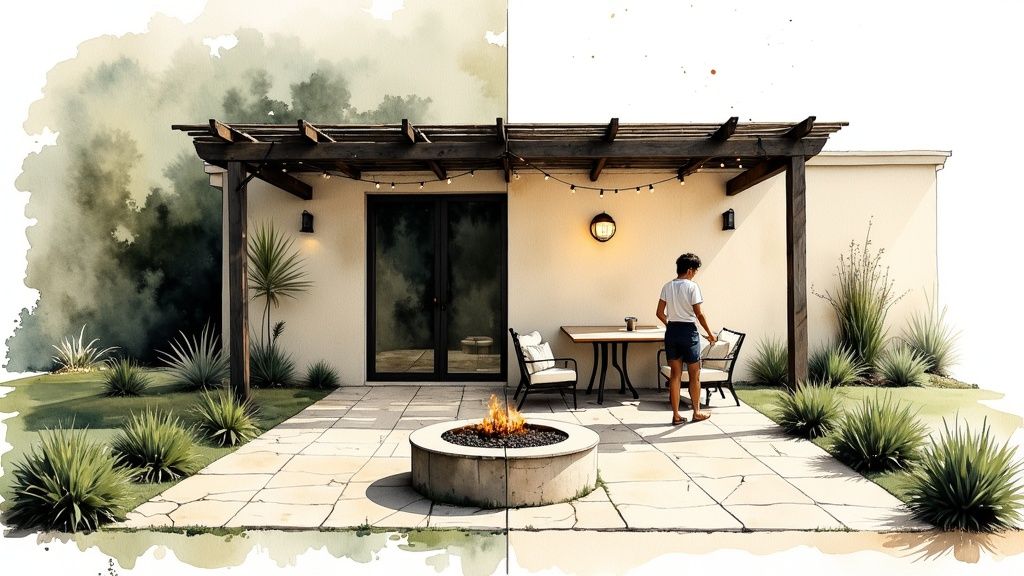
This transformation turns a neglected, underutilized backyard into a functional and beautiful extension of the home’s living space. The original yard was a simple, uninspired patch of grass with no defined purpose, offering little incentive for outdoor living. This kind of blank slate is the perfect canvas for one of the most value-adding before and after renovations, creating a dedicated zone for relaxation and entertainment.
Strategic Analysis
The project’s success was rooted in creating distinct “rooms” within the outdoor space. Establishing a paver patio defined a central living area, while a modern pergola added architectural interest and necessary shade. This zoning approach transforms an open area into a multi-functional oasis.
The selection of weather-resistant materials was key to longevity and low maintenance. Composite decking, durable outdoor fabrics, and stone pavers ensure the space can withstand the elements while retaining its aesthetic appeal. The addition of a fire pit created a focal point for social gatherings, extending the patio’s usability into cooler evenings.
Key Insight: The most effective outdoor renovations treat the yard as an exterior room. Defining specific zones for dining, lounging, and gathering with hardscaping and structures is more impactful than simple landscaping alone.
Actionable Takeaways
- Zone Your Space: Plan your patio or deck with distinct areas in mind. Use rugs, furniture groupings, and structures like pergolas to create functional “rooms” for different activities.
- Invest in Durability: Choose materials specifically designed for outdoor use, such as treated wood, composite decking, and performance fabrics, to ensure your investment lasts.
- Layer Your Lighting: Combine ambient lighting (string lights), task lighting (grill lights), and safety lighting (path lights) to create a welcoming and secure atmosphere after dark.
7. The Foundational Flooring Flip: Unifying a Home from the Ground Up
Flooring is the visual foundation of any home, and this transformation shows how replacing mismatched, dated surfaces can unify an entire space. The original home featured a jarring mix of worn-out beige carpet in the living areas and cracked linoleum in the kitchen. This patchwork approach made the home feel smaller and disjointed, a common issue in properties that have seen piecemeal updates over decades. A full flooring replacement is one of the most cohesive before and after renovations for creating a seamless and modern aesthetic.
Strategic Analysis
The success here was driven by a single, unifying material choice: Luxury Vinyl Plank (LVP). Opting for a consistent wide-plank, light-oak LVP throughout the main level eliminated visual breaks and created a continuous flow, making the entire floor plan feel more expansive and intentional. This material was also chosen for its practicality.
LVP offers the warm look of hardwood but provides superior durability and water resistance, making it ideal for high-traffic areas and spill-prone zones like the kitchen. This strategic selection addressed both aesthetic goals and lifestyle needs without the high cost and maintenance of traditional hardwood.
Key Insight: Unifying your flooring material across multiple rooms is a powerful design trick. It creates a cohesive visual canvas that makes the entire home feel larger, more connected, and intentionally designed.
Actionable Takeaways
- Prioritize Durability in High-Traffic Zones: When choosing a material for an entire level, select one that can handle the busiest areas. LVP, laminate, and engineered hardwood are excellent, durable options.
- Consider Subfloor Condition: Before purchasing new flooring, have a professional assess your subfloor. Leveling and repairs are critical for a successful installation and can be an unexpected but necessary cost.
- Don’t Forget the Details: Plan for transitions between different flooring types (like from LVP to tiled bathrooms) and new baseboards to ensure a clean, professional finish.
8. The Functional Laundry Room Flip: From Chaos to Chore-Chic
Laundry rooms are often the most overlooked spaces in a home, but this transformation showcases how a small, cluttered area can become a highly functional and organized workspace. The original room was a basic utility closet with a poorly placed washer and dryer, no folding surface, and chaotic wire shelving. Such neglected spaces are a common pain point and present a perfect opportunity for one of the most satisfying before and after renovations that improves daily life.
Strategic Analysis
The genius of this project lies in maximizing a small footprint with clever, vertical design. First, stacking the washer and dryer was a game-changer. This single move freed up crucial floor space, allowing for the addition of a tall utility cabinet for storing cleaning supplies out of sight.
Second, the design introduced a dedicated folding station. Installing a durable butcher block countertop over the new base cabinet created a much-needed work surface. This simple addition transformed the room from a mere machine closet into a fully operational laundry station, streamlining the entire chore from washing to folding.
Key Insight: In a utility space, function should dictate form. Prioritizing a logical workflow-stacking appliances and adding a countertop-delivers more practical value than purely aesthetic upgrades.
Actionable Takeaways
- Go Vertical: In small laundry rooms, stacking your washer and dryer is the most effective way to reclaim floor space for storage or a utility sink.
- Create a Work Surface: Even a small countertop for folding clothes makes a huge difference. Consider butcher block or laminate for an affordable and durable option.
- Don’t Forget Task Lighting: A single overhead bulb is rarely sufficient. Add under-cabinet LED strips to illuminate your folding area and make sorting easier.
9. The Productivity Power-Up: From Forgotten Corner to Focused Workspace
As remote work becomes a permanent fixture for many, converting an underutilized space into a dedicated home office is one of the most practical before and after renovations a homeowner can undertake. This project showcases the transformation of a cluttered guest room into a streamlined, professional home office designed for maximum productivity and comfort. The original room was a catch-all for spare furniture and lacked any functional identity.
Strategic Analysis
The success of this renovation was rooted in a function-first design philosophy. The primary goal was to create an environment that minimized distractions and supported focused work. This was achieved by selecting a calming, neutral color palette (a soft grey) to serve as a clean backdrop, especially for video calls.
The second key decision was investing in ergonomic infrastructure. Rather than repurposing an old desk, a proper sit-stand desk and an ergonomic chair were chosen. This commitment to physical comfort and long-term health is a critical, often overlooked, aspect of a successful home office design. Integrated storage solutions were also added to keep the desk surface clear and organized.
Key Insight: A truly effective home office renovation prioritizes function and ergonomics over purely aesthetic choices. The most valuable investment is in furniture and a layout that supports health, focus, and productivity for an eight-hour workday.
Actionable Takeaways
- Plan for Your Workflow: Before buying furniture, map out your daily tasks. Do you need dual monitors? A large surface for drawing? Tailor the space to your specific professional needs.
- Invest in Ergonomics: Your chair and desk are your most important tools. Prioritize adjustability and support to prevent strain and improve focus during long work sessions.
- Control Your Environment: Position your desk to take advantage of natural light, but add task lighting to reduce eye strain. Consider sound-dampening panels or a solid door to create a quiet, professional atmosphere.
10. The Welcoming Entryway: From Cluttered Drop-Zone to Grand First Impression
The entryway sets the tone for your entire home, yet it often becomes a chaotic drop-zone for shoes, coats, and mail. This transformation showcases how a neglected foyer can be reimagined into a functional and stylish introduction to the home. The original space was defined by a dated tile floor, poor lighting, and a single, overflowing coat rack, creating an immediate sense of clutter. These overlooked areas offer a significant opportunity for one of the most impactful before and after renovations focused on guest experience and daily organization.
Strategic Analysis
The project’s success revolved around creating distinct zones for function and aesthetics. First, installing a custom built-in mudroom unit with bench seating, cubbies, and hooks provided a designated spot for every item. This immediately solved the primary issue of clutter and established an organized system for the family.
Second, material and lighting choices were pivotal. Durable, wood-look luxury vinyl tile (LVT) replaced the old ceramic, offering a warmer look that’s easy to clean. A new, modern pendant light fixture replaced the dim, flush-mount light, instantly making the space feel brighter and more inviting.
Key Insight: A successful entryway renovation masterfully balances hardworking storage solutions with welcoming design elements. Functionality should come first; aesthetics will follow from a well-organized and properly lit foundation.
Actionable Takeaways
- Zone for Function: Before buying furniture, map out zones for shoes, coats, keys, and mail. This will guide your selection of storage solutions, whether it’s a built-in unit or a console table with baskets.
- Durable Flooring is Key: Entryways see heavy foot traffic. Choose materials like LVT, porcelain tile, or engineered hardwood that can withstand wear and tear while complementing the rest of your home’s style.
- Layer Your Lighting: Combine a statement overhead fixture with smaller accent lights or a table lamp to create a warm, layered, and welcoming ambiance.
Before & After: 10 Renovation Room Comparisons
| Project | 🔄 Implementation Complexity | ⚡ Resources & Time | 📊 Expected Outcomes (ROI / Impact) | Ideal Use Cases | ⭐ Key Advantages / 💡 Tip |
|---|---|---|---|---|---|
| Kitchen Renovation | High — structural work, permits, multiple trades | High cost and labor; $50,000–$150,000+; 2–6 months | 📊 ROI ~50–80%; major value and functionality uplift | Replace outdated kitchen; maximize resale or efficiency | ⭐ High resale impact; 💡 Plan work triangle and combine plumbing/electrical updates |
| Bathroom Renovation | Medium–High — waterproofing and plumbing expertise required | Moderate–high cost; $10,000–$50,000+; 4–12 weeks | 📊 ROI ~50–70%; improved comfort and moisture control | Upgrade master or guest baths; add accessibility or spa features | ⭐ Improves daily comfort; 💡 Prioritize ventilation and thorough waterproofing |
| Living Room Transformation | Medium — mostly cosmetic, occasional structural permits | Moderate cost; $5,000–$25,000; can be phased over weeks–months | 📊 ROI ~30–40%; strong visual and lifestyle impact | Entertaining spaces, open-plan reflows, media integration | ⭐ Immediate visual upgrade; 💡 Create a focal point and layered lighting |
| Bedroom Renovation | Low–Medium — mostly finishes and storage work | Moderate cost; $3,000–$15,000; relatively short timeline | 📊 ROI ~20–30%; enhances comfort and storage | Personal retreats, master suite refresh, staging for resale | ⭐ Improves sleep quality; 💡 Use calming palettes and invest in mattress/bedding |
| Basement Renovation & Finishing | High — moisture control, egress, HVAC, possible foundation work | Moderate–high cost; waterproofing $10,000+; several months | 📊 ROI ~50–70%; adds usable square footage and versatility | Create guest suites, home theater, gym, or rental space | ⭐ Adds significant livable area; 💡 Address moisture and install egress first |
| Outdoor / Patio Renovation | Medium — site work, permits, weather-dependent scheduling | Moderate cost; $5,000–$30,000+; seasonally dependent | 📊 ROI ~50–80% for decks/patios; boosts curb appeal and outdoor living | Outdoor entertaining, landscaping upgrades, outdoor kitchens | ⭐ Extends usable living space; 💡 Choose weather-resistant materials and plan drainage |
| Flooring Replacement Project | Medium — material choice and subfloor prep affect complexity | Variable cost; $1,000–$5,000+ per area; room-by-room install possible | 📊 ROI high for quality hardwood (80–100%); strong visual impact | Whole-home refresh, worn/dated floors, improve resale presentation | ⭐ High aesthetic/ROI payoff; 💡 Evaluate subfloor and moisture resistance before choosing material |
| Laundry Room Renovation | Low–Medium — plumbing/electrical and space optimization | Moderate cost; $3,000–$10,000; typically short project | 📊 ROI ~20–30%; improves daily efficiency and storage | Small homes, mudroom combos, functional utility upgrades | ⭐ Boosts organization and chores efficiency; 💡 Maximize vertical storage and ventilation |
| Home Office / Study Renovation | Medium — tech infrastructure and acoustic needs | Moderate cost; $2,000–$8,000; quick to moderate timeline | 📊 ROI ~30–50% depending on market; improves productivity | Remote workers, freelancers, professionals needing dedicated workspace | ⭐ Enhances productivity and marketability; 💡 Prioritize ergonomics, lighting, and sound control |
| Entryway / Foyer Renovation | Low–Medium — durable finishes and organization focus | Moderate cost; $2,000–$8,000; quick turnaround possible | 📊 ROI ~25–40%; strong first impression for buyers | Staging homes, practical high-traffic entry improvements | ⭐ Immediate curb-to-interior impact; 💡 Use durable flooring, create zones for coats/shoes |
Your Turn: Visualize Your Dream Renovation Today
The journey from a dated, dysfunctional room to a stunning, practical space is a powerful one. As we’ve explored through these diverse before and after renovations, transformation is not about magic; it’s about strategic vision and smart decision-making. Each successful project, from the complete kitchen overhaul to the subtle yet impactful entryway refresh, hinged on the ability to see potential where others saw problems. This is the fundamental lesson behind every inspiring makeover.
These case studies have illuminated several core principles that transcend style or budget. They show how reconfiguring a layout can revolutionize flow, how targeted lighting can redefine ambiance, and how a consistent color palette can unify disparate elements into a cohesive whole. We’ve seen that the most impactful changes often arise from a clear understanding of a space’s core function and the inhabitants’ daily needs.
Key Takeaways for Your Renovation
Let’s distill the most critical lessons from the transformations we’ve analyzed:
- Strategic Planning is Paramount: The most successful before and after renovations are born from meticulous planning. Defining your goals, setting a realistic budget, and understanding the sequence of work prevents costly mistakes and ensures the final outcome aligns with your initial vision.
- Function Dictates Form: A beautiful space that doesn’t work for your lifestyle is a design failure. Whether it’s adding storage in a cramped laundry room or creating distinct zones in a multipurpose basement, always prioritize how you will use the space.
- Embrace Smart Material Choices: You don’t always need the most expensive materials to achieve a high-end look. As our examples showed, durable luxury vinyl tile, clever use of paint, and well-chosen hardware can deliver significant impact without breaking the bank.
- Light is a Design Tool: Never underestimate the power of lighting. The strategic addition of layered lighting, from ambient overhead fixtures to targeted task lighting and accent lamps, was a common thread in dramatically improving the feel and functionality of almost every renovated space.
Mastering these concepts empowers you to move beyond simply admiring inspirational photos and start creating a concrete plan for your own home. The true value lies in translating these ideas into actionable steps, turning “someday” dreams into a tangible project. The biggest hurdle for many is the first one: visualizing what’s truly possible. Bridging the gap between the “before” you live with and the “after” you dream of is where the real work begins. Instead of struggling with uncertainty and imagination, what if you could see the future of your room today?
Ready to stop guessing and start seeing? RoomGenius empowers you to create your own stunning before and after renovations in seconds. Upload a photo of your room, choose a style, and let our advanced AI generate photorealistic redesigns, helping you visualize your dream space with clarity and confidence. Start your transformation with RoomGenius today!