8 Inspiring before and after bathroom remodel pictures
A bathroom remodel is one of the most impactful upgrades you can make to your home, boosting both its value and your daily enjoyment. But moving from a dated, dysfunctional space to a modern sanctuary can feel overwhelming. Where do you even begin? The answer is inspiration. By exploring real-world before and after bathroom remodel pictures, you can visualize the possibilities, understand key design strategies, and gather actionable ideas for your own project.
This guide breaks down 8 distinct types of bathroom renovations, showcasing dramatic transformations from small cosmetic updates to full-scale luxury conversions. We’ll analyze the strategic decisions behind each success story, offering replicable tactics and design insights to help you plan a remodel that perfectly suits your style, budget, and needs.
We will deconstruct everything from small space modernizations and luxury spa conversions to budget-friendly updates and accessible universal designs. For more real-world examples, you can also explore a gallery to view completed bathroom renovation projects and see stunning before and after comparisons. Get ready to see how even the most tired bathrooms can be reborn into stunning, functional spaces.
1. Small Space Bathroom Modernization
Transforming a cramped, outdated bathroom into a modern and functional oasis is one of the most impactful home improvements. Small space modernization focuses on creating an illusion of spaciousness within a compact footprint, typically bathrooms under 40 square feet. This approach relies on smart design choices rather than expensive structural changes, making it an accessible strategy for many homeowners. The goal is to enhance both aesthetics and utility through strategic fixture selection, color palettes, and storage solutions, proving that limited square footage doesn’t have to mean limited style.
These before and after bathroom remodel pictures often showcase dramatic changes, like a bulky vanity replaced with a sleek, wall-mounted sink or a dark, enclosed shower updated with a frameless glass door. The “after” photos consistently feature brighter, more open environments that feel significantly larger and more luxurious.
Strategic Analysis
The core strategy is to maximize every inch, both physically and visually. Designers often employ vertical space with tall, narrow storage or floor-to-ceiling tile, drawing the eye upward and making the ceiling feel higher. A light and airy color scheme, usually involving whites, soft grays, or pastels, reflects more light and visually pushes the walls back.
Key Insight: The most successful small bathroom remodels prioritize visual continuity. Using the same large-format tile on both the floor and walls can erase visual breaks, making the entire room feel like one cohesive, expansive space.
Actionable Takeaways
To replicate this in your own home, focus on space-saving fixtures and optical illusions.
- Floating Vanities: Wall-mounted vanities free up floor space, creating an uninterrupted line of sight that makes the room feel bigger.
- Large Mirrors: A single, large mirror can double the visual space and bounce light around the room.
- Pocket or Sliding Doors: Swapping a traditional swing door for a pocket door can reclaim up to nine square feet of usable floor space.
- Strategic Lighting: Recessed lighting saves headroom, and adding sconces on either side of a mirror provides even, flattering illumination without clutter.
This approach is ideal for powder rooms, guest baths, or any bathroom where space is at a premium. By implementing these tactics, you can achieve a high-end look that is both beautiful and highly functional. To see more inspiring examples, you can explore detailed galleries of remodeled small bathrooms. Get more ideas by checking out these pictures of remodeled small bathrooms.
2. Master Bathroom Luxury Spa Conversion
A master bathroom luxury spa conversion elevates a standard, functional space into a personal sanctuary designed for relaxation and rejuvenation. This remodel style goes beyond mere utility, focusing on creating a high-end, resort-like experience within your own home. It incorporates premium materials, sophisticated fixtures, and amenities like heated floors, freestanding soaking tubs, and multi-functional rainfall showers. The goal is to craft an environment that pampers the senses and serves as a true escape from the everyday.
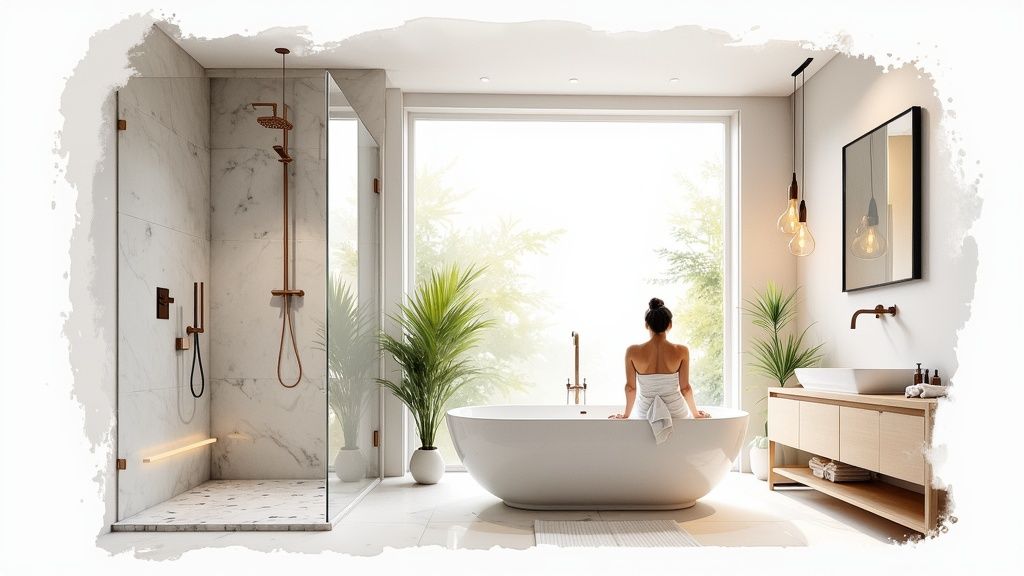
These before and after bathroom remodel pictures often depict a dramatic shift from builder-grade finishes to opulent materials like marble and natural stone. The “after” photos reveal a meticulously planned layout that prioritizes comfort and tranquility, often separating the tub and shower to create distinct zones for unwinding and efficient daily routines.
Strategic Analysis
The core strategy is to layer textures, lighting, and amenities to create a holistic sensory experience. Designers often use a serene, cohesive color palette to unify the space while incorporating natural materials to add warmth and organic texture. The layout is reconfigured to enhance flow and create a sense of spaciousness, often featuring a large, curbless shower and a statement-making freestanding tub as the room’s focal point.
Key Insight: The most successful luxury spa conversions are built on a foundation of technology and infrastructure. High-performance ventilation to manage steam, programmable heated floors for consistent comfort, and a multi-layered lighting scheme are non-negotiable elements that make the luxury experience functional.
Actionable Takeaways
To bring this spa-like feel to your master bath, focus on high-impact upgrades and thoughtful material choices.
- Separate Wet and Dry Zones: If space allows, separate the shower and tub. A spacious, walk-in shower with a rainfall head offers daily convenience, while a deep soaking tub provides a dedicated space for relaxation.
- Layer Your Lighting: Combine ambient lighting (e.g., a dimmer chandelier), task lighting (sconces by the vanity), and accent lighting (in a shower niche) to create different moods.
- Invest in Comfort Tech: Radiant floor heating is a game-changer for cold mornings, and a high-quality, quiet ventilation system is crucial for protecting your investment from moisture.
- Choose Natural Materials: Materials like marble, travertine, or wood-look porcelain tiles add a timeless, organic elegance that is central to the spa aesthetic.
This approach is perfect for homeowners looking to invest in a primary suite that doubles as a personal wellness retreat. By focusing on both luxury finishes and underlying comfort systems, you can create a truly restorative space.
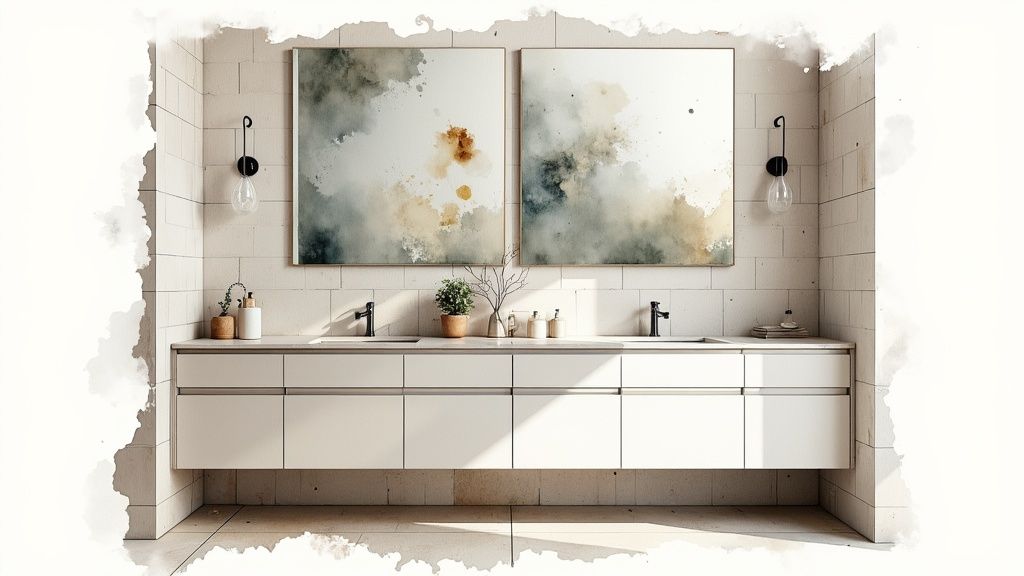
3. Budget-Conscious Cosmetic Updates
A stunning bathroom transformation doesn’t always require a gut renovation or a five-figure budget. Budget-conscious cosmetic updates focus on high-impact, low-cost changes that refresh a space’s appearance without altering its fundamental layout. This strategy, typically falling in the $3,000 to $8,000 range, prioritizes surface-level improvements like new paint, modern fixtures, and updated hardware to breathe new life into a dated bathroom, proving that smart, targeted investments can yield dramatic results.
The most compelling before and after bathroom remodel pictures in this category showcase how a few well-chosen upgrades can completely change the room’s character. Often, you’ll see a drab, builder-grade space revived with a bold new wall color, a stylish vanity light, a framed mirror, and new faucets, creating a custom look for a fraction of the cost of a full remodel.
Strategic Analysis
The core strategy here is to maximize return on investment by focusing on the most visible elements of the bathroom. Instead of moving plumbing or tearing down walls, this approach enhances what already exists. The focus is on aesthetic upgrades that can often be completed with basic DIY skills, which dramatically reduces labor costs and keeps the project accessible and affordable.
Key Insight: The 80/20 principle is crucial for budget remodels. 80% of the visual impact comes from just 20% of the potential changes. Targeting the vanity, lighting, paint, and hardware first delivers the most significant transformation for the least amount of money.
Actionable Takeaways
To execute a successful cosmetic update, prioritize changes that deliver the biggest visual punch.
- Paint Power: A fresh coat of paint is the single most cost-effective way to redefine a bathroom. Choose a moisture-resistant formula in a color that brightens the space.
- Hardware Swap: Replacing old drawer pulls, cabinet knobs, and faucet sets with modern designs in a cohesive finish like matte black or brushed gold is a quick and instant refresh.
- Lighting Upgrade: Swap a dated “Hollywood” strip light for a stylish sconce or vanity bar to instantly elevate the room’s ambiance and functionality.
- Reglaze and Refresh: Instead of replacing a dated but functional tub or tile, consider professional reglazing. A fresh application of caulk and grout cleaner can make old tile look new again.
This approach is perfect for homeowners looking for a significant change without the commitment of a major renovation. To discover more ways to transform your space on a budget, check out these affordable bathroom remodel ideas.
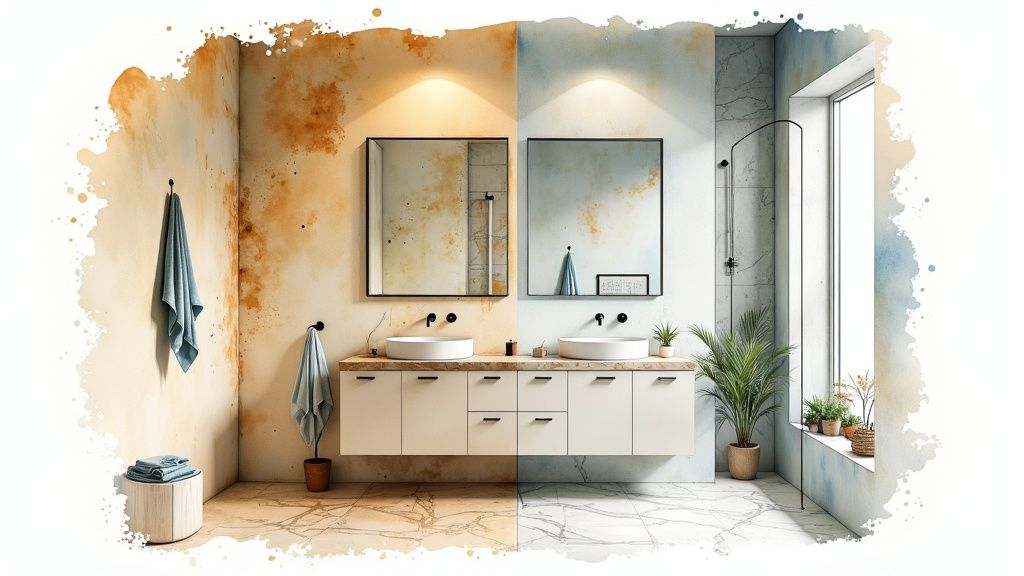
4. Vintage to Contemporary Style Conversion
Updating a bathroom from a bygone era, such as the 1980s or 90s, into a sleek, contemporary haven is a truly satisfying renovation. This conversion involves a complete stylistic overhaul, moving away from dated colors, materials, and fixtures to embrace modern design principles like clean lines, minimalism, and a neutral palette. The process is more than just a cosmetic fix; it’s about fundamentally reimagining the space for current tastes and functionality, often while respecting the home’s original architectural spirit.
These before and after bathroom remodel pictures highlight the profound impact of this change. You’ll frequently see honey oak vanities, carpeted floors, or pastel-colored tile sets replaced with floating vanities, large-format porcelain, and crisp white or gray color schemes. The “after” images present a cohesive, calming, and clutter-free environment that feels both timeless and luxurious.
Strategic Analysis
The core strategy here is a thoughtful edit of the old to make way for the new. This involves a complete gut renovation of finishes and fixtures while carefully considering the room’s original layout and “bones.” The goal is to create a clean slate where modern elements can shine without clashing with any lingering vintage vibes. This often means planning for potential surprises, like old plumbing or hidden water damage, which are common in older homes.
Key Insight: The most successful vintage-to-contemporary conversions blend styles intentionally. Instead of erasing every trace of the past, they might salvage a unique architectural detail, like a curved archway or a vintage window, and make it a focal point within the modern design.
Actionable Takeaways
To execute a successful style conversion, you need a clear vision and a solid plan.
- Establish a Neutral Base: Use a palette of whites, grays, or warm neutrals for walls and large surfaces. This provides a timeless backdrop that allows modern fixtures and finishes to stand out.
- Update All Fixtures: Replace every dated element, from the toilet and sink to the faucets and lighting. Opt for streamlined, minimalist designs in finishes like matte black, brushed nickel, or chrome.
- Prioritize Modern Materials: Choose contemporary materials like quartz countertops, frameless glass for the shower, and large-format porcelain or ceramic tiles to create a clean, high-end look.
- Mix, Don’t Match: Consider adding a single vintage-inspired element, such as a freestanding clawfoot tub or an ornate mirror, to provide character and prevent the space from feeling sterile.
This approach is perfect for homeowners looking to modernize their property and significantly increase its value and appeal. It bridges the gap between the home’s history and its future, creating a bathroom that is both stylish and enduring.
5. Accessible Universal Design Bathroom
An accessible universal design bathroom remodel prioritizes safety, independence, and comfort for individuals with mobility challenges or those planning to age in place. This design philosophy goes beyond mere ADA compliance, aiming to create a space that is functional for everyone, regardless of age or ability, without sacrificing style. The goal is to seamlessly integrate features like grab bars, curbless showers, and accessible vanities into a beautiful and dignified environment, ensuring long-term usability for all household members.
These before and after bathroom remodel pictures highlight transformations from standard, often hazardous bathrooms to safe, navigable spaces. Common changes include replacing a high-sided tub with a zero-threshold, walk-in shower or installing a floating vanity that allows for wheelchair access. The “after” photos reveal thoughtfully designed rooms that are both aesthetically pleasing and profoundly practical.
Strategic Analysis
The core strategy is to remove physical barriers and build in support systems that enhance user confidence and safety. This involves meticulous space planning to accommodate a wheelchair’s turning radius and ensuring all fixtures are within easy reach from a seated position. Materials are chosen for both durability and safety, such as slip-resistant flooring, and lighting is enhanced to prevent falls.
Key Insight: The most successful universal designs are discreet. By integrating safety features into the overall aesthetic, such as stylish grab bars that double as towel racks or a built-in shower bench that matches the wall tile, the bathroom feels like a spa-like retreat rather than a clinical space.
Actionable Takeaways
To create an accessible bathroom, focus on barrier-free design and ergonomic fixtures.
- Curbless Shower: A zero-threshold or curbless shower entry eliminates tripping hazards and allows for easy roll-in access for wheelchairs or walkers.
- Strategic Grab Bars: Install grab bars securely into wall studs around the toilet and within the shower. Consider models with contrasting colors for better visibility.
- Accessible Vanity: A wall-mounted or floating vanity provides knee clearance for users in wheelchairs, while single-lever faucets are easier to operate than knobs.
- Slip-Resistant Flooring: Choose materials like matte-finish porcelain or luxury vinyl tile with a high coefficient of friction (COF) rating to reduce the risk of falls.
This approach is essential for multigenerational households or for homeowners planning for their future needs. By focusing on universal design principles, you create a space that offers peace of mind and enduring functionality.
6. Secondary Bathroom Family Functionality Upgrade
A secondary bathroom, whether for kids, guests, or general family use, must be a workhorse of durability, easy maintenance, and smart organization. This type of remodel prioritizes practical functionality over high-end luxury, focusing on creating a space that can withstand heavy daily use and adapt to a family’s changing needs over time. The goal is to maximize utility and longevity with a budget typically ranging from $5,000 to $15,000, making it a highly practical investment for many households.
These before and after bathroom remodel pictures often highlight transformations from a generic, builder-grade space to a thoughtfully organized one. Common changes include replacing a single pedestal sink with a durable double vanity or adding clever, built-in storage solutions to manage clutter. The “after” photos reveal a room that is not only more visually appealing but fundamentally easier to use and clean for the entire family.
Strategic Analysis
The core strategy is to build a highly functional and resilient environment. This means selecting materials and fixtures that can handle everything from toddler bathtime splashes to teenage morning routines. Design choices favor timeless styles and neutral palettes that won’t feel dated as children grow, ensuring the bathroom remains versatile for guests or future homebuyers.
Key Insight: The most successful family bathroom upgrades prioritize storage and surface durability above all else. By integrating ample, accessible storage, you preemptively solve the biggest problem in shared bathrooms: clutter.
Actionable Takeaways
To apply this practical approach to your secondary bathroom, focus on robust materials and smart organization.
- Install Double Vanities: Adding a second sink is one of the most effective ways to reduce morning conflicts and streamline routines for multiple users.
- Choose Durable Finishes: Opt for quartz countertops, which are non-porous and resist stains, and large-format porcelain tiles with minimal grout lines for easier cleaning.
- Maximize Storage: Incorporate recessed medicine cabinets, shelving over the toilet, and vanities with deep drawers to keep toiletries and towels organized and out of sight.
- Brighten with Lighting: Use a combination of overhead lighting and bright vanity lights to ensure the space is well-lit for grooming tasks and feels clean and inviting.
This upgrade is perfect for any shared family bathroom where efficiency and durability are the main concerns. By focusing on these functional elements, you can create a space that serves your family well for years to come.
7. Eco-Friendly Sustainable Bathroom Transformation
An eco-friendly bathroom remodel prioritizes sustainability by incorporating water-saving fixtures, recycled or reclaimed materials, and energy-efficient systems. This approach focuses on reducing environmental impact, improving indoor air quality with non-toxic finishes, and often lowering long-term utility costs. The goal is to create a beautiful, healthy, and high-functioning space that aligns with environmentally conscious values, proving that style and sustainability can go hand in hand.
These before and after bathroom remodel pictures often highlight the replacement of old, water-guzzling toilets and faucets with sleek, low-flow models. The “after” images showcase materials like reclaimed wood vanities, recycled glass countertops, and bamboo flooring, creating a warm, natural aesthetic that is both modern and responsible.
Strategic Analysis
The core strategy behind a sustainable remodel is a life-cycle assessment of every material and fixture. This means considering not just the initial cost but also the environmental impact of manufacturing, the product’s lifespan, and its energy and water consumption over time. Designers aim for a harmonious balance between aesthetics, functionality, and long-term resource conservation.
Key Insight: The most impactful sustainable remodels focus on the “big three” areas of consumption: water, energy, and materials. Prioritizing high-efficiency toilets, LED lighting, and locally sourced, durable materials yields the greatest environmental and financial return on investment.
Actionable Takeaways
To implement an eco-friendly remodel, focus on smart choices that conserve resources and promote a healthier home environment.
- Water-Saving Fixtures: Install WaterSense-labeled toilets, faucets, and showerheads to significantly reduce water consumption without sacrificing performance.
- Sustainable Materials: Choose countertops made from recycled glass or paper composite, and opt for flooring like bamboo or cork, which are rapidly renewable resources.
- Energy Efficiency: Use ENERGY STAR-certified ventilation fans and LED lighting on dimmer switches to cut down on electricity usage.
- Low-VOC Finishes: Select low- or zero-VOC (volatile organic compound) paints, primers, and sealants to improve indoor air quality and reduce harmful off-gassing.
This approach is perfect for homeowners who want to minimize their carbon footprint and create a healthier living space. By investing in sustainable products, you can achieve a sophisticated remodel that benefits both your family and the planet.
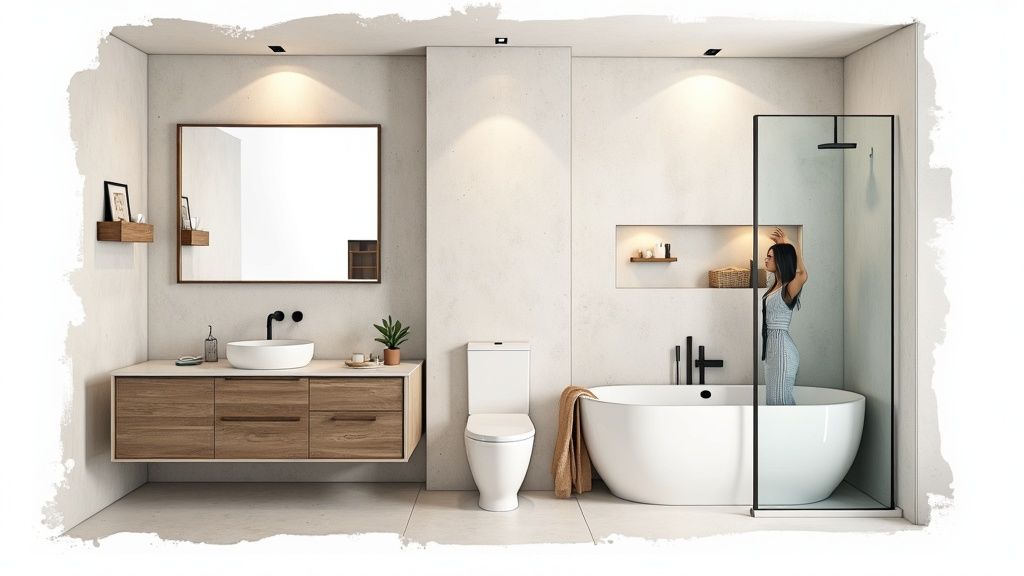
8. Open Concept Ensuite Master Bath Expansion
For homeowners seeking a true sanctuary, an open-concept ensuite expansion transforms a standard master bathroom into a sprawling, spa-like retreat. This renovation involves significant structural changes, such as removing walls to borrow space from an adjacent closet or underused bedroom. The goal is to create a seamless, multi-functional suite that often integrates a walk-in closet, a dedicated water closet, and luxurious amenities like a freestanding tub and a large, walk-in shower. It’s a move from a purely functional room to a destination for relaxation and preparation.
These before and after bathroom remodel pictures document some of the most dramatic home transformations possible. A cramped, compartmentalized bathroom is often shown becoming a bright, airy space with dual vanities, a seating area, and clear zones for different activities. The “after” photos highlight a sense of grandeur and flow that fundamentally changes the master suite experience.
Strategic Analysis
The core strategy here is spatial integration and functional zoning within a larger, unified footprint. Instead of just updating fixtures, this remodel rethinks the entire layout to improve circulation, increase natural light, and add high-end features that were previously impossible. This requires careful planning of plumbing, electrical, and HVAC systems to support the new, expanded layout.
Key Insight: Successful expansions prioritize creating distinct “zones” within the open layout. A partial wall, a change in flooring material, or strategic furniture placement can separate the sleeping area from the dressing room and bathing spaces, maintaining a sense of privacy and organization without sacrificing the open feel.
Actionable Takeaways
To achieve a luxury ensuite expansion, meticulous planning is non-negotiable.
- Professional Plans: Hire an architect or a certified designer to handle structural changes. They will ensure walls are not load-bearing and that all modifications meet building codes.
- Zone the Utilities: Group plumbing fixtures (toilet, shower, tub) together where possible to minimize complex and expensive pipe rerouting.
- Plan for Moisture: An expanded bathroom requires robust ventilation. Upgrade to a high-capacity exhaust fan and consider a dehumidifier to manage moisture and protect integrated closet spaces.
- Create Cohesion: Use consistent materials, such as the same countertop stone on vanities and a makeup station, to tie the large space together visually.
This ambitious approach is best for those planning their “forever home” or undertaking a major renovation where structural changes are already planned. To properly visualize and map out such a complex project, it is essential to learn how to create floor plans before any demolition begins.
8 Before-and-After Bathroom Remodel Comparisons
| Project | Implementation Complexity 🔄 | Resources & Speed ⚡ | Expected Outcomes 📊⭐ | Ideal Use Cases & Tips 💡 |
|---|---|---|---|---|
| Small Space Bathroom Modernization | Low–Medium; no structural work; layout constrained | Low–Mid cost; typically 2–4 weeks; DIY or basic trades | Visually larger, improved storage/function; moderate resale uplift | Apartments/micro-units; use wall-mounted fixtures, large mirror, pocket doors |
| Master Bathroom Luxury Spa Conversion | High; specialist trades, electrical/plumbing upgrades | High cost ($25k–$100k+); 4–12 weeks; pro installers required | Luxury comfort; strong value uplift (≈60–80% ROI); higher maintenance | High-end homes; layer lighting, heated floors, separate shower/tub |
| Budget-Conscious Cosmetic Updates | Low; cosmetic only, minimal disruption | Low cost ($3k–$8k); 1–2 weeks; DIY-friendly | Fast visual refresh; modest ROI (30–50%); short-term solution | Sellers/renters; prioritize paint, lighting, hardware for max impact |
| Vintage to Contemporary Style Conversion | Medium–High; demo and retiling; possible structural surprises | Mid cost ($8k–$20k); weeks–months; may need designer/contractor | Timeless, modern aesthetic; improved function; strong buyer appeal | Older homes needing style update; salvage character elements; budget for contingencies |
| Accessible Universal Design Bathroom | Medium–High; code/compliance and specialized design | Mid–High cost ($15k–$35k); longer planning/permitting | Greater safety and independence; increases accessibility value | Aging-in-place or disability needs; consult OTs, plan wheelchair clearances |
| Secondary Bathroom Family Functionality Upgrade | Medium; focus on durability and storage | Mid cost ($5k–$15k); moderate timeline; possible plumbing work | Improved daily use, reduced conflicts; durable finishes | Family or shared bathrooms; add double vanities, ample storage, easy-clean materials |
| Eco-Friendly Sustainable Bathroom Transformation | Medium; requires sourcing and system expertise | Mid–High initial cost; potential long-term savings; specialized contractors | Lower water/energy use (30–50%), better indoor air, market appeal to green buyers | Eco-minded homeowners; start with low-flow fixtures and low-VOC finishes |
| Open Concept Ensuite Master Bath Expansion | Very High; structural changes, permits, architect involvement | Very high cost ($40k–$150k+); 8–16+ weeks; multi‑trade coordination | Resort-like luxury; highest ROI (≈80–100%); major marketability boost | Larger homes seeking luxury; hire architect, phase work, verify permits and HVAC/plumbing plans |
From Vision to Reality: Planning Your Perfect Bathroom Remodel
The stunning before and after bathroom remodel pictures we’ve explored throughout this guide do more than just showcase beautiful design. They serve as a powerful testament to the transformative potential that exists within every home, proving that a well-executed plan can turn even the most dated or dysfunctional bathroom into a sanctuary of style and utility.
From the clever space-saving solutions in the small bathroom modernization to the opulent details of the master bath spa conversion, a common thread unites these successful projects: strategic foresight. The most impactful remodels are born from a clear vision, where every choice, from the layout to the light fixtures, is made with purpose.
Core Principles for a Successful Transformation
As you move from inspiration to action, remember the key takeaways highlighted in our examples:
- Define Your Goal: Are you chasing luxury, maximizing a tight footprint, or aiming for a budget-friendly refresh? Your primary objective will guide every subsequent decision, just as it did in the accessible universal design and the family-focused secondary bathroom projects.
- Functionality First: A beautiful bathroom that doesn’t work for your daily routine is a design failure. Prioritize layout, storage, and flow before getting lost in aesthetic details. The open-concept ensuite expansion perfectly illustrates how reimagining a layout can dramatically improve usability.
- Material and Style Cohesion: The most successful remodels, like the vintage-to-contemporary conversion, demonstrate a clear, cohesive style. Select materials, colors, and finishes that complement each other and align with your home’s overall aesthetic for a timeless result.
Your Actionable Next Steps
Feeling motivated to start your own project? It’s time to translate that inspiration into a concrete plan. Begin by assessing your current space, taking detailed measurements, and creating a list of “must-haves” versus “nice-to-haves.” This initial planning phase is crucial for establishing a realistic budget and timeline.
Consider which elements you can tackle yourself versus those that require a professional. For homeowners with a DIY spirit, custom-built pieces can add a unique touch and potentially save money. For instance, if you’re planning your perfect bathroom remodel, consider whether a DIY approach to key components like a new vanity is right for your project. Explore this comprehensive guide to building a custom bathroom vanity to understand the process, tools, and skills required.
Ultimately, the journey from a “before” photo to a stunning “after” is a creative process fueled by research and planning. By studying successful before and after bathroom remodel pictures and applying these strategic principles, you empower yourself to create a space that not only looks incredible but also enhances your daily life.
Ready to see what your bathroom could become? Don’t just dream about the possibilities, visualize them. With RoomGenius, you can upload a photo of your current bathroom and let AI generate multiple design concepts, allowing you to experiment with layouts, styles, and finishes instantly. See your own “after” picture before you even begin by visiting RoomGenius and start designing today.