The Ultimate Bathroom Reno Planner for a Stress-Free Remodel
A solid plan is what separates a dream bathroom from a renovation nightmare. It’s your roadmap, turning what can feel like a chaotic, overwhelming process into a series of manageable steps. The very first thing on that map? Figuring out why you’re even doing this.
Are you desperate for a spa-like escape from the daily grind, or are you just trying to fix a leaky faucet and update some seriously dated tile? Nailing down this core vision is the foundation for everything else. It’s what keeps you from blowing your budget and ensures the finished room actually works for you.
Defining Your Vision Before You Start
Jumping into a bathroom renovation without a clear vision is like going grocery shopping when you’re hungry and without a list. You’ll spend a lot of money and time, but you probably won’t end up with what you actually need.
Before you fall down the rabbit hole of Pinterest boards and glossy fixture catalogs, take a step back. The most important thing you can do right now is look at your current bathroom and get crystal clear on what you want to achieve. This is about more than just picking pretty things; it’s about understanding the real purpose of the project.
So, ask yourself the big questions. Is this renovation mostly about creating a beautiful new look, improving how the room functions day-to-day, or boosting your home’s resale value? Your answers here will guide every single decision you make from this point forward.
Assess Your Current Space
Get brutally honest about your current bathroom. I mean, really dig in. What do you love, and what drives you absolutely crazy? The easiest way to do this is to grab a notebook and make two simple columns: “What Works” and “What Doesn’t.” This little exercise is surprisingly powerful for clarifying your priorities.
- What Works: Maybe you love the natural light that floods in every morning. Perhaps the toilet is tucked away in a perfect spot, or the existing vanity has a ton of great storage. Don’t discount the good stuff.
- What Doesn’t: Is the shower pressure pathetic? Is the bathtub so small it’s basically useless? Does the total lack of counter space make getting ready a daily battle with clutter?
For instance, a common complaint I hear is that a bathroom feels cramped and dark. If that’s on your “What Doesn’t” list, your goal immediately becomes “create a brighter, more open space.” That simple goal instantly helps you make decisions—you’ll lean toward recessed lighting, a lighter color palette, or a glass shower door instead of a billowy curtain.
Define Your Primary Goals
With your list of pain points and positives in hand, you can start setting some real, actionable goals. “I want a nicer bathroom” isn’t a goal; it’s a wish. Get specific and think about the outcome you want.
Here are a few ways to frame your goals based on common scenarios:
- The Spa Retreat: Your main goal is pure relaxation. This means a deep soaking tub, a luxurious rain shower head, dimmable lighting, and maybe even heated floors are high on your priority list.
- The Family Workhorse: Here, the goal is all about durability and efficiency for a busy household. You’ll be prioritizing things like a double vanity to end morning squabbles, tons of clever storage, and tough-as-nails flooring like porcelain tile.
- The Accessible Oasis: If you’re planning to age in place, your goals will focus on safety and comfort. A curbless walk-in shower, well-placed grab bars, and a comfort-height toilet become non-negotiable.
From experience, a common mistake is ripping out a bathtub to create a huge, luxurious shower, only to realize later that you miss having the option to soak. Unless it’s a second or third bathroom, think twice before removing the only tub in the house—it can affect your daily life and future resale value.
Find Your Personal Style
Knowing how you need the bathroom to function is half the battle; the other half is knowing how you want it to feel. What’s your vibe? Are you drawn to the clean, sharp lines of modern design? The cozy warmth of modern farmhouse? Or the timeless, can’t-go-wrong appeal of classic subway tile?
If you’re staring at a blank slate and feeling lost, it can be a huge help to figure out how to find your decorating style to give your vision a name and a direction.
For a fantastic, big-picture look at the entire process you’re about to start, check out this ultimate guide to planning the perfect bathroom renovation. Taking the time to clarify your vision now creates a powerful filter for every choice to come, making the entire project smoother and much more focused.
Getting Real with Your Budget and Timeline
Okay, you’ve got the vision. Now for the hard part: bringing that dream bathroom down to earth with a realistic budget and a workable schedule. From my experience, this is the make-or-break stage of any renovation. Getting this right is what separates a smooth, successful project from a stressful, budget-blowing nightmare.
A solid budget is your roadmap. It tells you where you can splurge and where you need to pull back. A practical timeline, on the other hand, is what keeps your life from descending into chaos while your bathroom is out of commission.
The bathroom remodeling market is a giant, estimated at USD 398.1 billion in 2024 globally. While that means you have tons of product choices, it also means good, reliable contractors are in high demand, which can definitely impact your costs.
What Does a Bathroom Remodel Actually Cost?
Most people are shocked to discover where the money really goes. It’s not just the gorgeous tile or the sleek new vanity. The biggest line item, almost without fail, is labor.
Don’t be surprised when 40-60% of your total budget goes directly to the skilled tradespeople—the plumbers, electricians, and tile setters who bring it all together. Their expertise is what ensures your bathroom not only looks good but functions perfectly for years to come.
Sample Bathroom Renovation Budget Breakdown
To give you a clearer picture of how to divide your funds, here’s a typical breakdown. Think of this as a starting point; your personal choices will shift these percentages around.
| Expense Category | Typical Budget Allocation (%) | Example Cost (for a $15,000 Reno) |
|---|---|---|
| Labor | 40-60% | $6,000 - $9,000 |
| Fixtures (Tub, Toilet) | 15% | $2,250 |
| Cabinetry & Countertops | 10% | $1,500 |
| Flooring & Tiling | 10% | $1,500 |
| Faucets & Plumbing | 10% | $1,500 |
| Lighting & Electrical | 5% | $750 |
As you can see, opting for that custom-built vanity or a high-end freestanding tub will quickly change the math. If you’re trying to make every penny count, be sure to check out our guide on affordable bathroom remodel ideas.
The One Thing You Can’t Skip: A Contingency Fund
If you listen to just one piece of advice in this guide, make it this one. You absolutely must have a contingency fund of 15-20% of your total project cost. No exceptions.
A contingency fund is your project’s safety net. It’s not for upgrading your faucet at the last minute. It’s for when your contractor pulls back the old shower wall and discovers years of hidden water damage and rotted studs.
That’s the kind of discovery that can stop a project dead in its tracks. Without that buffer, you’ll be forced to cut corners elsewhere, and you’ll likely regret it. Treat it as a non-negotiable cost from day one.

This process—assessing your needs, prioritizing your wants, and visualizing the outcome—is what helps you build an accurate budget in the first place.
Creating a Timeline That Makes Sense
There’s a natural order to a bathroom renovation. You can’t install the vanity before the floor is in, and you certainly can’t paint before the drywall is up. Trying to work out of sequence is a recipe for expensive rework and massive headaches.
While a simple cosmetic refresh might only take a week, a full-gut remodel where you’re moving walls and plumbing can easily take 4 to 8 weeks—sometimes even longer.
Here’s the typical order of operations you should expect:
- Tear-Out: This is demo day. Everything old comes out, and it’s often when you uncover those lovely surprises we talked about.
- Rough-In Work: Your plumber and electrician run new pipes and wires inside the open walls. This happens before anything gets closed up.
- Inspections: Depending on where you live, an inspector may need to sign off on the rough-in work to make sure it’s up to code.
- Drywall, Waterproofing, and Tile: Once the walls are back up, the crucial waterproofing goes in for the shower and tub areas, followed by your beautiful new tile.
- Painting: Now’s the time for color, while the room is still an empty shell. It’s much easier to paint without having to tape around a new vanity and toilet.
- Big Installations: The tub, shower, vanity, and toilet are carefully put into place.
- Final Finishes: Finally, the faucets, showerhead, light fixtures, and mirror are installed, and all the final connections are made.
Always remember that one “small” change can cause a huge ripple effect. Deciding to move the toilet just two feet can mean jackhammering the concrete slab and completely rerouting the main drain line, adding thousands of dollars and weeks to your timeline. Planning everything out beforehand helps you see these dependencies before they become costly problems.
Sketching Out a Functional and Stylish Layout
Okay, you’ve got your goals locked in and a budget figured out. Now for the fun part: designing the actual layout. This is where your vision starts to become tangible, long before a single tile is pulled up. A solid layout is the absolute foundation of a successful bathroom renovation, making sure the final space is as practical as it is beautiful.
The real goal here is to make every square foot count. That doesn’t always mean a full gut job. Sometimes, simple changes—like swapping a standard door for a pocket door or choosing a floating vanity—can make a cramped bathroom feel surprisingly spacious.

Maximizing Space With Smart Configurations
Deciding where to place your “big three”—the toilet, sink, and shower or tub—is your most important move. While sticking to the existing plumbing locations is always the cheapest route, a total remodel gives you a blank canvas to work with.
Here are a few layout strategies I’ve seen work wonders:
- Wet Rooms: This approach involves waterproofing the entire bathroom, creating one big, open shower space. It’s an amazing trick for small bathrooms because it gets rid of visual clutter like shower curbs, making the whole room feel bigger.
- Three-Quarter Baths: Ditching the bathtub for a spacious walk-in shower can free up a ton of floor space. Unless it’s the only tub in your house, this is a popular, modern choice that adds a touch of luxury.
- Compartmentalized Layouts: For a busy primary bathroom, tucking the toilet into its own little room (often called a water closet) is a game-changer. It adds a layer of privacy that allows more than one person to use the space at the same time.
Here’s a pro tip I always share with clients: Think about sightlines. The very first thing you see when you walk in should never be the toilet. Instead, try to make a gorgeous vanity, a striking tile feature, or a freestanding tub the star of the show.
This one detail alone can elevate the entire room, making it feel intentionally designed rather than just functional.
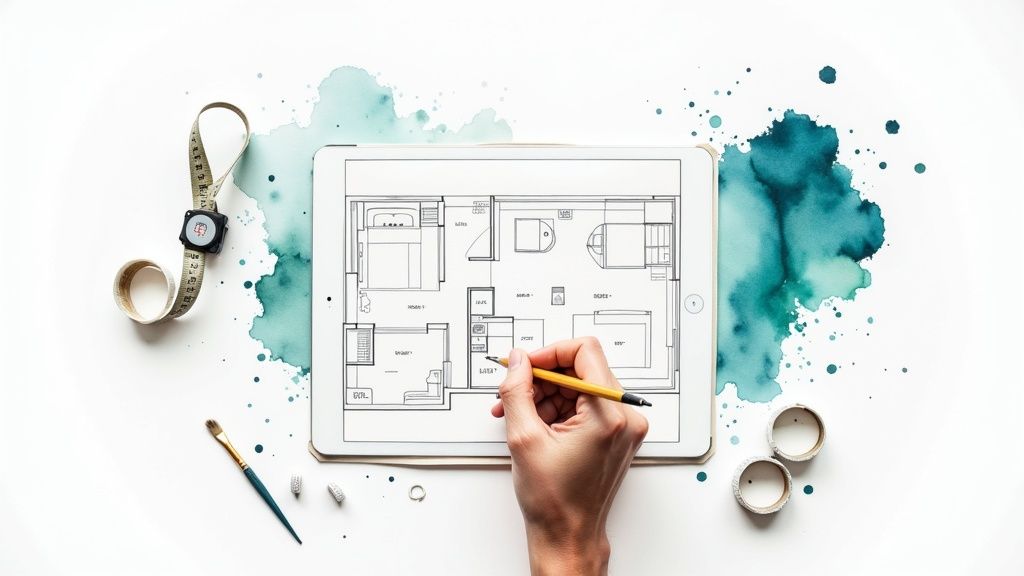
Bring Your Plan to Life with Modern Tools
It wasn’t long ago that visualizing a new layout meant squinting at confusing blueprints or just trying to imagine it all in your head. Thankfully, technology has completely changed the game. AI design tools let you play architect and experiment with different layouts risk-free.
Platforms like RoomGenius are incredibly helpful. You can plug in your bathroom’s dimensions and get several layout ideas in an instant. From there, you can drag and drop fixtures to see how a bigger vanity affects your walking path or compare how a shower-tub combo looks next to a standalone shower.
This visual process is key to making confident choices and avoiding those dreaded “I wish we had…” regrets down the line. It’s a critical part of creating a great floor plan. For a more detailed walkthrough, our guide explains how to create floor plans that really work, from getting your measurements right to optimizing traffic flow.
Nailing Down Your Design Style
With a functional layout set, you can start layering in the aesthetics—the stuff that really injects your personality into the space. Are you leaning toward the cozy, rustic vibe of a modern farmhouse, or do you love the clean, minimalist look of Scandinavian design?
To get you started, here are a few popular styles:
| Design Style | Key Characteristics | Best For |
|---|---|---|
| Scandinavian | Light wood tones, white walls, clean lines, minimalist fixtures, and an emphasis on natural light. | Creating a calm, airy, and uncluttered retreat. |
| Modern Farmhouse | Shiplap walls, matte black fixtures, trough sinks, and warm, rustic wood accents. | A cozy, comfortable, and inviting family bathroom. |
| Industrial | Exposed brick or concrete, metal-framed shower doors, vessel sinks, and utilitarian lighting. | An edgy, urban look with a focus on raw materials. |
| Mid-Century Modern | Geometric tile patterns, teak vanities, bold colors like orange or teal, and sleek, organic shapes. | A retro-inspired space with a playful and timeless feel. |
And remember, you don’t have to be a purist. The most interesting designs often borrow elements from different styles to create something totally unique to you. Your layout gives the room its function, but your style gives it a soul.
Choosing Materials and Fixtures That Last
Alright, this is where your bathroom renovation starts to feel real. Moving from ideas on paper to picking out the actual materials is one of the most exciting parts of the process. The choices you make here will define the entire look, feel, and—most importantly—the durability of your new space for years to come.
It’s easy to get sidetracked by all the stunning options out there. The key is to find that sweet spot between aesthetics, daily performance, and your budget. For example, that fancy rain showerhead is a great “want,” but a top-notch waterproofing membrane behind the tile is a definite “need.”
Let’s break down where to put your money and what to look for.
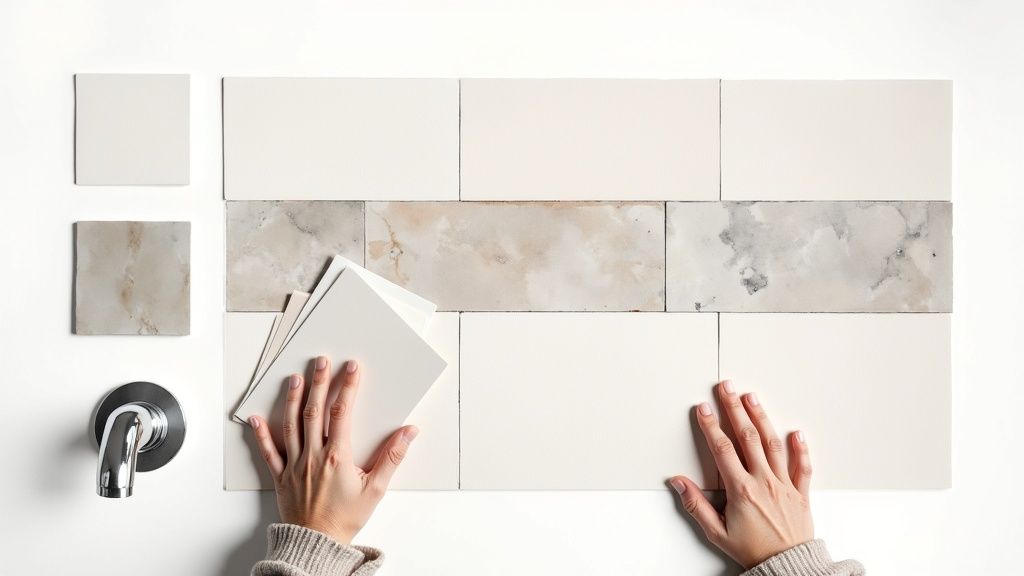
Selecting Tiles and Surfaces
The floor and wall coverings are the canvas of your bathroom. Get these right, and everything else will fall into place. While you obviously want them to look good, their ability to stand up to a wet, high-traffic environment is what really matters.
The classic tile debate usually comes down to porcelain versus ceramic. Here’s my take:
- Porcelain Tile: This is my go-to for bathroom floors and shower walls, hands down. It’s fired at a much higher temperature than ceramic, making it incredibly dense and water-resistant. You can’t beat it for durability in wet areas.
- Ceramic Tile: A bit more budget-friendly and often easier to cut, ceramic is a solid choice for areas that don’t get soaked, like a vanity backsplash or the walls outside the shower.
A word of caution: Please don’t choose a glossy, smooth tile for your floor just because it looks pretty or saves a few bucks. Always check the slip-resistance rating. For shower floors, I always recommend small mosaic tiles—the extra grout lines provide fantastic natural grip.
When it comes to the vanity countertop, you’re usually balancing appearance with how much cleaning you want to do. Quartz is a crowd-pleaser for a reason; it’s an engineered stone that’s non-porous, so it won’t stain from a spilled bottle of foundation or a glob of toothpaste. I’m also a big fan of solid surface materials, which give you that seamless, modern look and can be buffed out if they get scratched.
Choosing Your Core Fixtures
These are the workhorses of your bathroom. A leaky faucet or a weak-flushing toilet is a daily annoyance you just don’t need. This is one area where investing in quality really pays off.
Take the toilet, for instance. It’s used constantly. Look for a model with a high MaP (Maximum Performance) score, which is a straightforward rating of its flushing power. A dual-flush model is a no-brainer—it saves a surprising amount of water over its lifetime.
For your faucets and showerheads, the finish you choose impacts both the style and your cleaning routine.
- Chrome: Timeless, affordable, and a breeze to clean. It’s a can’t-go-wrong option.
- Brushed Nickel or Brass: These are great for hiding fingerprints and water spots, and they bring a warmer, softer look to the room.
- Matte Black: It looks incredibly sharp and modern, but be prepared to wipe it down often. It shows every single water spot and fingerprint.
Think honestly about your tolerance for upkeep. If you’re not the type to wipe down fixtures after every use, you might grow to resent that beautiful matte black faucet.
Final Touches: A Shopping Checklist
With the big-ticket items sorted, it’s the little details that will really pull your design together. Don’t let these become an afterthought! Your bathroom reno planner should have a spot to track these finishing touches so nothing gets missed in the final rush.
Here’s a quick list to get you started:
- Main Lighting: An overhead fixture to light the whole room.
- Task Lighting: Sconces or a vanity light bar are essential for a shadow-free reflection.
- Hardware: All your cabinet pulls, knobs, and drawer handles.
- Accessories: The towel bars, robe hooks, and toilet paper holder.
- Exhaust Fan: Don’t cheap out here. Get a quiet model with a CFM (cubic feet per minute) rating appropriate for your bathroom’s size to prevent moisture problems.
- Light Bulbs: The color temperature makes a huge difference. Look for bulbs around 3000K for a bright, clean light that’s perfect for tasks like applying makeup but isn’t as harsh as office lighting.
By carefully considering each piece for both its look and its longevity, you’re not just designing a bathroom—you’re making a smart investment that will function beautifully for years.
Hiring Pros Versus Tackling It Yourself
This is one of the biggest forks in the road you’ll face: who is actually going to do the work? The pull of a DIY project is strong. You see the potential cost savings and imagine the satisfaction of a job well done. But a bathroom is a tricky space—it’s where plumbing, electrical, and waterproofing all collide. A tiny mistake here can quickly spiral into a massive, wet, and expensive headache.
The right choice comes down to being brutally honest about your skills, your free time, and just how complex this job really is. It doesn’t have to be an all-or-nothing decision, either. Many of the most successful remodels I’ve seen use a hybrid approach, where the homeowner tackles some jobs and leaves the high-stakes work to licensed pros.
What Can You Realistically DIY?
If you’re handy and confident, some bathroom tasks are definitely within reach. These are typically the projects with a low risk of causing catastrophic damage if something goes slightly wrong.
A few common DIY-friendly jobs include:
- Painting: A fresh coat of paint delivers the most bang for your buck. All it really costs is a weekend of your time, some patience, and a steady hand.
- Installing a Vanity: If you aren’t moving any plumbing, swapping out an old vanity is a pretty straightforward project. It’s a great way to make a big impact.
- Replacing Fixtures: Changing a faucet, a showerhead, or a light fixture (after you’ve safely killed the power) is usually manageable with just a few basic tools.
- Demolition: This can be a huge labor-saver. Tearing out old tile, drywall, or fixtures saves your contractor time and saves you money. Just make sure you know what’s hiding behind those walls before you start swinging.
When to Call in the Professionals
While a DIY approach can trim the budget, some jobs just aren’t worth the risk. My rule of thumb is simple: if it involves your home’s core systems, you hire a licensed and insured professional. No exceptions.
These tasks are non-negotiable for professional hire:
- All Plumbing Work: Moving a toilet, rerouting shower pipes, or installing new supply lines needs a licensed plumber. I’ve seen firsthand how improperly installed plumbing leads to devastating water damage.
- All Electrical Work: Adding outlets, moving wiring for sconces, or putting in a new exhaust fan has to be done by a licensed electrician. This is about meeting safety codes and preventing fire hazards.
- Waterproofing and Tiling: This is more technical than it looks. A poorly waterproofed shower will fail, causing hidden leaks and rot. A pro tiler ensures a perfect, long-lasting finish that protects your home.
- Structural Changes: If you’re taking down a wall, you absolutely need a general contractor, and maybe even a structural engineer, to make sure you don’t compromise your home’s integrity.
The numbers back this up. The trend is clearly shifting toward professional help, as pro-led kitchen and bath remodels are expected to grow by about 2.9% in 2025, while DIY projects are only projected to see 0.6% growth. This is because modern bathrooms are getting more complex. If you want to dig into the data, you can read the full research on the 2025 kitchen and bath market outlook.
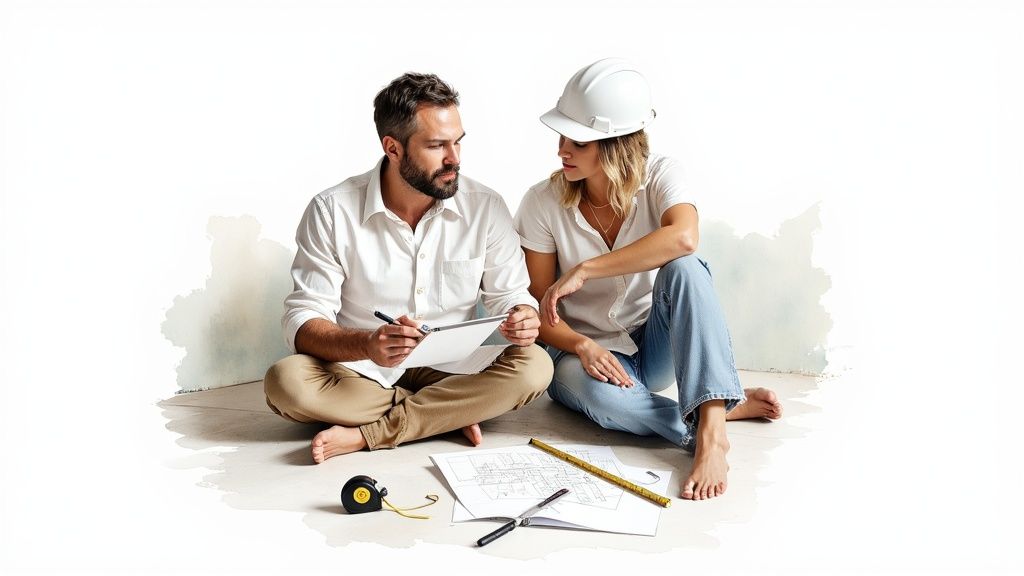
Vetting and Hiring a Contractor
Finding the right contractor is the single most important decision for a stress-free renovation. You’re trusting this person with your home and a significant amount of money, so you have to do your homework.
A great contractor does more than just the work; they manage the project, coordinate subcontractors, and solve problems. A bad one can turn your dream remodel into a nightmare of delays and shoddy workmanship.
Here’s how to find a reliable pro:
- Gather Recommendations: Start by asking friends, family, and neighbors for referrals. You want contractors who specialize in bathrooms, not just general handymen.
- Check Credentials: Verify that they have a valid license and carry both general liability insurance and workers’ compensation. Never, ever hire someone who can’t show you proof.
- Interview Multiple Candidates: Get at least three detailed bids. Look beyond the final price—compare the proposed scope of work, the specific materials listed, and the project timeline.
- Ask the Right Questions: Ask about their experience with projects just like yours. How do they handle unexpected issues? Who will be your daily point of contact on the job site?
- Review the Contract: The contract needs to be airtight. It must include a clear payment schedule, specific start and end dates, and a complete list of every material and fixture. Never sign a vague agreement or pay the full amount upfront.
7. Tackling Permits and Kicking Off Construction
Alright, you’ve made it this far. Your design is locked in, the beautiful new materials are on their way, and you’ve found a contractor you trust. Now, your bathroom reno planner shifts from a collection of ideas into an action plan. This is where the real work begins, but before anyone even thinks about swinging a hammer, there’s one last piece of red tape to handle: the building permit.
Figuring out if you need a permit can seem murky, but I have a simple rule of thumb I always share with clients: if you’re changing the structure, plumbing, or electrical footprint of the room, you almost certainly need one.
- Moving a wall, even a non-load-bearing one? You’ll need a permit.
- Relocating the toilet or shower drain? That’s a permit.
- Running a new electrical line for that fancy bidet seat? Yep, permit required.
On the other hand, simple cosmetic swaps like changing a faucet, painting, or replacing a vanity in the exact same spot usually don’t require any official sign-off. Your contractor should be the one to pull the permits, but as the homeowner, the buck ultimately stops with you. Make sure it gets done. Skipping this can bite you hard down the road with fines or major headaches when you try to sell.
The Construction Play-by-Play
Once the paperwork is squared away, construction can finally begin. And trust me, there’s a very specific, logical order to everything. Going out of sequence is a surefire way to cause delays, damage new work, and rack up extra costs. While no two jobs are identical, the general flow is pretty universal.
Here’s how a typical bathroom renovation unfolds:
- Demolition and Haul-Away: The old bathroom gets torn out. Depending on the scope, this could mean going right down to the studs. This is also the moment of truth, where you might uncover nasty surprises like old water damage or mold.
- The “Rough-In” Phase: With the walls wide open, the plumbers and electricians get to work. They’ll run all the new water lines, drains, and electrical wiring for your new layout.
- Critical Inspections: This is a non-negotiable step. A city inspector comes to sign off on the rough-in work before anything gets covered up. This ensures everything is up to code and safe.
- Closing Up and Waterproofing: New drywall goes up. Then comes one of the most important steps: applying a waterproofing membrane in the entire shower and tub area.
- Tile and Flooring: Now for the fun part. Your beautiful tile goes in, usually starting with the shower walls and then moving to the main floor.
- Painting and Big Installations: The room gets a fresh coat of paint before the bulky items arrive. Then, the vanity, toilet, and tub are carefully brought in and set in place.
- The Finishing Touches: Finally, the “jewelry” of the bathroom is installed—faucets, showerheads, light fixtures, and towel bars. The final plumbing and electrical connections are made, and the room comes to life.
My Pro Tip: Before a single tile is set in that shower, go in there and personally look at the waterproofing. It should be a flawless, continuous membrane. This is your bathroom’s only defense against leaks. A tiny mistake here can cause thousands in damage later. Have your contractor walk you through it and confirm it was done right. Keeping an eye on these make-or-break moments is how you take real control over the quality of your renovation.
Got Questions About Your Bathroom Renovation?
Even with the best plan in hand, you’re bound to have a few questions pop up. It’s totally normal. Moving from paper plans to the real world of demolition and construction brings up all sorts of details. Let’s walk through some of the most common things people ask so you can move forward feeling confident.
Timelines And Value: The Big Picture
One of the first things everyone wants to know is, “How long will I be without a bathroom?” For a full, down-to-the-studs renovation, you should expect the project to take anywhere from three to eight weeks. A simple refresh with new paint and a faucet might just take a weekend, but if you’re moving plumbing, rewiring, or taking down walls, it can easily push toward that two-month mark. The final timeline really depends on your contractor’s schedule, how long it takes for custom tile or a special-order vanity to arrive, and even how busy your local permitting office is.
Then comes the other big question: is it really worth the investment? Absolutely. A thoughtfully remodeled bathroom almost always provides a great return. Homeowners can typically expect to get back 60-70% of what they spend when they eventually sell. A modern, functional bathroom is a huge draw for buyers and can make your home sell much faster.
Don’t forget, “value” isn’t just about the money. The daily satisfaction you get from a space that perfectly suits your needs—whether that’s a relaxing, spa-like escape or a super-efficient family bathroom—is a return you get to enjoy every single day.
Getting The Order Right and Spotting Hidden Costs
For a renovation to go smoothly, you have to do things in the right order. Messing up the sequence means tearing out new work to fix something that should have been done earlier, which is a budget and timeline killer. The typical flow looks something like this: demolition, rough-in plumbing and electrical, any new framing, waterproofing, tiling and painting, and then bringing in the big fixtures like the vanity and toilet for final installation.
So, what are those budget-busting surprises people always talk about? They almost always show up right after demolition. The most common culprits are:
- Hidden water damage from a tiny, decades-old leak.
- Old plumbing or wiring that isn’t up to modern safety codes.
- Unexpected mold or even asbestos, which needs to be handled by pros.
This is exactly why that 15-20% contingency fund is non-negotiable. It’s the safety net that keeps your project from grinding to a halt. If you’re looking for a resource that dives deep into all the financial details, check out this expert guide to bathroom renovation costs and planning.
Ready to stop guessing and start seeing? With RoomGenius, you can plug in your bathroom’s measurements and get instant layout ideas, play with different design styles, and see it all come together before a single tile is pulled up. Try RoomGenius today and design your perfect bathroom with total confidence.