10 Brilliant Bathroom Layout Ideas to Inspire Your 2025 Remodel
Planning a bathroom remodel starts with the perfect foundation: the layout. The right arrangement of fixtures can transform a cramped, awkward space into a functional and serene retreat, significantly impacting everything from traffic flow and usability to the overall aesthetic appeal. Getting the layout right is the most critical first step, as it dictates all subsequent design choices, including plumbing, electrical, and fixture selection. A well-planned layout maximizes every square inch, ensuring the final result is both beautiful and practical.
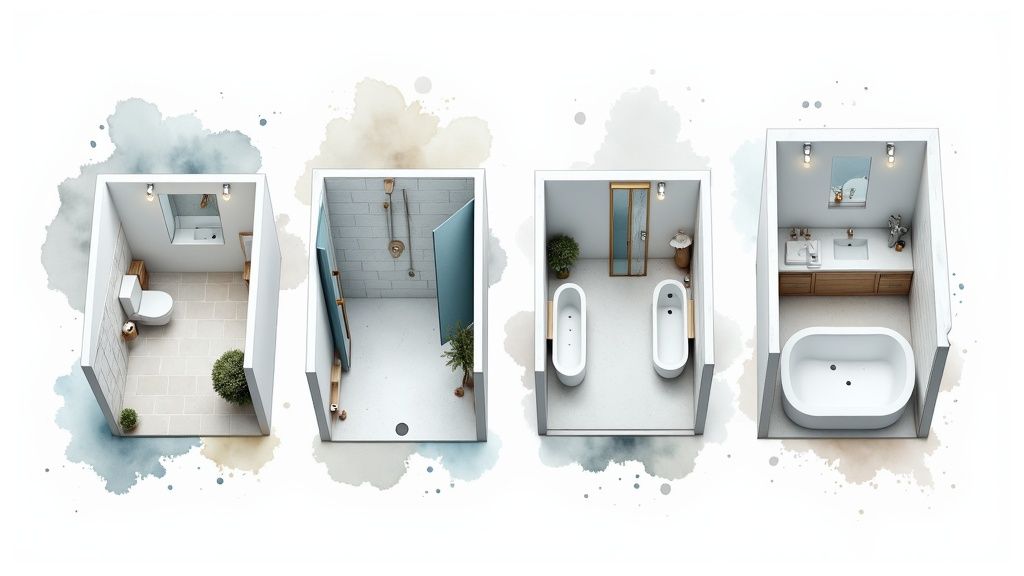
This guide moves beyond generic inspiration to provide a comprehensive breakdown of the most effective bathroom layout ideas. We will dissect 10 distinct floor plans, from the space-saving galley style to the luxurious open-concept master suite. Each entry includes detailed schematics, essential measurements, and a clear-eyed look at the pros and cons. We’ll cover solutions for common challenges, whether you are maximizing a small footprint, designing a shared Jack-and-Jill, or creating a spa-like wet room. For those specifically aiming to maximize functionality in compact areas, you can also explore these brilliant renovation ideas for small bathrooms for additional focused strategies.
Our goal is to equip you with the actionable insights needed to make an informed decision. Forget the guesswork; this list provides the concrete details required for confident planning. Get ready to explore proven layouts that cater to various needs, styles, and budgets, setting the stage for a successful renovation. And if you find yourself needing a more tailored solution, remember that a tool like RoomGenius can help visualize these concepts within your home’s specific dimensions, generating multiple AI-powered alternatives to refine your vision.
1. Galley Bathroom Layout
The galley layout is a classic and highly efficient solution for narrow bathroom spaces. This design arranges fixtures in a linear sequence along one or two parallel walls, creating a functional corridor. It’s one of the most common bathroom layout ideas for maximizing utility in constrained footprints, such as those found in apartments, en-suites, or converted spaces like a closet or hallway nook.
Fixture Placement & Key Measurements
In a typical galley layout, the sink, toilet, and shower/tub are placed in a row. For single-wall galleys, this creates an unobstructed path. In a double-galley, fixtures are on opposing walls, which requires careful planning to ensure clearance.
- Minimum Width: A single-wall galley requires a minimum width of 5 feet (1.5 meters). For a double-galley, aim for at least 8 feet (2.4 meters) to maintain a comfortable central walkway.
- Clearance: Ensure at least 30 inches (76 cm) of clear floor space along the length of the room. This walkway is critical for movement and accessibility.
- Fixture Spacing: Allow a minimum of 15 inches (38 cm) from the centerline of the toilet to any adjacent wall or fixture.
Pro Tip: Wall-mounted toilets and vanities are game-changers in a galley layout. By lifting fixtures off the floor, you create an uninterrupted sightline that makes the space feel larger and simplifies cleaning.
Pros & Cons
Pros:
- Space-Efficient: Maximizes functionality in long, narrow rooms.
- Cost-Effective: Plumbing is often consolidated along one wall, reducing installation complexity and cost.
- Simple to Plan: The linear arrangement is straightforward to design.
Cons:
- Can Feel Cramped: The corridor-like shape can feel restrictive if not styled correctly.
- Limited Traffic Flow: Can only accommodate one person comfortably at a time.
Best Use-Cases & Styling
This layout is ideal for guest bathrooms, small master en-suites, and basement additions. To make it feel more spacious, use a large mirror spanning the length of the vanity, install bright, uniform lighting, and choose a light color palette. A pocket or sliding barn door is an excellent choice to eliminate the space consumed by a traditional swinging door.
Before finalizing your design, it’s wise to visualize the flow. Learning how to create detailed floor plans for your bathroom can help you test different fixture arrangements and ensure every inch is optimized.
2. Master Bath Suite Layout
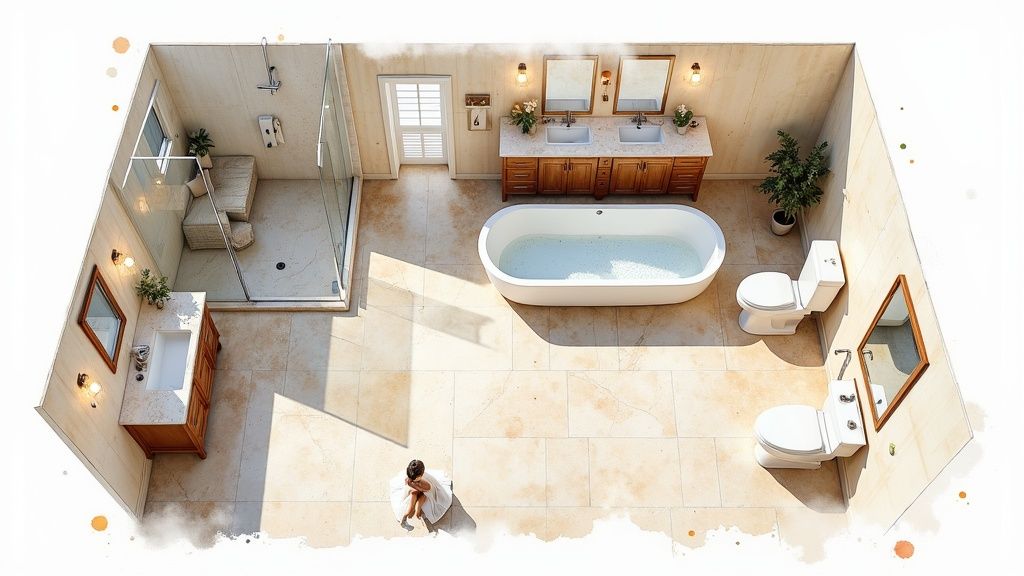
The master bath suite layout transforms a functional bathroom into a luxurious, multi-zone personal retreat. This high-end design is defined by its generous scale and compartmentalized areas, often featuring separate spaces for grooming, bathing, and the toilet. It prioritizes comfort, privacy, and spa-like amenities, making it a hallmark of upscale master bedrooms in modern homes and luxury properties.
Fixture Placement & Key Measurements
A successful master suite layout hinges on creating distinct zones. The double vanity is often the focal point, while the walk-in shower and freestanding tub are separated. The toilet is typically enclosed in its own private water closet for ultimate privacy.
- Minimum Size: This layout requires a significant footprint, typically starting at 100 square feet (9.3 square meters) but often exceeding 150 square feet.
- Vanity Space: For a double vanity, allow 60 to 72 inches (152 to 183 cm) of width. Ensure at least 36 inches (91 cm) of clearance in front for comfortable use.
- Water Closet: A separate toilet room should be at least 36 inches wide by 66 inches deep (91 by 168 cm).
Pro Tip: Physically separate the “wet zone” (shower and tub) from the “dry zone” (vanity and storage) using glass partitions or a half-wall. This enhances safety, simplifies cleaning, and adds architectural interest.
Pros & Cons
Pros:
- Ultimate Luxury & Comfort: Creates a spa-like experience at home.
- Enhanced Privacy: Separate zones allow multiple people to use the space simultaneously without interference.
- Increases Home Value: A well-designed master suite is a major selling point.
Cons:
- Requires Substantial Space: Not feasible for small or medium-sized homes.
- High Cost: Extensive plumbing, high-end fixtures, and larger square footage lead to significant expense.
Best Use-Cases & Styling
This layout is the gold standard for master bedrooms in new constructions and large-scale renovations. To enhance the design, incorporate luxury features like heated floors, a steam shower, or a dedicated makeup vanity. For those specifically designing a primary retreat, exploring inspiring master bathroom remodel ideas can help define the optimal layout.
To manage a project of this scale, using a structured planning tool is essential. A detailed bathroom renovation planner can help you coordinate fixtures, finishes, and contractors effectively.
3. Jack-and-Jill Bathroom Layout
The Jack-and-Jill layout is a clever and highly functional solution for family homes, serving as a shared bathroom accessible from two separate bedrooms. This design is one of the most practical bathroom layout ideas for siblings or adjoining guest rooms, as it provides a semi-private en-suite experience for both users while saving the space and cost of building two full, separate bathrooms.
Fixture Placement & Key Measurements
A common Jack-and-Jill configuration features a central area with dual vanities, which then leads to a separate, private compartment for the toilet and shower/tub. This compartmentalization is key to its functionality, allowing one person to shower while another uses the sink.
- Minimum Width: The space requires significant width to accommodate dual sinks and proper clearance. A minimum width of 10-12 feet (3-3.6 meters) is recommended for a comfortable layout with a separate water closet.
- Vanity Space: To comfortably fit two sinks, the vanity should be at least 60-72 inches (152-183 cm) wide. This allows for adequate counter space and personal storage for each user.
- Door Clearance: Account for the swing of two entry doors plus the door to the toilet/shower compartment. Pocket doors are an excellent space-saving alternative.
Pro Tip: Designate separate storage, such as dedicated drawers or medicine cabinets, for each user. This simple organizational step can prevent daily squabbles and keep the shared space tidy and functional.
Pros & Cons
Pros:
- Space and Cost-Efficient: Provides two bedrooms with en-suite access for the price and footprint of one-and-a-half bathrooms.
- Promotes Sharing: Ideal for teaching children to share a space and manage a routine.
- High Functionality: The compartmentalized design allows for simultaneous use, which is perfect for busy morning schedules.
Cons:
- Privacy Concerns: Accidental walk-ins are a common issue if doors aren’t consistently locked.
- Complex Layout: Requires more square footage and careful planning than a standard bathroom.
- Noise Transmission: Sounds can easily travel between the connected bedrooms through the bathroom.
Best Use-Cases & Styling
This layout is perfect for family homes, especially between children’s bedrooms or a guest room and a home office. To enhance privacy and usability, install solid-core doors with clear “in-use” locks on both entries. Use durable, easy-to-clean materials like quartz countertops and porcelain tile. For styling, consider giving each user’s side a subtle personal touch with different colored towels or accessories to create a sense of individual space.
4. Open-Concept Bathroom Layout
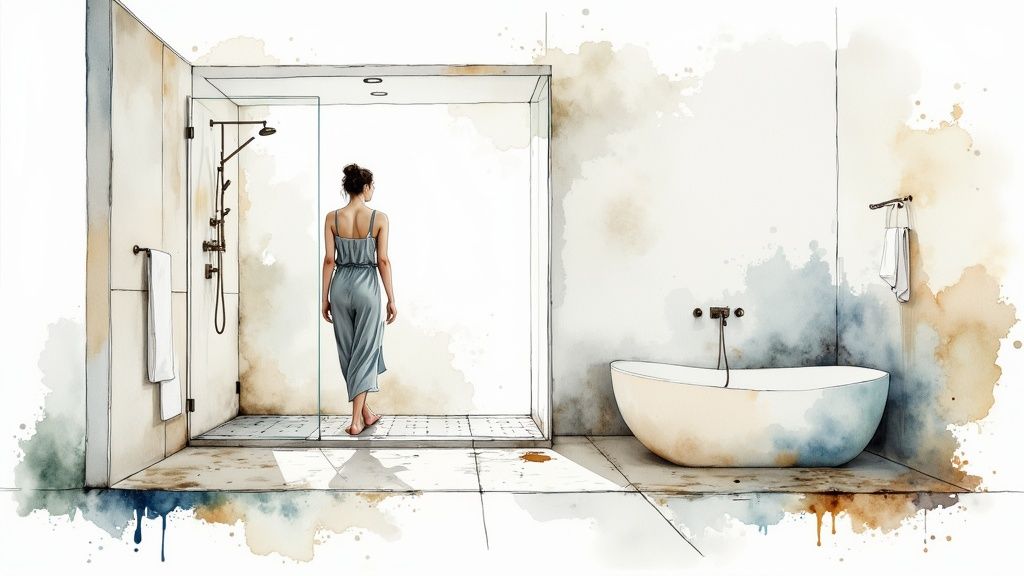
The open-concept layout dissolves traditional walls and barriers, merging the primary bedroom and bathroom into a single, fluid space. This design creates a luxurious, spa-like suite by removing visual obstructions between sleeping, bathing, and vanity zones. It’s one of the more contemporary bathroom layout ideas, favored in minimalist architecture and high-end hotel design for its airy, expansive feel.
Fixture Placement & Key Measurements
In an open-concept layout, the toilet is typically enclosed in a separate water closet for privacy, while the freestanding tub, walk-in shower, and vanity are integrated into the main living area. The arrangement is more about creating zones than following strict linear rules.
- Minimum Area: This layout works best in large master suites, requiring at least 200 square feet (18.5 square meters) to feel balanced and not crowded.
- Clearance: Generous clearance is key. Allow at least 36-48 inches (91-122 cm) around major fixtures like the tub and shower entrance to enhance the open, uncluttered aesthetic.
- Zoning: Use a freestanding tub as a centerpiece or a low-profile partial wall to subtly delineate the bathing area from the sleeping area without closing it off.
Pro Tip: Effective moisture management is non-negotiable. Invest in a high-powered, humidity-sensing exhaust fan and consider a secondary in-line fan to handle the increased steam. Use waterproof materials like porcelain tile or vinyl plank flooring throughout the entire space.
Pros & Cons
Pros:
- Luxurious Feel: Creates an expansive, high-end, resort-style atmosphere.
- Enhanced Natural Light: Removing walls allows light to flow freely, making the entire suite feel brighter and larger.
- Accessibility: An open, barrier-free design can be easily adapted for universal access.
Cons:
- Lack of Privacy: The absence of walls can be uncomfortable for couples with different schedules or privacy needs.
- Moisture & Humidity: Steam and humidity can spread to the bedroom, requiring superior ventilation and moisture-resistant finishes.
- Higher Cost: Requires extensive waterproofing, specialized ventilation, and cohesive flooring, which increases construction costs.
Best Use-Cases & Styling
This layout is perfect for spacious master suites, modern lofts, and vacation homes where a spa-like retreat is the primary goal. To define zones without walls, use area rugs in the sleeping area, change flooring materials (e.g., tile in the wet zone, wood in the bedroom), or use a slight change in floor elevation. A muted, natural color palette and large-format tiles will enhance the seamless, minimalist look.
5. Corner Bathroom Layout
The corner layout is a smart and efficient design that reclaims often-underutilized corner space, typically by tucking the shower or bathtub neatly into it. This strategic move frees up valuable linear wall space for the vanity and toilet, making it one of the most practical bathroom layout ideas for square-shaped or smaller rooms where every inch counts. It prevents the room from feeling crowded by concentrating the largest fixture in one area.
Fixture Placement & Key Measurements
In a corner layout, the shower or tub serves as the anchor, with the toilet and sink/vanity placed on the adjacent walls. This creates a functional triangular workflow that minimizes movement between the main zones of the bathroom.
- Minimum Dimensions: This layout works well in rooms that are at least 6x6 feet (1.8 x 1.8 meters). This size allows for a standard corner shower and adequate clearance for other fixtures.
- Shower Size: A neo-angle or corner shower stall should be at least 32x32 inches (81x81 cm), though 36x36 inches (91x91 cm) is more comfortable.
- Clearance: Maintain at least 21 inches (53 cm) of clear space in front of the toilet and sink. A minimum of 30 inches (76 cm) is recommended in front of the shower entry.
Pro Tip: Choose a corner shower with a frameless glass enclosure and a sliding or curved door. This minimizes the visual weight of the fixture and eliminates the “door swing” footprint, preserving precious floor space and enhancing the open feel of the bathroom.
Pros & Cons
Pros:
- Highly Space-Efficient: Maximizes usable space in small or square bathrooms.
- Creates Open Floor Space: Centralizes the largest fixture, opening up the middle of the room.
- Improved Traffic Flow: The triangular arrangement can feel more intuitive and less linear than a galley layout.
Cons:
- Plumbing Complexity: May require more complex plumbing runs compared to a single-wall layout.
- Limited Fixture Size: Often requires specially designed corner fixtures, which may limit size and style options.
Best Use-Cases & Styling
This layout is perfect for small master bathrooms, en-suites, and basement or attic bathroom additions. It’s a go-to solution when you need to fit a full bath into a compact footprint without sacrificing functionality. To style it effectively, use a corner vanity or floating shelves to mirror the shower’s placement and maintain symmetry. Bright, reflective tiles can make the corner shower feel larger and less enclosed.
For visual inspiration on how this layout transforms compact areas, you can explore various pictures of remodeled small bathrooms that expertly utilize corner designs.
6. Wet Room Layout
The wet room layout is a bold, modern approach that transforms the entire bathroom into a waterproofed enclosure. This design eliminates the traditional shower curb and door, integrating the shower area seamlessly with the rest of the floor. This creates an open, accessible, and luxurious space popular in contemporary European design and high-end spas.
Fixture Placement & Key Measurements
In a true wet room, the entire space is designed to handle water, but fixture placement is still key to functionality. The shower is typically located at the far end of the room, while the toilet and vanity are placed in a “drier” zone to minimize water spray.
- Floor Slope: The floor must have a subtle, continuous slope towards the drain. A gradient of 1:50 (a 1-inch drop for every 50 inches of length) is standard to ensure proper drainage.
- Drainage: A high-capacity linear drain installed along the wall under the showerhead is often the most effective and stylish choice.
- Splash Zone: Even in an open layout, try to keep the toilet and vanity at least 5-6 feet (1.5-1.8 meters) away from the showerhead to reduce overspray. A partial glass screen can help contain most of the water without enclosing the space.
Pro Tip: Invest in high-quality waterproofing. A liquid-applied membrane or sheet membrane system must be applied to the floor, up the walls (especially in the shower area), and meticulously sealed around all fixtures and drains. This is not a step to cut corners on.
Pros & Cons
Pros:
- Accessibility: The curb-free entry is ideal for individuals with mobility challenges, making it perfect for aging-in-place designs.
- Maximizes Space: Creates a sense of openness, making even small bathrooms feel larger and more luxurious.
- Easy to Clean: With fewer corners and no shower door tracks, cleaning is significantly simpler.
Cons:
- High Installation Cost: Requires extensive, professional waterproofing and tiling, making it more expensive than a standard bathroom.
- Water Splashes: Everything can get damp, including towels, toilet paper, and cabinets if not planned carefully.
- Resale Concerns: May not appeal to all homebuyers, potentially impacting resale value in some markets.
Best Use-Cases & Styling
This layout is perfect for minimalist master en-suites, accessible bathrooms, and small spaces where a shower door would be obtrusive. To enhance the design, use large-format, non-slip tiles to create a seamless look. Wall-mounted fixtures are a must to keep the floor clear. Good ventilation is crucial to manage humidity, so invest in a powerful, high-quality exhaust fan.
7. Compartmentalized Bathroom Layout
The compartmentalized layout transforms a single bathroom into a multi-user space by dividing it into separate, enclosed zones for different functions. This design typically isolates the toilet in its own small room (a water closet), separating it from the vanity and bathing areas. This is one of the most practical bathroom layout ideas for busy family homes or shared primary suites, maximizing privacy and efficiency.
Fixture Placement & Key Measurements
In this layout, the key is separation. The toilet is almost always placed in its own enclosed compartment with a door. The vanity area might be open to the bedroom or a main hallway, while the shower and tub can be in a third, separate room.
- Toilet Compartment Size: The minimum size for a separate toilet room is 30 inches by 60 inches (76 cm by 152 cm), but 36 inches by 66 inches (91 cm by 168 cm) is far more comfortable.
- Door Clearance: Pocket doors or outward-swinging doors are essential for small toilet compartments to avoid trapping a user inside. A standard 24-inch (61 cm) door is often sufficient.
- Ventilation: Each enclosed compartment, especially the toilet room, requires its own dedicated ventilation fan to manage moisture and odors effectively.
Pro Tip: For a seamless feel, use cohesive flooring and wall tiles throughout the different compartments. This visual link prevents the separated zones from feeling disjointed and makes the entire suite feel like one intentionally designed space.
Pros & Cons
Pros:
- Enhanced Privacy: Offers unparalleled privacy for the toilet user.
- Multi-User Functionality: Allows multiple people to use the bathroom simultaneously without interference.
- Improved Hygiene: Contains odors and moisture within specific zones.
Cons:
- Requires More Space: This layout demands a larger overall footprint than a standard single-room bathroom.
- Higher Cost: Requires more materials for walls, doors, and separate electrical and ventilation systems, increasing construction costs.
- Can Feel Fragmented: If not designed carefully, the separate zones can feel small and disconnected from each other.
Best Use-Cases & Styling
This layout is perfect for primary en-suite bathrooms shared by couples with different schedules, as well as “Jack and Jill” bathrooms situated between two children’s bedrooms. To unify the space, maintain a consistent design theme across all compartments. Use glass panels or doors for the shower area to enhance the sense of openness, and ensure each zone has adequate, layered lighting for its specific function.
8. Linear Bathroom Layout
The linear bathroom layout is a model of simplicity and efficiency, arranging all major fixtures-the sink, toilet, and shower/tub-in a single, orderly row along one wall. This straightforward design is one of the most practical bathroom layout ideas because it streamlines plumbing and creates an open, unobstructed traffic path. It’s an incredibly versatile choice that works well in rectangular spaces, from compact guest bathrooms to more generously sized primary suites.
Fixture Placement & Key Measurements
In a linear layout, the sequence of fixtures is key to functionality. A common arrangement is sink, then toilet, then tub/shower at the far end, which places the most-used item closest to the door.
- Minimum Width: The room needs to be at least 5 feet (1.5 meters) wide to accommodate the fixtures and a comfortable walkway.
- Clearance: Maintain at least 36 inches (91 cm) of clear space in front of the fixtures to allow for easy movement and use.
- Fixture Spacing: Ensure a minimum of 18 inches (46 cm) between the edge of the sink and the centerline of the toilet, and 15 inches (38 cm) from the toilet’s centerline to the tub or a wall.
Pro Tip: With all fixtures on one wall, the opposite wall becomes a blank canvas. Use it for a long, shallow storage unit, a decorative feature wall with bold tile, or a series of towel hooks and art to add personality without cluttering the main functional zone.
Pros & Cons
Pros:
- Highly Cost-Effective: Consolidating all plumbing and electrical work onto a single “wet wall” significantly reduces labor and material costs.
- Maximizes Open Space: Frees up the rest of the room, making it feel larger and more open.
- Simple & Versatile: Easy to plan and implement in various room sizes and shapes.
Cons:
- Limited Design Creativity: The single-wall arrangement can feel formulaic if not styled thoughtfully.
- Can Create a “Bowling Alley” Effect: In very long and narrow rooms, it may accentuate the tunnel-like dimensions.
Best Use-Cases & Styling
This layout is a go-to for standard apartment bathrooms, mobile homes, and basement or attic conversions where plumbing access is limited. To enhance a linear layout, install a large, continuous mirror over the vanity and toilet to visually double the space. Use consistent lighting fixtures above each station to create a cohesive look and consider a floating vanity to make the floor plan feel more expansive.
9. Triangular Work Zone Bathroom Layout
Borrowed from classic kitchen ergonomics, the triangular work zone is a highly efficient design principle applied to bathroom layout ideas. This approach places the three primary fixtures-the sink, toilet, and shower/tub-at the points of a triangle. The goal is to optimize the workflow between these key areas, minimizing steps and creating an intuitive, comfortable user experience, especially in medium to large bathrooms where fixtures are more spread out.
Fixture Placement & Key Measurements
The core of this layout is creating an efficient “work triangle” connecting the main functional zones. The sink, being the most frequently used fixture, often serves as a central point, with the toilet and shower/tub forming the other two corners.
- Triangle Legs: Each leg of the triangle (the distance between two fixtures) should ideally measure between 4 feet (1.2 meters) and 9 feet (2.7 meters).
- Total Distance: The sum of the three sides of the triangle should not exceed 26 feet (7.9 meters) to maintain efficiency.
- Clearance: The pathways between the points of the triangle must remain unobstructed. Aim for at least 36 inches (91 cm) of clear space for comfortable movement.
Pro Tip: Position the most-used fixture, the sink and vanity area, closest to the door for quick access. The toilet and shower can be placed further into the room for greater privacy and a more logical flow.
Pros & Cons
Pros:
- Highly Ergonomic: Reduces unnecessary movement and makes the daily routine feel more seamless.
- Efficient for Multiple Users: The spread-out design can make it easier for two people to use the space simultaneously without getting in each other’s way.
- Adaptable: Works well in square or irregularly shaped rooms where a linear layout would be awkward.
Cons:
- Requires More Space: This layout is generally not suitable for small or narrow bathrooms.
- Complex Plumbing: Spreading fixtures across multiple walls can increase plumbing complexity and installation costs compared to a single-wall layout.
Best Use-Cases & Styling
This layout is perfect for master bathrooms, family bathrooms, and any space large enough to accommodate the triangular arrangement without feeling cluttered. To enhance the design, use lighting to define each zone. For instance, place pendant lights over the vanity, a dedicated light in the shower, and subtle ambient lighting near the toilet. This not only improves functionality but also visually reinforces the distinct zones within the cohesive layout.
10. Accessible/Universal Design Bathroom Layout
An accessible or universal design layout prioritizes safety, comfort, and ease of use for people of all ages and abilities. This forward-thinking approach goes beyond basic ADA compliance to create a space that is inherently functional for everyone, from children to seniors and individuals with mobility challenges. It’s one of the most thoughtful bathroom layout ideas, focusing on removing barriers and enhancing independence.
Fixture Placement & Key Measurements
The core of this layout is creating ample maneuvering space. Fixtures are positioned to allow for unobstructed movement, particularly for those using wheelchairs or walkers.
- Minimum Size: An accessible bathroom typically requires a minimum footprint of 5 feet by 8 feet (1.5 by 2.4 meters) to accommodate a 60-inch (152 cm) diameter turning circle for a wheelchair.
- Doorway Width: Doorways should have a minimum clear width of 32 inches (81 cm), with 36 inches (91 cm) being ideal.
- Fixture Clearance: Ensure at least 30 inches by 48 inches (76 by 122 cm) of clear floor space in front of each fixture (sink, toilet, shower).
- Grab Bar Height: Install grab bars at a height of 33-36 inches (84-91 cm) above the finished floor.
Pro Tip: A curbless, zero-entry shower is the cornerstone of universal design. It eliminates trip hazards and allows for seamless roll-in access, making it safer for every user while also creating a sleek, modern aesthetic.
Pros & Cons
Pros:
- Inclusive & Safe: Accommodates users with diverse mobility needs, reducing the risk of falls.
- Future-Proofs Your Home: Supports “aging-in-place,” increasing long-term home value and livability.
- Spacious Feel: The open-concept design and wide clearances make the bathroom feel larger.
Cons:
- Higher Initial Cost: Requires specialized fixtures, structural reinforcement for grab bars, and more complex plumbing for features like curbless showers.
- Requires More Space: The necessary clearances demand a larger footprint than a standard bathroom.
Best Use-Cases & Styling
This layout is essential for aging-in-place renovations, multi-generational homes, and anyone planning for long-term accessibility. To enhance usability, opt for slip-resistant flooring, a comfort-height toilet (17-19 inches high), and lever-style or touchless faucets. Use contrasting colors between the floor, walls, and fixtures to improve visibility for those with low vision.
10 Bathroom Layouts: Side-by-Side Comparison
| Layout | 🔄 Implementation complexity | ⚡ Resource requirements | ⭐📊 Expected outcomes & key advantages | Best use cases | 💡 Quick tips |
|---|---|---|---|---|---|
| Galley Bathroom Layout | Low — straightforward plumbing run | Low — minimal materials & labor | Space-efficient, cost-effective; good functionality in tight areas | Small apartments, powder rooms, hallway conversions | Use vertical storage; wall-mounted fixtures; mirrors; sliding doors |
| Master Bath Suite Layout | High — multi-zone plumbing/electrical | High — premium fixtures, finishes, larger footprint | Luxury, high resale value; reduces conflicts; spa-like experience | Master bedrooms, luxury renovations, upscale properties | Separate wet/dry zones; heated floors; double vanities; ample storage |
| Jack-and-Jill Bathroom Layout | Moderate — dual entries and privacy hardware | Moderate — duplicate sinks, partitioning | Efficient shared use; reduces sibling conflict; adds value | Multi-child family homes, guest houses, vacation rentals | Install locks on both doors; assign shelves; consider shower timers |
| Open-Concept Bathroom Layout | Moderate–High — moisture control & subtle zoning needed | Moderate–High — quality ventilation and waterproof finishes | Airy, modern aesthetic; easier accessibility; feels spacious | Modern homes, lofts, spa-inspired designs | Install robust ventilation; waterproof materials; use subtle zoning |
| Corner Bathroom Layout | Low — simple corner fixture placement | Low — standard fixtures, saves wall space | Maximizes floor area; improves traffic flow in small rooms | Small/urban bathrooms, efficient renovations | Use angled glass doors; corner shelving; corner bathtubs with seating |
| Wet Room Layout | High — full waterproofing and precise drainage | High — specialized membranes and drainage systems | Seamless, accessible spa-like experience; excellent for mobility needs | Luxury homes, accessible/aging-in-place designs, spas | Use quality waterproof membranes; ensure proper slope and linear drains |
| Compartmentalized Bathroom Layout | High — multiple enclosed zones and doors | High — extra walls, doors, ventilation | Maximum privacy; supports simultaneous users; organized workflow | Large bathrooms, multi-user homes, European-style designs | Provide individual ventilation, sound dampening, pocket doors |
| Linear Bathroom Layout | Low — single-wall plumbing simplifies install | Low — economical materials and labor | Simple, cost-effective layout; clear organization; good for narrow spaces | Small bathrooms, guest rooms, apartments, RVs | Space fixtures 18–24” apart; use opposite wall for storage; consistent styling |
| Triangular Work Zone Bathroom Layout | Moderate — strategic fixture placement required | Moderate — balanced space allocation | Optimized movement and workflow; efficient for multiple users | Medium–large bathrooms, master baths, professionally designed spaces | Measure 3–4 ft per triangle side; keep sink central; ensure clear paths |
| Accessible/Universal Design Bathroom Layout | Moderate–High — code compliance, spatial planning | Moderate–High — grab bars, accessible fixtures, larger footprint | Inclusive, safer, meets ADA/standards; supports aging-in-place; higher resale | Homes for elderly/disabled occupants, ADA-compliant renovations | Plan 60” turning radius, install grab bars, non-slip floors, lever handles |
From Blueprint to Bliss: Bringing Your Ideal Bathroom to Life
Navigating the world of bathroom layout ideas can feel overwhelming, but as we’ve explored, the perfect blueprint for your home is within reach. It begins with a fundamental understanding of your space, your lifestyle, and your long-term goals. The layout is more than just where you place the fixtures; it’s the invisible architecture that dictates flow, functionality, and the overall feeling of your sanctuary.
We’ve journeyed through ten distinct approaches, each offering a unique solution to common design challenges. From the efficient, space-saving nature of the Galley and Linear layouts perfect for narrow rooms, to the expansive, spa-like potential of an Open-Concept or Master Bath Suite, the options are vast. We saw how a Wet Room can create a seamless, modern aesthetic while maximizing a small footprint, and how a Compartmentalized design can bring hotel-level privacy and efficiency to a busy family home.
Key Takeaways for Your Bathroom Remodel
The most critical takeaway is that there is no single “best” layout, only the one that is best for you. Your decision should be a calculated balance of several key factors:
- Functionality First: Before falling in love with a particular style, honestly assess your daily routine. Does your family need a Jack-and-Jill layout to ease morning congestion? Would an Accessible Design provide more comfort and future-proof your home? The most beautiful bathroom is useless if it doesn’t work for its primary users.
- Scale and Proportion are Everything: The success of any layout hinges on accurate measurements. The classic Triangular Work Zone is effective because it respects ergonomic principles and clearance requirements. Always map out your clearances for doors, drawers, and walkways before committing.
- Embrace Creative Constraints: A small or awkwardly shaped space, like one requiring a Corner Layout, isn’t a dead end. It’s an invitation to innovate. These constraints often lead to the most creative and rewarding bathroom layout ideas, forcing a focus on smart, multi-functional solutions.
Your Actionable Next Steps
With this wealth of information, it’s time to move from inspiration to implementation. Don’t let the possibilities paralyze you. Instead, follow a structured path to clarity.
- Measure and Sketch: Get precise dimensions of your current bathroom. Note the locations of existing plumbing, windows, and doors. Create a simple, to-scale drawing of the empty space.
- Define Your Priorities: Make a list of your non-negotiables. Is a double vanity essential? Do you dream of a separate soaking tub? Is ample storage the primary goal?
- Shortlist Your Favorites: Based on your space and priorities, select two or three layouts from this guide that seem like the best fit. Sketch them out within your bathroom’s footprint to see how they feel.
- Visualize the Possibilities: This is where abstract ideas become tangible. A flat floor plan can be difficult to envision in three dimensions. Using a tool to see how a layout will actually look in your space is a crucial step before making any final decisions.
Ultimately, mastering these bathroom layout ideas empowers you to create a space that enhances your daily life. A well-designed bathroom is an investment in your home’s value and, more importantly, in your personal well-being. It’s the room where you start and end each day, and its design should support, soothe, and simplify your routine. By choosing a layout with intention, you are not just renovating a room; you are crafting an experience.
Ready to stop guessing and start visualizing? Upload a photo of your current bathroom to RoomGenius and let our AI generate tailored redesigns based on the concepts you’ve learned about today. See your perfect bathroom layout come to life in seconds at RoomGenius.