AI Sketch to Rendering: Turn Hand Sketches into Photorealistic Rooms
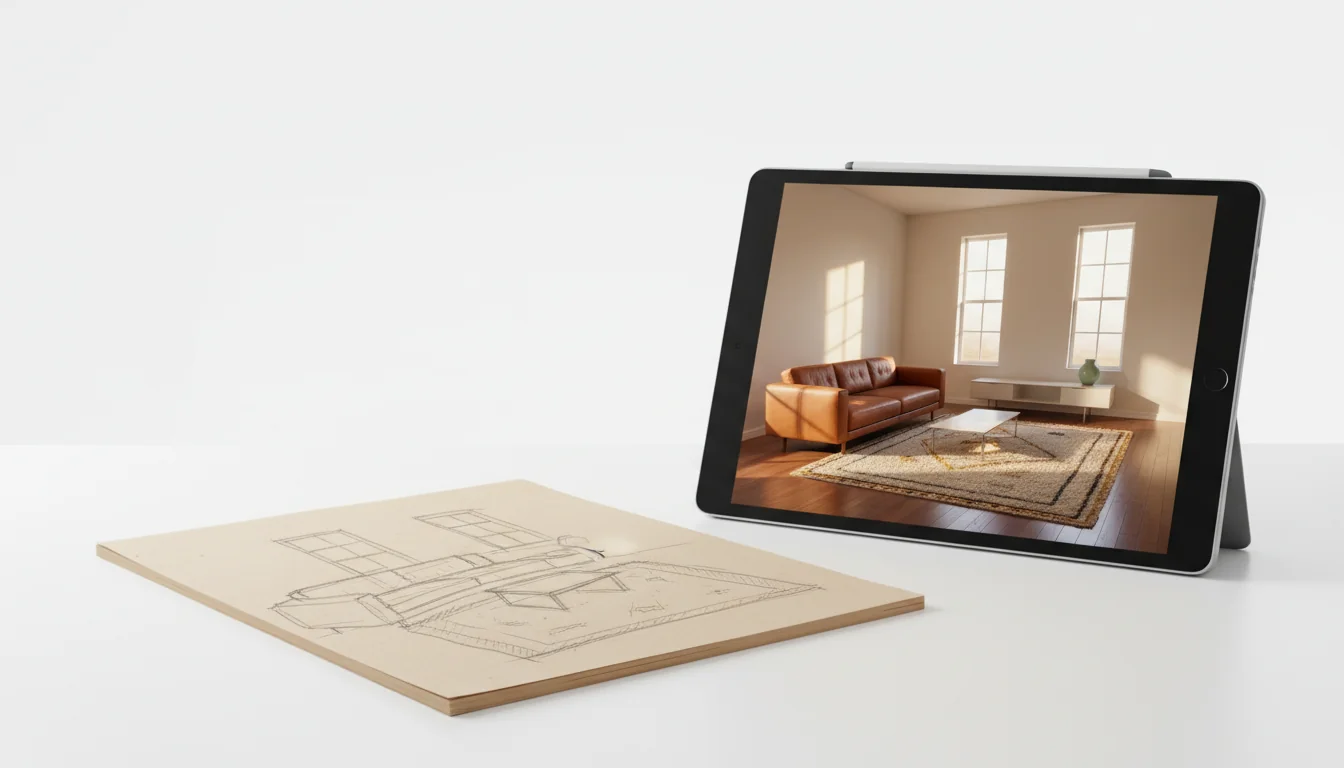
A pencil. A coffee-stained Moleskine. Twenty minutes between a site visit and the next meeting. You sketch the room — sofa here, two windows there, a rug, a low credenza, a hint of a pendant — and that’s the conversation. The client gets it; you get it. Then comes the part that has historically eaten three days of your week: turning that scribble into something a non-designer can actually feel. Pulling out the CAD seat, modeling every wall, texturing it, rendering it overnight, redoing the wood tone in the morning because the warm walnut in your head turned out cooler in the render. By the time the visual is ready, the brief has moved.
This is the gap AI sketch to rendering is built to close. Not by replacing your CAD pipeline, but by collapsing the distance between a napkin sketch and a presentation-quality image to under a minute. You sketch on paper, on a tablet, or with a stylus inside the app. The model reads the lines, infers what they describe, and returns a photoreal interior that respects your composition — while the napkin is still on the table.
What is AI sketch to rendering? AI sketch to rendering is a workflow that takes a hand-drawn or tablet sketch of an interior — line work, basic geometry, optional annotations — and converts it into a photorealistic room image in seconds. The AI infers materials, lighting, scale, and missing detail from the sketch, then synthesizes a render that respects the original composition. Designers use it for rapid ideation, client presentations, and portfolio mockups; students use it to skip the CAD learning curve while still producing convincing visuals.
Sketch-to-render as a workflow, not a feature
The reason the sketch-to-render category clicked for professionals in 2025 is that it stopped being marketed as a parlor trick and started being treated as a stage in a real design pipeline. The useful framing is that sketch-to-render is the second step in a four-step ideation loop: think, sketch, render, decide.
In the old loop, “render” was a discrete project: brief, model, light, render, review, revise. It took a week, it cost money, and it forced commitment before commitment was earned. Clients stopped pushing for variations because they could feel that each one cost the firm a day.
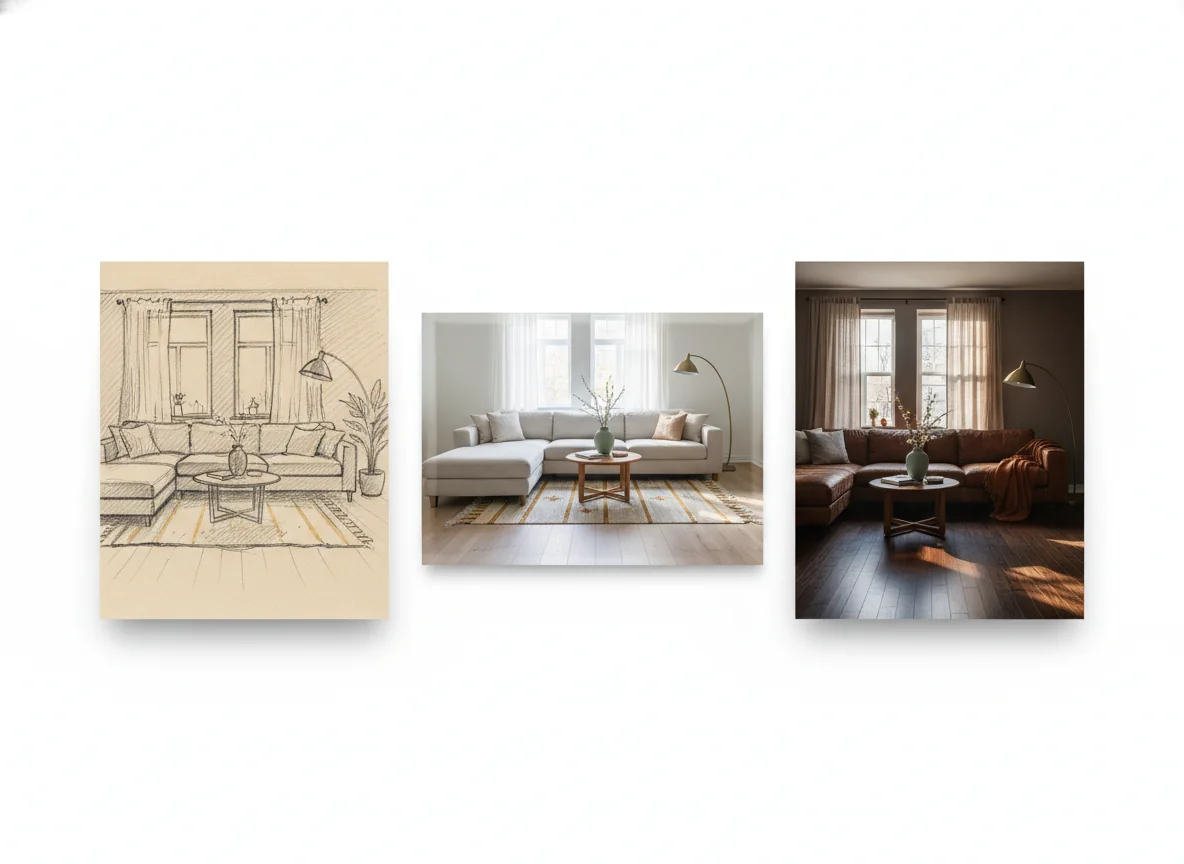
In the AI-assisted loop, “render” becomes a continuous step. You sketch a room, render it in 40 seconds, change a line, render again. The unit cost is so low that it stops shaping the conversation. You explore the way you’d explore in pencil — quickly, cheaply, with permission to be wrong — but in photoreal output the client can read. That shift, from rendering as a milestone to rendering as a verb, is the actual product. A working session at a small firm now looks like this: a designer sketches three furniture arrangements on the same room outline, runs each through the AI, hangs all three side by side, and walks the client through them in twenty minutes.
What the AI infers from a sketch
A sketch is information-poor on the page and information-rich in the designer’s head. The model’s job is to extract what’s drawn, infer what’s standard, and ask for what’s ambiguous. Three layers of inference run, in roughly this order.
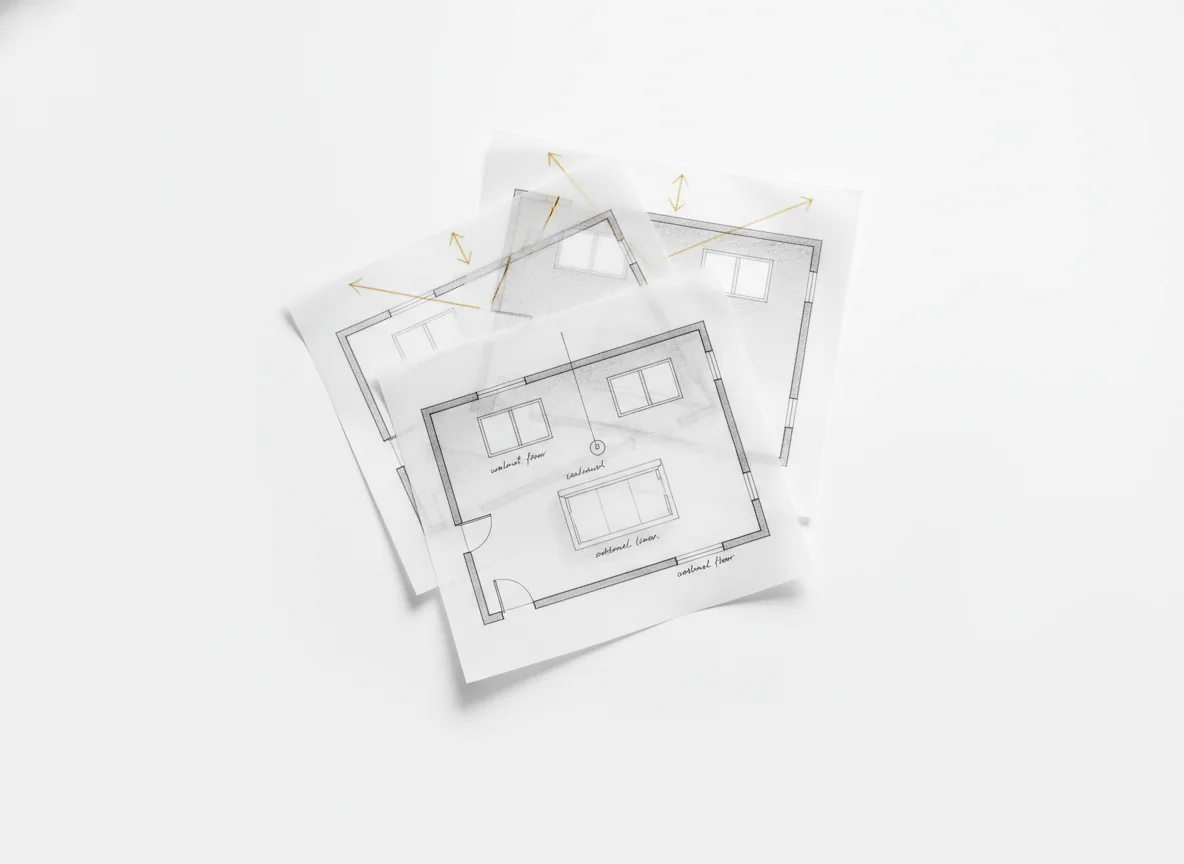
Geometry. The model reads your strokes as room geometry: walls, doors, windows, furniture footprints, sightlines. It standardizes implicit conventions — a rectangle with a horizontal split is a window; two parallel arcs are a swinging door; a long rounded rectangle with three small ones inside is a sofa with cushions. The geometry pass cares about composition, not measurement. It doesn’t need your sketch to be to scale; it needs the relationships between elements to be unambiguous.
Materials. Once the geometry is locked, the model assigns materials. Some come from explicit annotations (“oak floor,” “linen sofa”); most come from priors. A sketch of a living room with a low rectangular sofa and a rug, in a residential apartment with one tall window, gets a different material palette than the same composition labeled “hotel lobby.” This is where the model’s training on millions of labeled interior photos earns its keep — it has seen which materials cluster together in which rooms, and it picks defaults that read as a coherent style.
Lighting. The least obvious layer, and often the one that determines whether the render lands. The model infers direction from window geometry (a south-facing window implies hard, warm afternoon light; two small north windows imply soft, diffuse light), atmosphere from room type, and time of day from your annotations — defaulting to “early afternoon” if you stay quiet. Lighting is what makes a render feel like a room rather than a 3D model.
You can override any of these. Annotate “9 p.m., dimmed, single warm-white floor lamp” and the model will respect it. The annotation channel is the single biggest lever a pro has on output quality.
Loose sketches vs detailed sketches: what changes
A common question from designers piloting these tools: how detailed does the sketch need to be? The honest answer is that loose and detailed sketches both work, but they steer the model differently.
A loose sketch — fifteen seconds, three or four shapes, almost no annotation — gives the model maximum freedom. It will infer aggressively from priors, which means the result will be polished but median: a living room that looks like a hundred other living rooms in its training set. This is useful for rapid ideation. You’re not asking “what does my room look like?” — you’re asking “what’s a beautiful version of a room in this rough shape?”
A detailed sketch — five minutes, more lines, annotated finishes, dimensions, a few notes about light and palette — gives the model your constraints. It will respect them. The result reads more specifically yours, but it requires a sketch that already knows what it wants. This is the right input for client presentations and portfolio work.
| Sketch density | Time to draw | What the AI fills in | Best for |
|---|---|---|---|
| Napkin sketch (3–5 lines) | 30 seconds | Almost everything: materials, lighting, palette, decor | Live brainstorming; “what if?” mood checks |
| Loose sketch (10–20 lines) | 2–3 minutes | Most materials, all lighting, decor | Comparing a few layout options quickly |
| Annotated sketch (30+ lines + notes) | 5–10 minutes | Lighting and decor; respects your palette and finishes | Client presentations and portfolio |
| Detailed sketch + photo of existing room | 10+ minutes | Decor and atmosphere only | Renovation pitches against real walls |
The temptation for designers used to traditional rendering is to default to the densest sketch — to over-specify, the way you’d over-specify a CAD model. Resist it for the first two passes. Loose sketches are how the model surfaces directions you wouldn’t have thought to ask for. Once a direction lands, then tighten the sketch and re-render. Two-stage sketching — coarse then fine — is the workflow that gets the most out of these tools.
For designers refining pencil habits before they move to the tablet, our interior design sketch primer covers the line economy that translates best to AI-assisted rendering. The core trick: lines that you would draw to communicate to another human are the lines the AI reads most reliably.
Use cases: client presentations, portfolio, pitches
The product the designer is selling determines how the sketch-to-render output is best deployed. Three clusters dominate professional use in 2026.
Client presentations. The most common use, and the one that quietly shifts the economics of a small studio. Instead of arriving with one rendered concept, the designer arrives with three or four AI-rendered concepts of the same room. The client picks a direction in the meeting; the next billing cycle starts on the right brief. The win isn’t visual fidelity; it’s reducing the number of rounds. A studio that closes in two meetings instead of four spends less time selling and more time designing. A six-person residential firm we’ve worked with in Hamburg saw close rates rise after she started bringing four sketch-to-render variations to the discovery meeting — the clients felt seen because they got to choose, and the firm felt like it was being paid to design rather than to convince.
Portfolio. Junior designers and students face a chicken-and-egg problem: you can’t get a job without a portfolio, and you can’t build a portfolio without commissions. Sketch-to-render is the workaround. Design a series of speculative rooms — a small Berlin studio, a Brooklyn brownstone living room, a coastal kitchen — sketch them, render them, and ship as portfolio pieces with a clear “speculative project” label. Hiring managers in 2026 read these as taste demonstrations, not deception, because the labeling is honest. Show your sketches alongside the renders; that’s the part that actually sells. For students working through what counts as a strong sketch in this context, interior design sketches walks through how to compose for legibility.
Pitches. Architects and developers use sketch-to-render at the earliest stage of a pitch — sometimes before they’ve earned the brief. A 30-minute charrette ends with a sketch of the proposed lobby. The render goes into the pitch deck the next morning. The proposal that used to take a week of speculative-rendering investment now ships overnight, which means firms can pitch on jobs they would have walked away from. Lower marginal cost of speculation changes which pitches are worth making. The unifying thread is that the sketch-to-render output is not the final deliverable — it’s the artifact that lets the designer have the right conversation.
Combining a sketch and a photo
The most interesting workflow is the hybrid one: a photo of the existing room plus a sketch of what you want to change. This is also where AI rendering tools differentiate most sharply from each other in 2026.
The photo gives the model a real-world anchor — actual walls, actual windows, actual light direction at the time the photo was taken, actual floor in actual condition. The sketch overlays what’s new — a sofa repositioned, a wall opened, a built-in added, a kitchen island where the table used to be. The model renders the room with the changes integrated and the unchanged parts honored. The result feels like a renovation render rather than a hypothetical, because most of the room is the room.
The hybrid mode handles three common pro tasks well: renovation pitches (clients struggle to imagine what an opened wall will feel like; the photo-plus-sketch render lets them see it), furniture-replacement scenarios (keep the room, swap the sofa, render before committing), and light-change studies (the photo locks geometry; the sketch annotation shifts the lighting; the render shows the same room at golden hour, midday, evening). Same room, three lights, three renders, one decision.
The caveat: the photo’s perspective and the sketch’s perspective need to roughly agree. If the photo is a wide-angle phone shot and the sketch is an isometric, the result wobbles. Sketch over a tracing of the photo if you want fidelity. Most pros end up with a small library of “sketch templates” they reuse for hybrid renders.
Limits and workarounds
Worth naming clearly, because the category isn’t perfect. Three failure modes show up consistently in 2026 tools.
Scale ambiguity. The model is excellent at composition and weak at exact measurement. A sketch with a sofa drawn at “couch-ish” size returns a render with a sofa at “couch-ish” size — which might be 220 cm or 280 cm depending on the inferred room scale. Workaround: annotate one known dimension on the sketch (the door width, the window height) and the model will scale everything else off it.
Repeated detail. Patterns the model has to repeat — a row of identical pendants, twelve dining chairs, a slatted wood ceiling — sometimes lose consistency between elements. The first three pendants match; the fourth subtly differs. Workaround: render the room at a wider angle so repeating elements take fewer pixels each, or run a second pass with explicit instruction to enforce repeat consistency.
Highly specific objects. A vintage Vitra LCW chair the client owns; a specific Tom Dixon pendant; a unique heirloom chest. The model will render a mid-century chair, a drum pendant, a dark wooden chest, but it won’t precisely render the named object. Workaround: sketch it loosely, accept “an object of that type,” and composite the actual product image on top for final boards.
For designers used to CAD precision, these limits feel uncomfortable at first. The mental shift is to treat AI rendering as a fast inferential tool, not an exact one — a stage in the design process, not a replacement for the documentation set. For more on where AI fits inside a pro toolset, interior design software for professionals compares where each tool earns its keep.
A practical sketch-to-render checklist
For pros piloting this inside an existing studio, the patterns that produce the most reliable output: keep the sketch flat (resist perspective shading — line work renders more cleanly), annotate only the constraints you care about and stay quiet on the rest, render three variations before showing anything (the first render is rarely the best — it’s the median), keep the sketches as deliverables (clients value seeing the line work alongside the render), and iterate at the sketch level rather than the render level (if a render isn’t landing, the fix is usually a clearer sketch, not a new prompt).
The studios getting the most out of these tools treat the sketch as the design and the render as the conversation. The sketch is what they bill against; the render is what they sell with. For a deeper look at sketching’s role in the modern design process, interior sketch design is the companion read, and the American Society of Interior Designers publishes practitioner guidance that pairs well with the rapid-iteration workflow.
Frequently asked questions
How long does it take to render a sketch?
On modern AI sketch-to-rendering tools, a single render takes between 15 and 60 seconds depending on resolution and detail density. The first render of a session is sometimes slower because the model is loading. For comparison, a traditional photoreal render of the same scene in V-Ray or Lumion takes anywhere from 20 minutes to several hours. That speed difference is what makes “render every variation” a viable workflow rather than a luxury.
Do I need a digital tablet, or can I sketch on paper?
Both work. Pen-and-paper sketches go through the camera in the app — point your phone at the napkin, the model reads the lines. Tablet sketches in apps like Procreate, Concepts, or RoomGenius’s stylus mode skip the camera step and tend to produce slightly cleaner reads because the line work is digital from the start. For pros doing a lot of iteration, a tablet is the better long-term tool; for designers who think faster on paper, the camera path is a real workflow, not a fallback.
Will the render match exactly what I sketched?
It will match the composition exactly — layout, relative positions, major furniture, room geometry. It will not match the details exactly; the model fills materials, lighting, decor, and small objects from priors and annotations. If you want a specific finish or palette, annotate the sketch. If you want a specific brand-name product, accept that the render shows a generic version and composite the real product image afterward. Treat the render as 90% match plus 10% inference, and aim your effort at controlling that 10%.
Can I use sketch-to-rendering for commercial projects?
Yes, with appropriate licensing. Most modern tools — RoomGenius included — allow commercial use on paid plans, including renders in client presentations, pitch decks, and published portfolios. Check the license tier before delivering renders as part of a billable scope; some free tiers restrict commercial use. The other consideration is client expectation-setting: be explicit that the render is a concept visualization, not a documentation drawing.
How does sketch-to-render fit alongside CAD and 3D modeling?
It sits upstream of CAD and 3D, not in place of them. Use sketch-to-render to nail the brief, lock direction with the client, and explore variations cheaply. Once the direction is locked, drop into CAD or your modeling tool of choice for documentation and the deliverables the project actually needs. The AI render is the conversation; the CAD set is the construction. Studios that try to use AI rendering as a CAD substitute hit walls fast; studios that use it as a fast-ideation layer above CAD compound the value over every project.
Sketch on paper. Render in seconds.
This is what RoomGenius is built around. Open the app, sketch the room — on paper, on your tablet, or directly with your stylus inside the app — and the AI returns a photoreal render in under a minute. Annotate finishes if you have them; stay quiet if you don’t. Run three variations before committing. Bring the renders to the client meeting with the sketch still attached, because the sketch is the design and the render is the proof. For studios doing rapid ideation, portfolio work, and pitches, the unit economics of speculation just changed. Download for iPhone on the App Store or Android on Google Play, open a fresh canvas, and sketch a room.